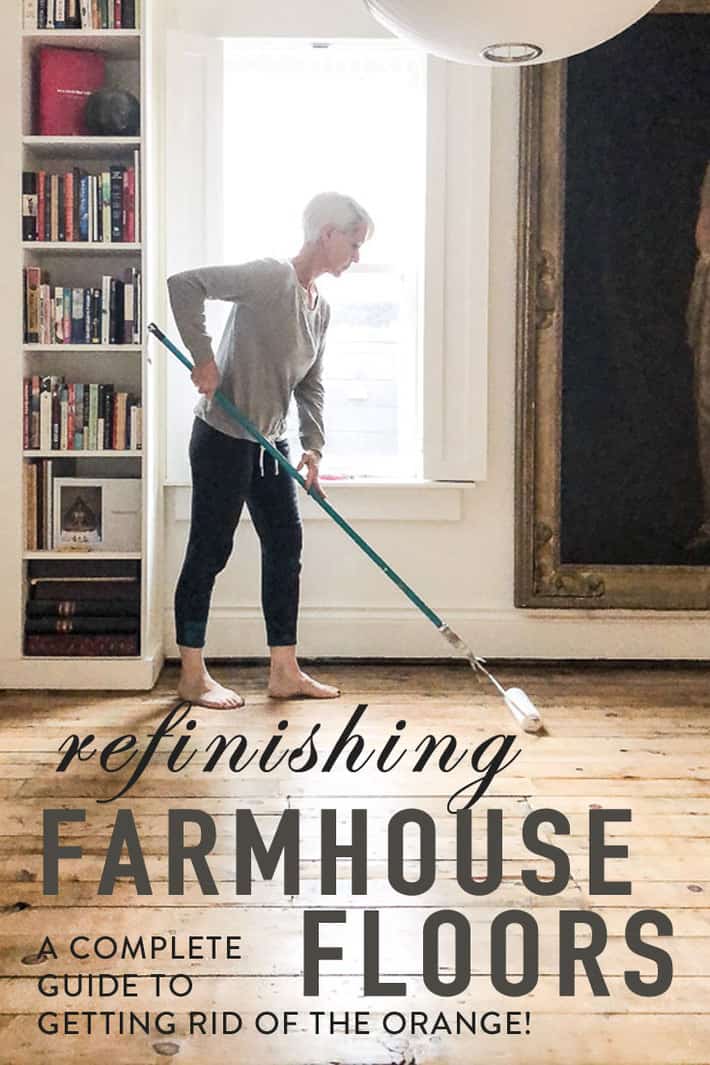
Pine floors are notorious for turning orange once you finish them. Their natural desire is to transform into pumpkin orange right before your eyes, but you can temper that tone by updating the way you finish them.
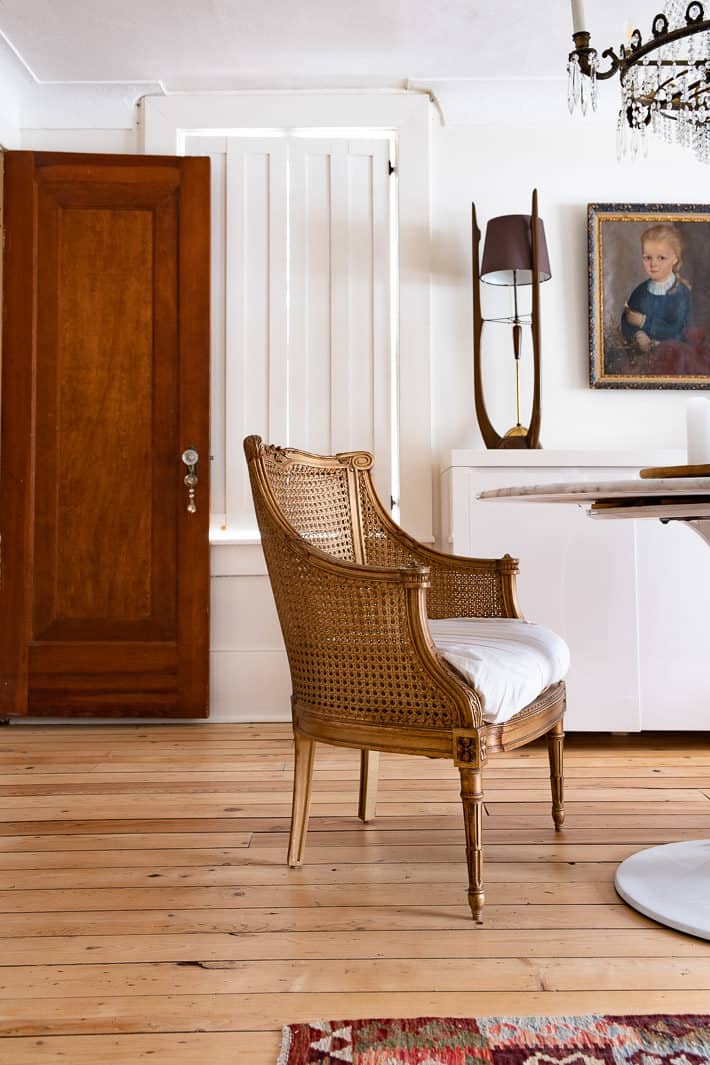
When I first bought my house and had the floors done, the only finishing option was drenching them with a plastic-like orangey goo that smelled very much like premature death. That toxic finishing option was called Polyurethane.
The only thing this stuff has going for it is the fact that it's bullet proof. Seriously. You could have an O.K. Corral type shootout in your living room and bullets would just bounce off the floor.
I suppose there were other options for finishing my floors 20 years ago but I didn't know what they were and neither did the flooring companies. So I had them "Polyurethaned" and have hated my floors for the past 20 years.
Polyurethane, still the most popular finishing option for wood floors, is slippery, unnatural looking, and brings out the orange or yellow tone in any floor. The product itself also turns more orange as it ages so the floors just get more and more orange as time goes on. Which is fine if you like orange floors. I do not.
When I accidentally ripped up all my floors this past fall (as one does) I decided I was going to research everything there was to know about refinishing pine floors until my fingers were numb and my floors weren't orange.
I ripped up my kitchen floor on a whim as well in 2013 and installed heated floors, VCT tile and levelled it all with self levelling cement myself.
I am now the most knowledgeable person in the galaxy with regard to pine flooring. I know more than anyone. I am the foremost expert.
Actually, I'm not, but I do know more than I did 20 years ago.
And I NOW have pine floors without any hint of pumpkin orange. Here's how I did it.
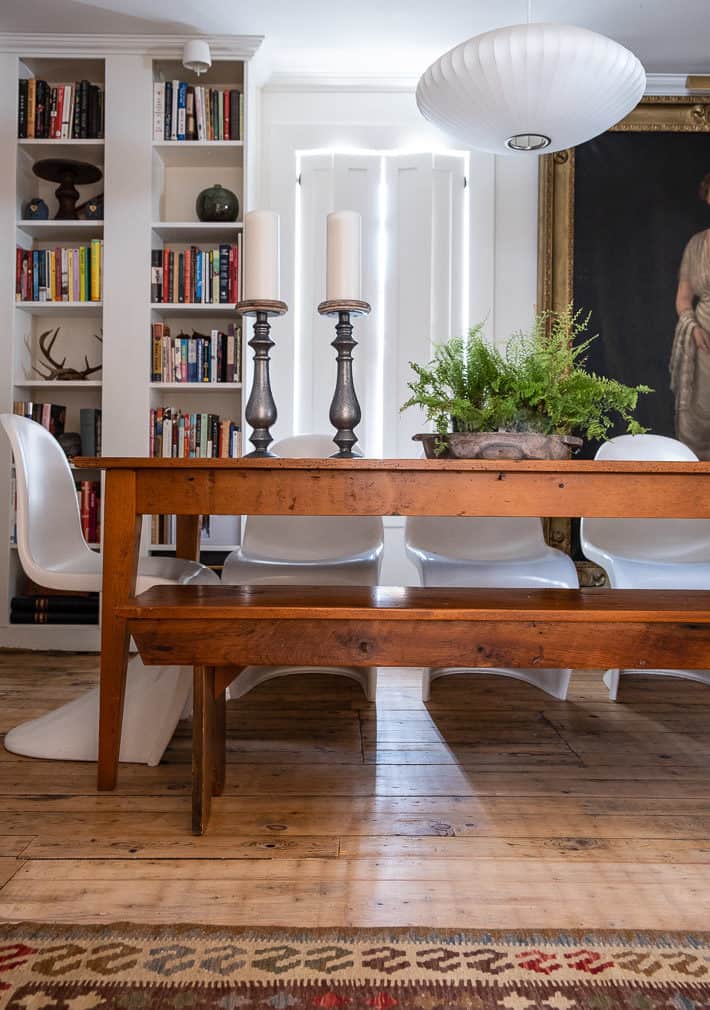
How to Finish Pine Floors (Without the Orange)
Just before delving into my pine floor research I was simply going to leave my pine floors raw after sanding them. I wanted raw wood (unfinished) floors for two reasons.
- Raw wood floors feel beautiful beneath your feet unlike finished floors which feel like plastic.
- Raw wood floors would retain their natural colour and not end up looking like a Cheeto.
I decided against the raw floors because I was a bit worried about cleaning them and a bit more worried about not being able to drag my furniture across them like I normally do. (raw wood has NO protection and the pine would gouge easily)
After a couple of weeks of hard core research I decided there were two keys to a natural looking pine floor.
Keys to Natural Looking Pine Floors
A MATTE FINISH & A WATER BASED FORMULA
I don't think either of these things were readily available 10 years ago let alone 20. There are other ways to achieve that neutral pine finish like waxing or soaping the floors but both of those things require maintenance I wasn't convinced I would keep up.
After talking to my flooring guy about my concerns we came up with a 3 step plan for my floor finish. I was going to use a water based, low VOC, non toxic, green product from Bona's professional line.
A lot of people online are using Benjamin Moore's Stays Clear for their floors, and I'm sure it's a great product, in fact it's what I was going to use UNTIL I spoke with a professional floor refinisher. He very gently steered me in the direction of a professional product. Literally. Like, he gave me directions to the nearest distributer.
These Bona products aren't the same ones that can be bought at Home Depot. They're only available through distributors, or as I recently found out ... Amazon (which I've linked to above in the product list).
If you'd like to see if you have a distributor in your area you can click Bona's Distribution Map to find a store near you in the US or Canada.
Would you like to save this stuff?
How to Refinish a Pine Floor
MATERIALS
- Bona NaturalSeal
- Bona Novia - Satin
- Bona Traffic HD - Matte
- (3) 10 mm microfiber rollers
- Paint brush for edging
- Paint Tray
- Paint Tray liners (optional)
- Broom handle for paint roller
- Paint roller frame
- Sandpaper for between finish coats (220 grit)
STEPS
- Sand the old finish or staining off - Two of my rooms needed to be professionally sanded to remove the polyurethane. One room I sanded myself with a palm sander because the wood had no finish on it so I didn't need the power of a professional sander. Also I wanted to retain the character and staining on the floor and to do that you have to sand by hand. Once your floor is sanded vacuum, vacuum, vacuum. You only have one shot at making sure you've got rid of all the dust around. After vacuuming, wipe the floor with a damp cloth.
TIP: If you want your floors to still feel like worn old floors, don't sand them with too fine of a final grit. This will make the floors feel unnatural and like glass. End with around a 100 grit. This post has good information on sanding pine.
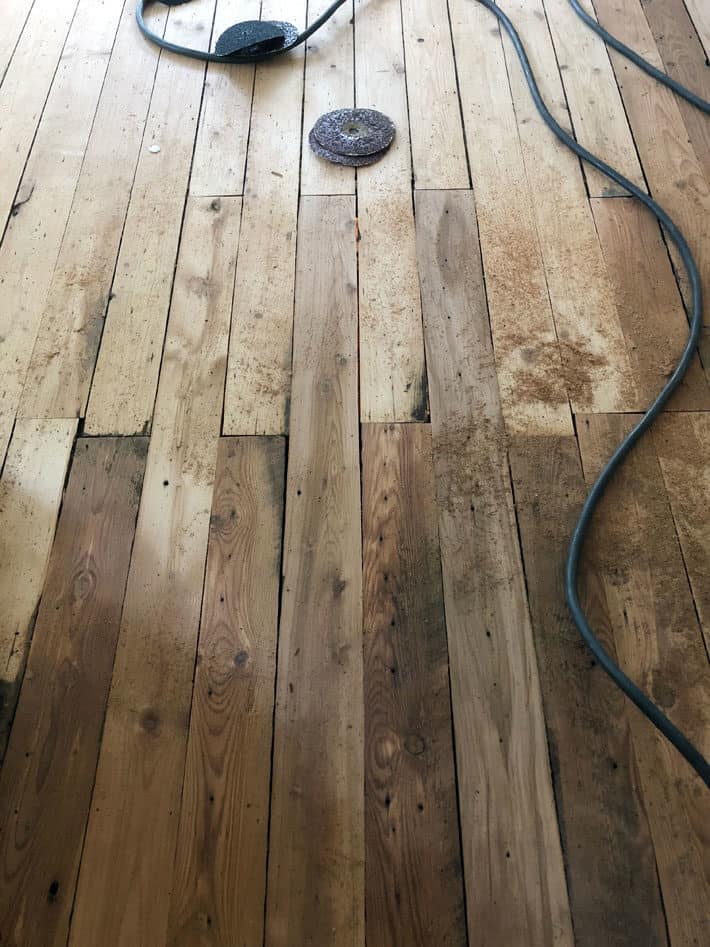
TIP: A lot of people recommend a tack cloth for this type of job but my sister, a painter, said both she's found tack cloths can ruin a finish by causing it to fish-eye. She uses a damp cloth for picking up dust so I did the same. It worked great.
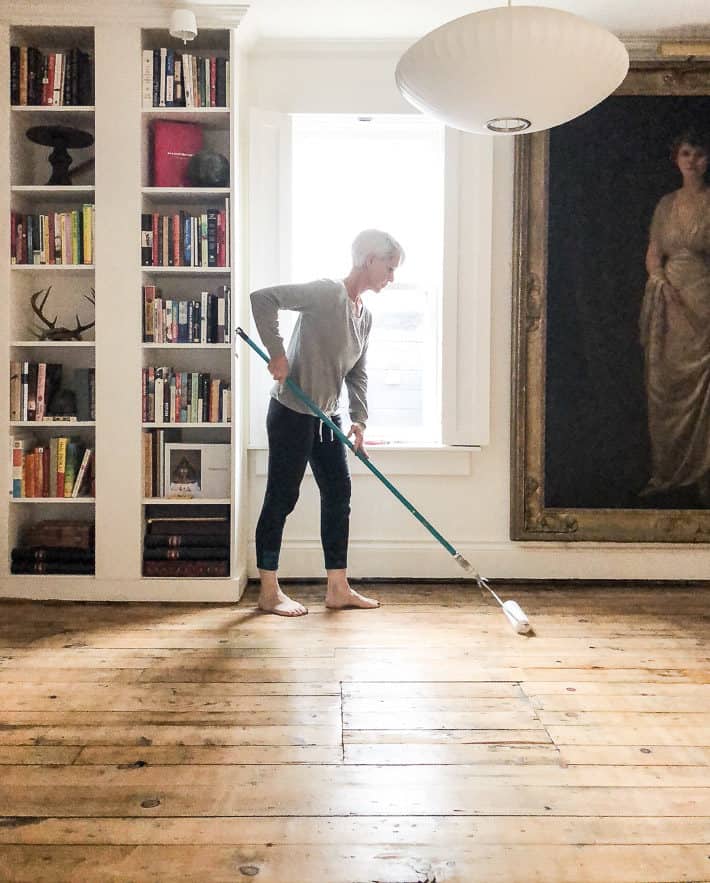
2. Apply 1 coat of Bona NaturalSeal. Using a paintbrush cut in around the edges of the room. Don't do the whole room, only do about 4' at a time. You don't want the edging to dry before you get a chance to roll that section of the floor, or else the edging will show. You need to always be painting "wet on wet".
Using a 10 mm roller and a paint roller pan, roll the sealer onto the floor being careful to keep everything smooth the same way you would if you were rolling paint onto a wall. Repeat the edging and rolling across the room until it's all done. Allow to dry 3 hours (I left it overnight) Sanding between the sealer and the finish coats is NOT necessary according to Bona. But for the smoothest finish, sand the floor VERY lightly with 180-240 grit sandpaper after it has dried. You barely have to even go over the floor. Vacuum, then wipe with a damp cloth.
3. Apply 1 coat of Bona Novia (Satin). Apply a coat of the Bona Novia Satin the same way you did the sealer by edging and rolling (using a NEW roller). Allow to dry 3 hours. (again I left it overnight). Sand very lightly with 180-240 grit sandpaper. Vacuum, then wipe with a damp cloth.
4. Apply 2 coats of Bona Traffic HD*. Apply a coat of Bona Traffic HD the same way you did the others, edging and rolling (with a new 10 mm roller), making sure you don't leave any pooling or striping. Allow to dry 3 hours. Sand again, if that's what you're doing and vacuum and wipe with a damp cloth. Repeat for a second coat. NOTE: Bona Traffic HD requires mixing a hardener into the product before use. Once it's mixed you have a limited time to work with it (4 hours). That's just enough time to do 2 coats. If you cannot get both coats done in 4 hours, only mix up as much of the product as you'll need. You'll have to do your own math on this.
QUESTIONS & ANSWERS about Refinishing Pine Floors
How much will I need? 1 gallon (each bottle is 1 gallon) will do 500 square feet of flooring) Buy extra if you think you might need it. As long as you don't open it and you'll be able to return it. (check with who you buy it from first though)
How much will it cost? For my 3 gallons (the sealer, the Novio and the Traffic HD) plus a few rollers, it was $274 Canadian to do around 500 square feet of flooring.
Why not use Bona Traffic HD for all of your finish coats? *The Bona Traffic HD is more expensive than the Bona Novia so using the Novia as your second coat keeps the price down a bit. Bona Traffic HD is your only option for a matte finish, plus it has the best durability so if for some reason you only want to use one product, go with the Bona Traffic HD for all of your finish coats, NOT the Bona Novia.
I looked online and they say applying the finish is really hard and you have to be able to swirl it around corners and you should use a pad to put it on and I'm really scared to do it because I might ruin my floors. You won't. I thought the same thing when I looked up how to properly apply the finish. Just ignore what you've read and think of it like painting a wall. You want to feather out your edges and you don't want noticeable lines or splotches. If you see a splotch, just run over it again lightly with the roller.
I like whitewashed floors. How do I get that look? There's the somewhat difficult way of using wood lye (bleach) and castile soap but you can get a similar look by just using the Bona NordicSeal as your sealer instead of the Bona NaturalSeal.
Doesn't sanding old floors remove all the patina and beauty of them?? It depends on the age of the wood. The older the wood, the deeper the colour in them goes. 20 year old floors with have colour just on the surface. 100 year old floors will have colour almost all the way through the board. So you can sand them and still retain that nice old wood look. Keep in mind, the board will be lighter the deeper you sand no matter what, but there will be colour and it will still look like a mottled, old piece of wood.
Can you bleach wood floors? I did. Some of the replacement boards I used for patching were made of fir which was darker than my pine floors. I just poured straight bleach onto the board and wiped it with cloth. By the next day the boards had lightened. In some cases I had to do this twice.
I hope, hope, HOPE this helps any of you who have faced the same orange floor crisis as I did. There's is a green alternative that will eliminate your orange floors.
You can do it! Exhume the fume from your Oompa Loompa room.
→Follow me on Instagram where I do lots of other stuff←


Lucinda Presnall
Thank you. I have hundred year old oak floors with bona traffic finish but am looking at a hundred and seventy five year old home with pine. I’m encouraged!
Amanda
Thank you, great post!
I'm currently researching the best methods for finishing *new* wide pine flooring (we unfortunately, don't have old floors in our home, but we're going for that antique wide pine look). In order to achieve it, we're planning to stain the boards. But I've read that pine does not take stain well/evenly. Did you come across any research about combining a wood stain with the Bona?
I've been looking into Rubio Monocoat as a nontoxic, matte oil/wax finish and alternative to poly (which I also can't stand!), but apparently the color does not work well on pine because it absorbs so unevenly...
Laura Patton
Can you use Bona HD over minwax dark walnut stain?
Alli
Hey there,
When your floors were sanded, did you just do a screening (removing only the polyurethane) or sanding down to raw wood?
Thank you!
Karen
Hi. The floors were sanded, but lightly. ~ karen!
Melissa Fallert
Thank you! This is so helpful. I am in the process of purchasing a 1920's home that has pine floors under carpet and glued down vinyl. I want to restore without the orange. I love the way your floors turned out and I am the same with the orange. I love pumpkin just not on my floors!!
Karen
And they still look great. No yellowing or orangeing. :) ~ karen!
Susan
I read this article about 2 years ago and finally jumped in to try it over the last few days. My home in Maine was built in 1780, with "pumpkin pine" or eastern pine floors on the second floor. My floors were definitely orange-y before I sanded. I ordered the Natural Sealer and the High Traffic HD, but the distributor told me the Novia has been discontinued, so just used the other products. My only issue was that I couldn’t get the King mattress out the door as the door frame is too short! So, it to me twice as long as I would have to move the mattress back and forth after drying. I think I was transplanted into a Lucy and Ethel episode doing that! Anyway, I am BEYOND thrilled with the results, it was exactly the look I was trying to achieve. I wanted a very natural look and a matte finish and this is perfect! I did not even sand between coats! I use the home as a short term rental, so I am positive this will be a durable finish on pine. I only wish I could post a photo for all to see! On to the rest of the house...!
Karen
Congratulations! That's a big job done. I'm glad it turned out the way you wanted. ~ karen!
Jen
Hi Susan! When skipping the Novia, did you do an extra coat of Traffic HD to make up for the difference? Or just the two coats mentioned in the article?
Nichol
✨✨I love your humor!✨✨
I came here for the wood floor info, but you had me smiling the entire time! It’s a lot like my own.✨Thanks for being YOU!
Karen
Well thank you Nichol! I hope you subscribed, you seem like someone who might be nice to have stick around, lol. ;) ~ karen!
Janet
Hi Karen, thank you so much for all of this information. It has been so helpful. I’ve recently sanded my 120 year old pine floors and used your advice and same products to finish them. I like them, but I do think that it has left a bit of a pinkish tone under artificial light. Did you find your floors to have this tint? Any advice to tone that down? I still have the whole way in my bedroom to do.
Thx,
Janet
Karen
Hi Janet. I didn't have any pink undertones, but that would depend on the species and age of the wood. Even where it was grown. I actually made that part up, but I actually think it's probably true, lol. If they're already finished there isn't much you can do to alter the colour because whatever you do, will just be a top coating on the finish. I would have recommended trying bleach, or adding a touch of diluted green stain to neutralize the pink. ~ karen!
Kristen
Hello!
Quick question. I am refinishing a very old pine floor, going to sand it down to raw wood (it’s covered in gross orange poly) and do exactly what you did. I am also replacing all of the baseboard and window trim with new raw pine. Can I do this same procedure to the trim as well? I want a matte finish and natural look so I’m thinking I will just treat the wood trim the same way I treat the floor. Any thoughts would be much appreciated 🙏🏼 Kristen
Ali F
I just wanted to say THANK YOU for writing this blog post. The information is clear, specific and exactly what I've been trying to find for months. Without this info, I would have been winging it. Everything else is available is dated and/or vague. I can't find the Novia product anywhere, but I think it may have been replaced with the Domo line.
Karen
Hi Ali. I know how you feel! It was the same way when I was doing my floors. Good luck! ~ karen!
Tia
Hi Karen!
I came across your post because my husband and I are getting g ready
To put down pine planks in our family room. I don’t want them to be orange so this is very helpful but what color stain did you use? I’m having a hard time with that because I don’t want them to be too dark but also don’t want too yellow. Your pics look exactly like what I have a vision of in my head LOL.
Thanks!
Tia
Karen
Hi Tia. No stain. At all. Just the products I've recommended. They have the least affect on colour of any sealants. ~ karen!
LR
hI Karen,
why did you use 3 products. What did using the bona Novia add to it? I'm asking because I have found other articles that just use the Natural Seal and the traffic HD with satin. Just wondering if the novia is necessary or if I can get the same effect with the 2 layers of the Naturalseal and 2 layers of the Traffic HD. Your floors are beautiful!!! This article is so helpful! Thank you!
Amanda
Hi Tia, I'm after the same info you were! Did you end up using a stain?? I hope your floors came out well! ~Amanda
Charmaine
What hardner product did you use with the Bona high traffic?
Steve johnson
I have tongue and groove fir flooring that has worn through in areas. The spacing is 1/4 to 3/8 and edges are sometimes rounded and raw wood they are so worn. They are face centered with small head common/flooring nails in 3/4 chip board underlayment. 5% of nails are flush to surface. Tried resetting with 3 lb hammer but no go. I need to pull all nails and reset tongue and groove so spacing isn't so wide. Now I have a big 85 lb black lab dog and I am unsure all the work trying to do the impossible resetting will work out. The room is 1200 square ft. The flooring guy wants me to redo with solid hickory for $15,000. My cabinet/kitchen pro carpenter thinks he can redo the 1200 sq. Ft. With specialized sanders for a lot less. We have a big log house and the fir looks great. But fir? Is the rehab likely to succeed? The flooring guy shakes his head. My banker says there are a lot of other things to do. All it has to do is last 4-5 years. Then I can do hickory more safely. Has anyone actually tried resetting fir flooring to close the gaps? The floor is 1989. it lasted 30 years! But the dog and the nails are not encouraging.
Lisa Pape
Hi Karen. Are your pine planks tongue and groove or just planks. Thanks
Lia Pape
Hi Karen. Are your pine planks tongue and groove or just planks. Thanks
Karen
Hi Lia. They're both, but the majority of them are tongue and groove. The odd replacement board is not. ~ karen!