Lithium ion batteries are a wondrous invention that are lightweight and long lasting. But it's infuriating when the battery won't recharge. You stick the battery in the charger and ... nothing. Guess what? You can fix these batteries that appear to be completely dead. Read on ...
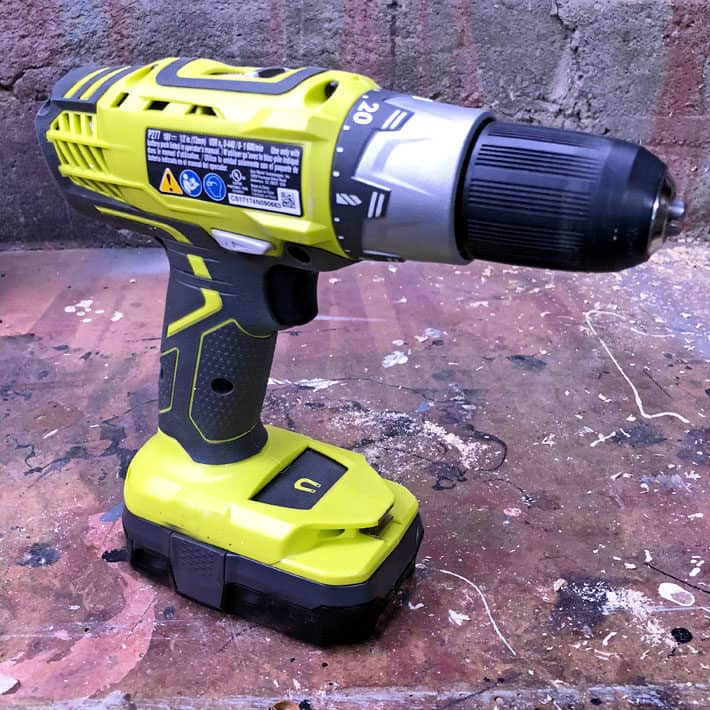
This post is NOT sponsored by Ryobi. They do not approve of or endorse this method for fixing a Ryobi battery. AT all.
Jump straight to the tutorial and how to video.
One of two things are going to happen as you read this post. You will either unfollow me due to my pathological boringness or ... you will propose marriage. So get ready to act accordingly.
If you have any sort of cordless power tool, but especially one powered by a Ryobi 18V battery, you have no doubt encountered the dreaded flashing red charger light.
And if you haven't ... you will.
It inevitably goes like this - you run to the basement to grab your cordless drill because after 10 years of thinking about it, you're finally going to build that 4 level, Tudor style treehouse with kitchenette.
Or you're going to hang a picture. (I can teach you how to hang a picture too)
Either way you put your battery in the charger and all you get is a flashing red light, which according to the label on the charger means your battery is defective. It isn't just dead. It's "defective".
I'm here to tell you it isn't. You probably left it in the charger too long which drains the battery.
Your battery is fine. It just needs a little boost.
This is where you want to go if you're looking for how to boost a car battery.
Table of Contents
You Can Fix a Rechargeable Battery That Won't Take a Charge.
You heard me right. You do NOT have to buy a new $50 battery. You do not have to call the company and swear at them because this stupid "defective" battery is only 2 weeks old. (although by all means feel free to do so) You do not have to wait until they ship you a replacement battery to finish your project. You can get that battery up and working in about 5 minutes.
NOTE: First try pulse charging.
Pulse charge your battery by plugging and unplugging your charger (with the battery in it) for 10 seconds. Try this a few times. If it doesn't correct the problem, continue on with this tutorial.
How to Fix an 18V Battery
What You Need
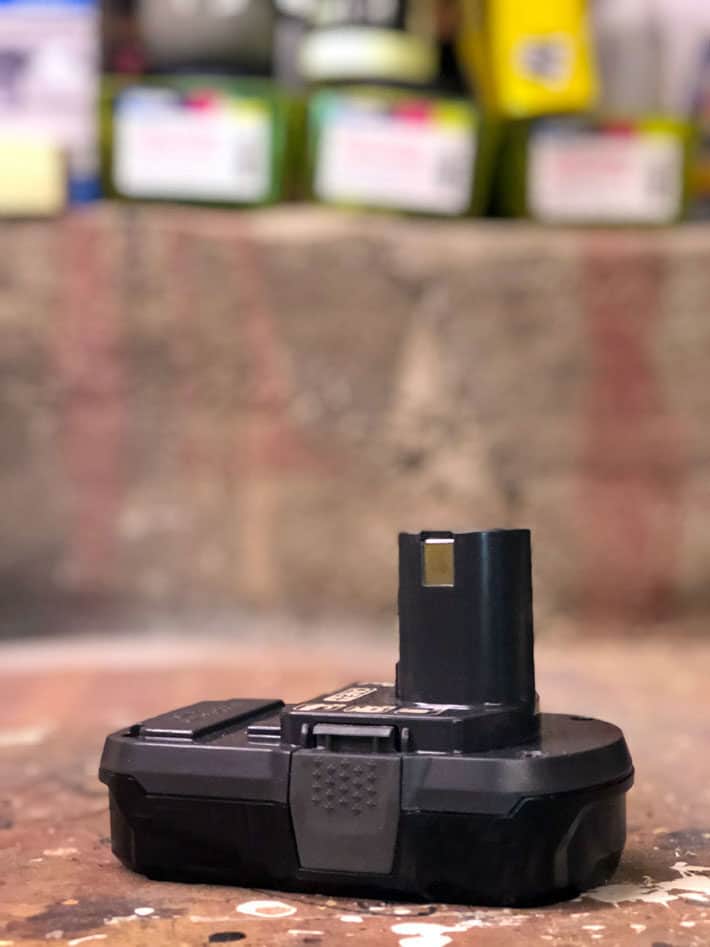
- A lithium ion battery that won't charge
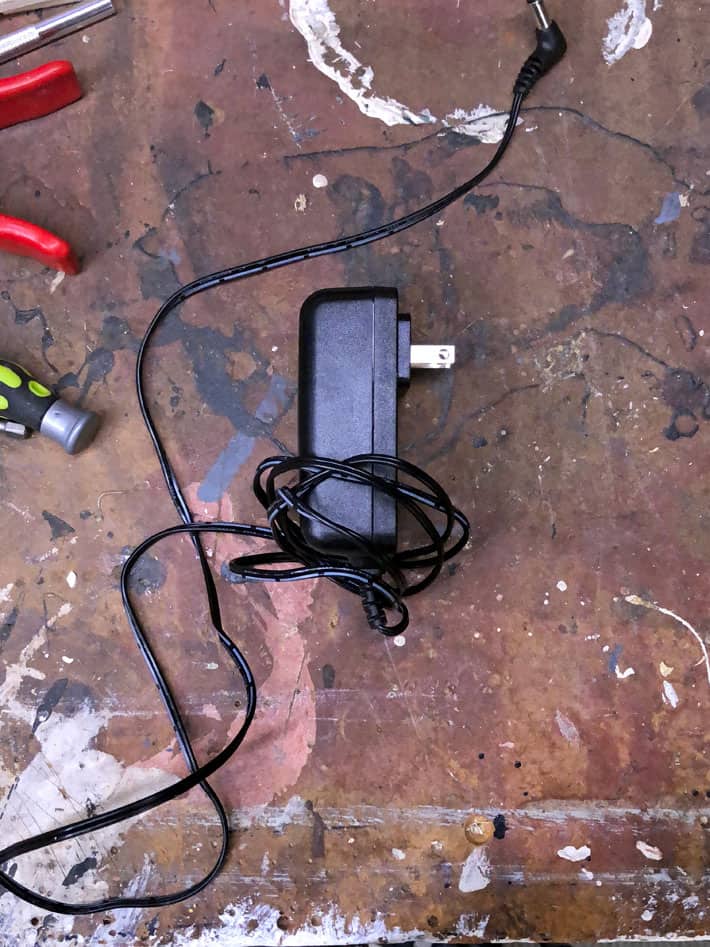
- An AC adapter (an old phone charger for example)
- A multimeter. (this is actually optional but helpful ... if you don't have one don't worry, you can still fix your battery)

Note: If you aren't used to doing this sort of thing, or using things like a "multimeter" this is going to seem crazy hard and way out of your DIY league. It isn't.
Steps
Step 1. Cut the end off of your AC adapter. That's right. Just cut it off. It's for a 10 year old cell phone, you're never going to use it again anyway. It's frankly kind of weird that you saved it to begin with.
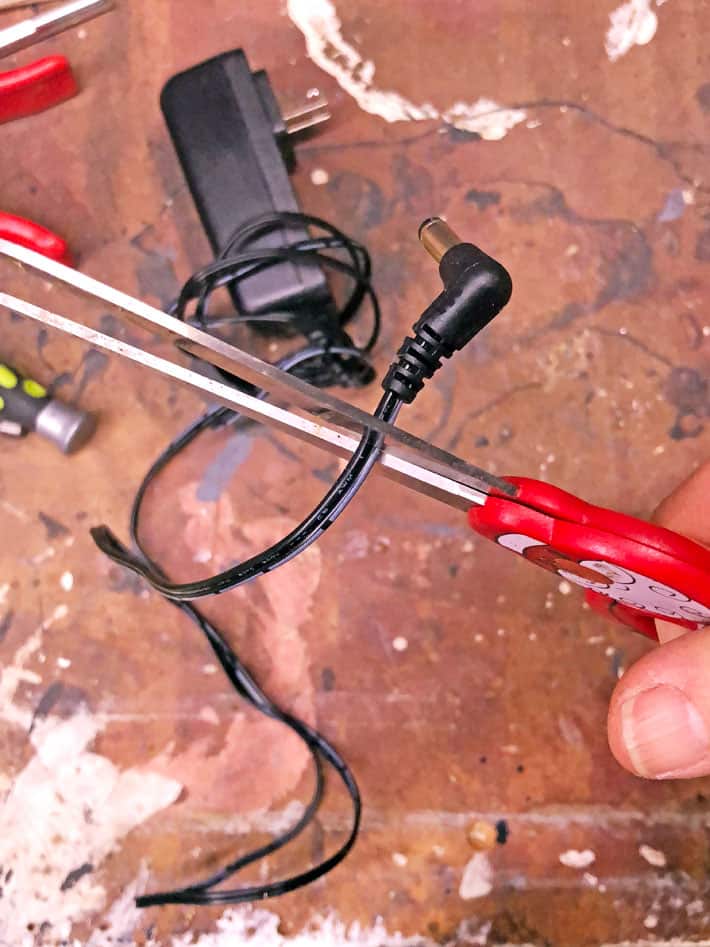
Step 2. Separate and strip off 1" of each wire. You have *just* made booster cables! Good for you.

TIP:
Black wire = negative Striped or solid white wire = positive
IT IS VERY IMPORTANT TO NOT MIX THE TWO UP.
Step 3. Remove the screws holding the battery together.
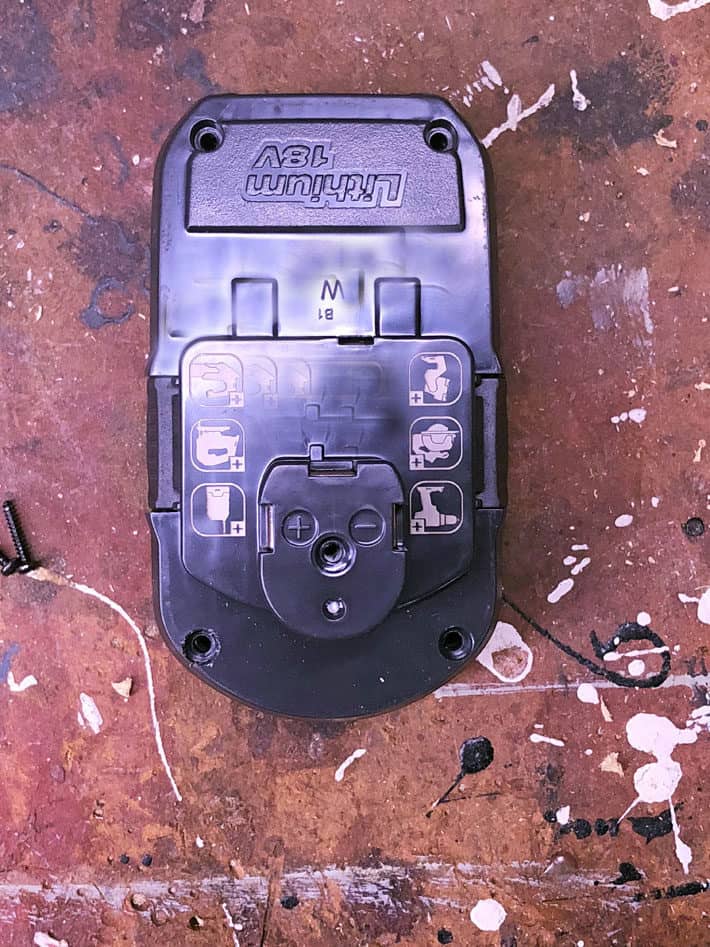
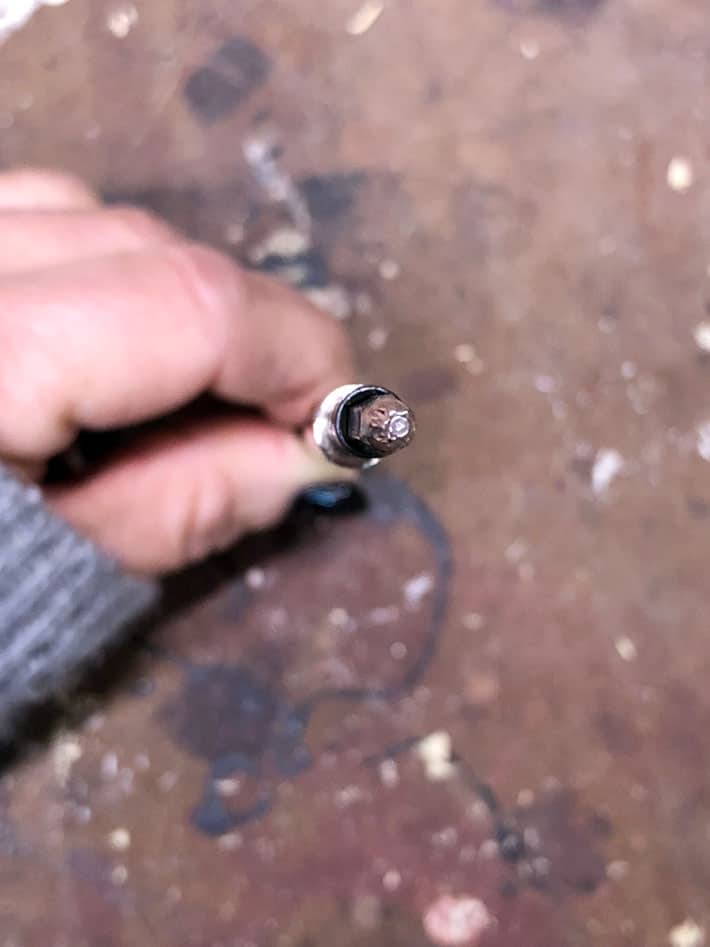
For Ryobi batteries it's a star shaped screw head like the one below.
A few years ago I bought a kit of small screwdriver heads from Amazon that has every small, weird, head you'd ever need.
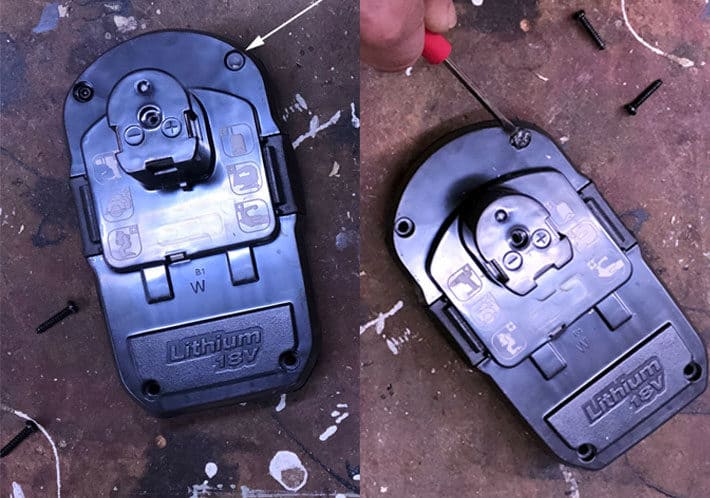
TIP:
There's a hidden screw under a piece of plastic. You need to pry the plastic off to get at the screw underneath. I used a very thin screwdriver to pry it off.
Step 4. Pull the top off of the battery case.
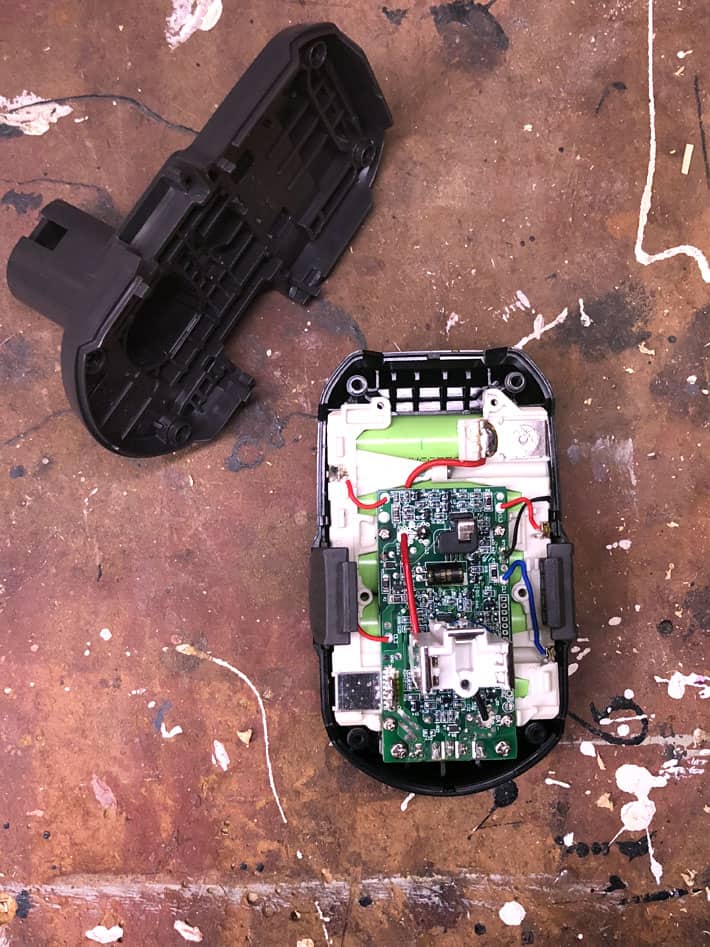
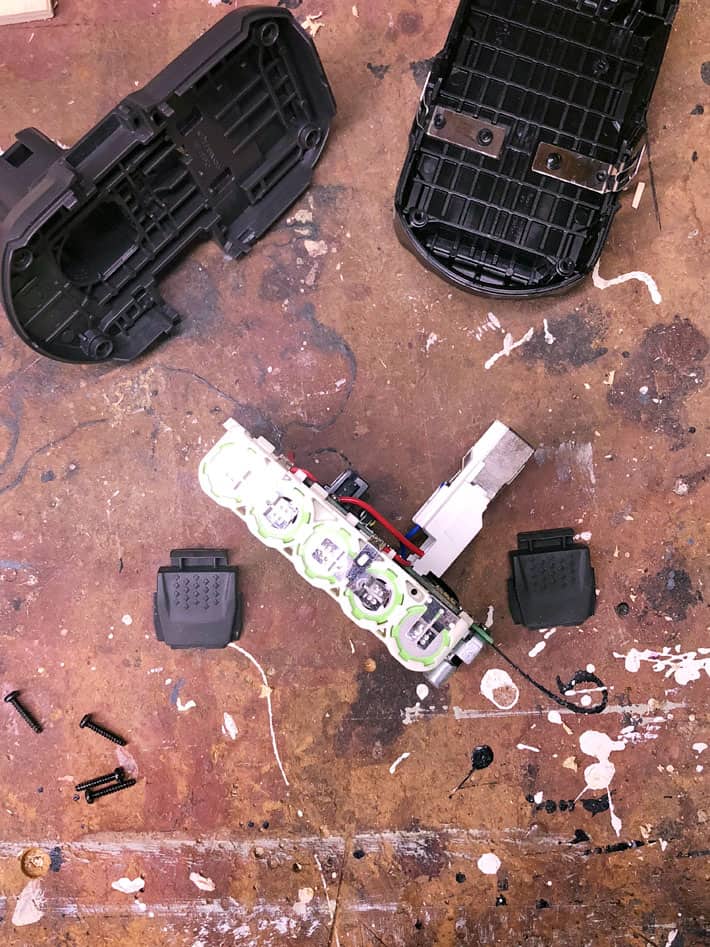
Step 5. Remove the 2 plastic side pieces. They're the things you press in to remove your battery from your drill.
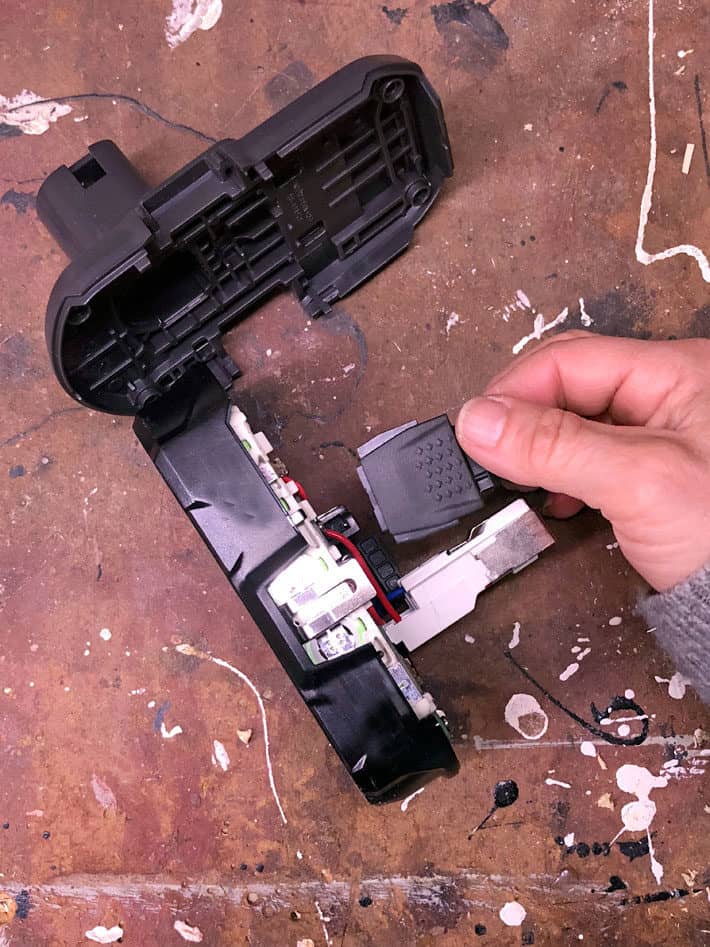
Step 6. Lift the battery pack out.
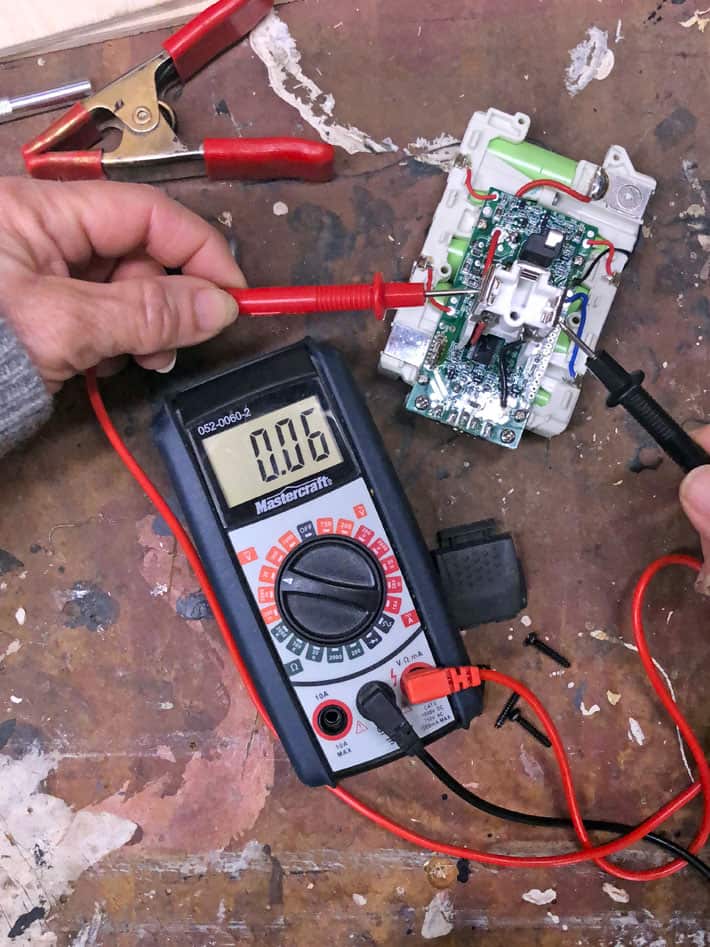
Step 7. Set the Multimeter to read volts. For testing an 18 volt battery choose the 20 volts setting. This will give you the most accurate reading. (If you don't have a multimeter skip to Step 9 and hope for the best)
TIP
Volts are symbolized by a "V" with one or two straight lines over it on a multimeter so it's that section of the multimeter that you use. The section under the V with the straight line(s). Not the squiggly line. The straight line.

Step 8. Touching the red probe to the positive (red) terminal and the black probe to the negative (black) terminal, read the voltage shown on the multimeter. In my case the battery was carrying a charge of 0.06 volts. Which is *almost* nothing, but not completely nothing.
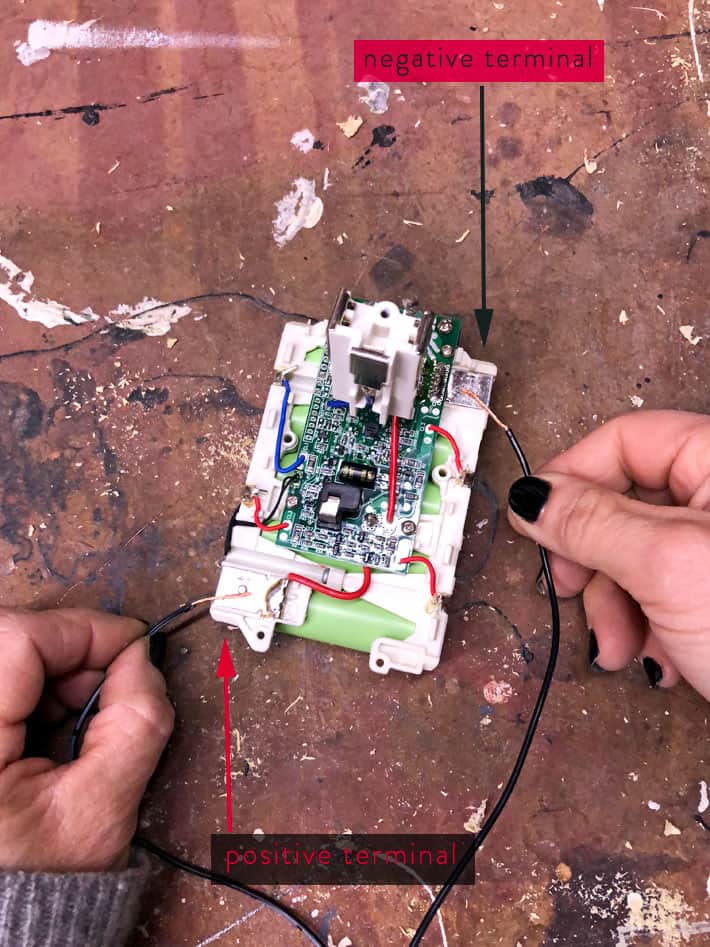
Step 9. Plug your AC adapter in and using the wires, boost your dead battery. Just touch the black wire to the negative terminal (the one with the black wire going to it) and the white wire (or striped wire) to the positive terminal (the one with the red wire going to it). Do this on and off for approximately a minute.
TIP
Apparently lithium ion batteries should be "pulse" charged. Which means you hold your wires down for 15 seconds or so, then release them. Then hold them down again. Over and over.
DOUBLE CHECK THAT YOU ARE TOUCHING POSITIVE TO POSITIVE AND NEGATIVE TO NEGATIVE.
Step 10. Test your the voltage on your battery pack again. It should be higher than it was before boosting. (Again, if you don't have a multimeter don't worry about this - you'll just have to press on without one)
Mine went from 0.06 volts to 7.58 volts after a minute long boosting session.
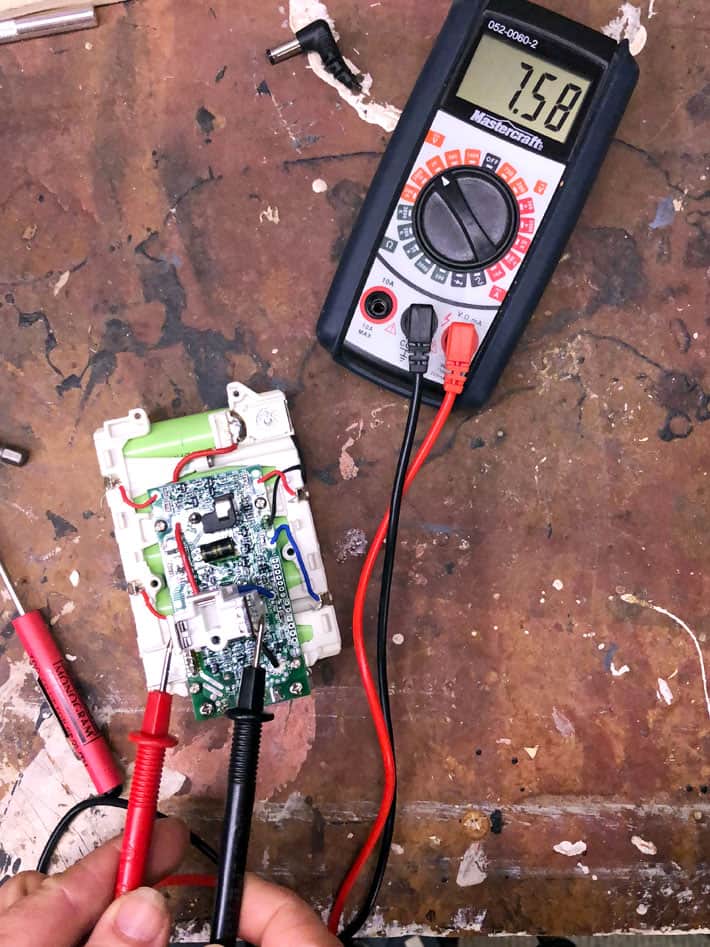
Step 11. Put the plastic cover back on the battery pack (just the part that goes into the charger) and set your battery on the charger to see if it will take a charge.
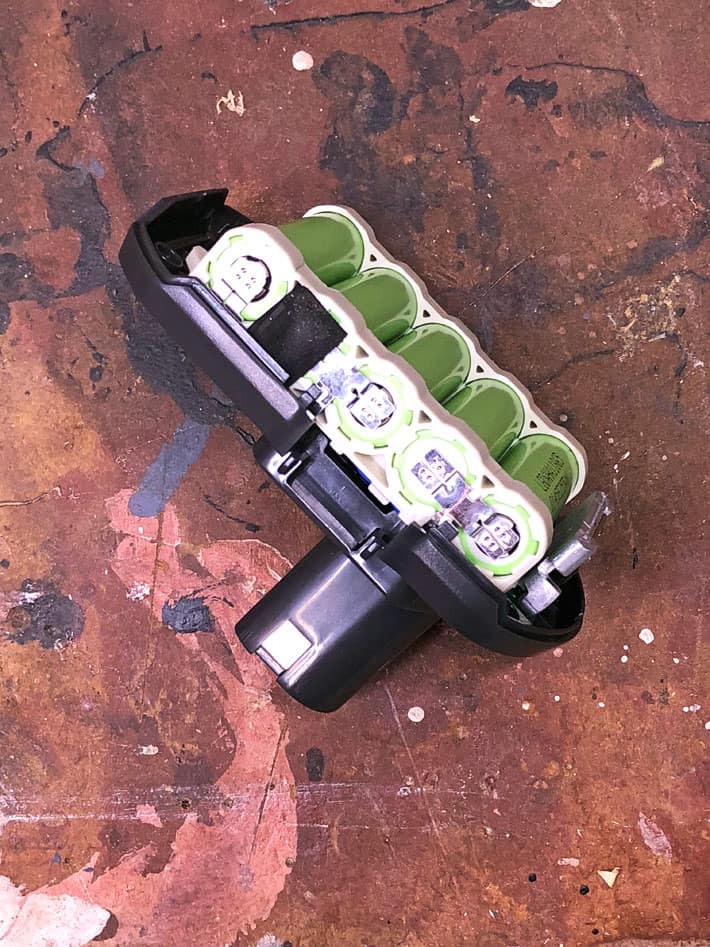
If you still only get a red flashing light and the battery won't charge, boost the battery some more. I find the battery charger will recognize that the battery is good again when you boost it to between 10 and 14 volts.
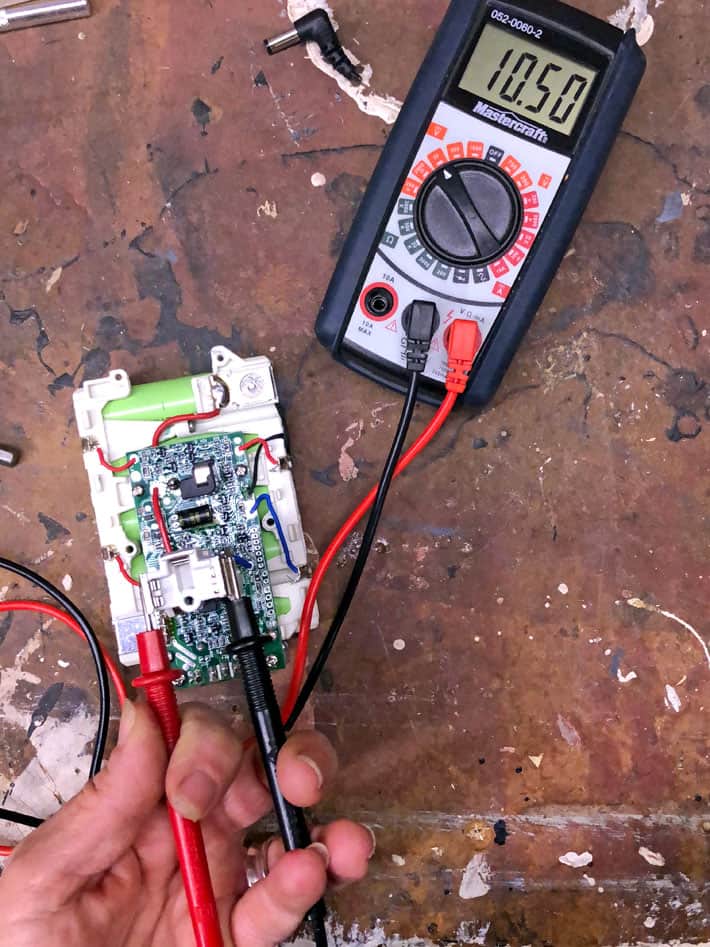
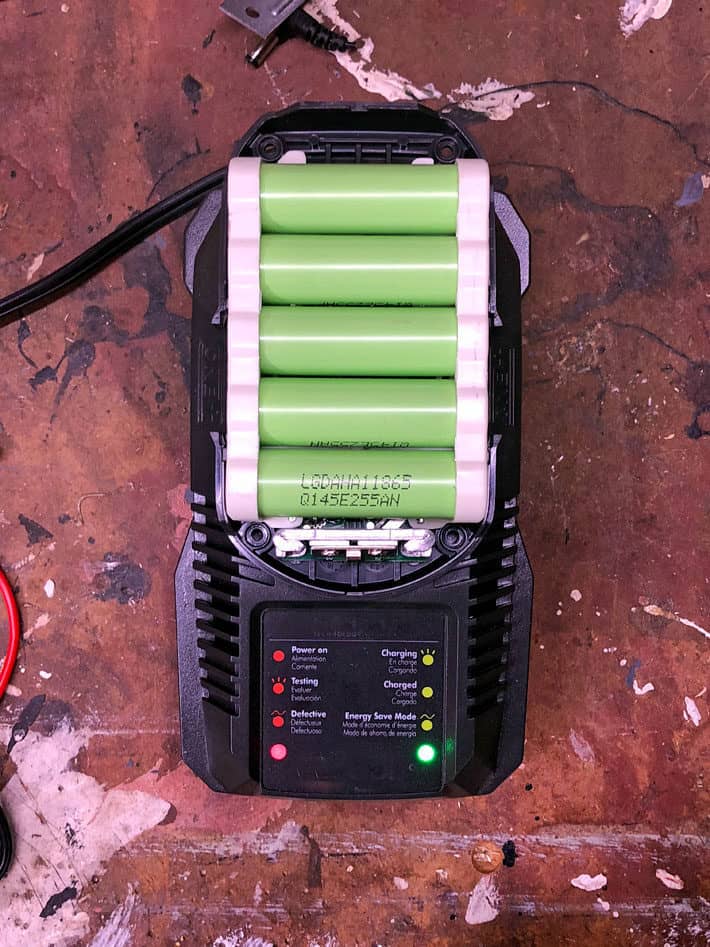
Just keep repeating the "pulse" boosting and testing the battery until it will finally be recognized by the charger and you get the green light.
To those of you who found this subject matter to be on par with spending 3 hours in a waiting room, sorry 'bout that.
For the rest of you? I know exactly how you feel. I felt the same way. Let me know exactly how elated you were after you brought your first battery back to life in the comments section.
Here's a 3 minute tutorial video showing me as I fix my own battery.
How to Fix a Ryobi 18v Rechargeable Battery
Instructions
- Cut the end off of your AC adapter. That's right. Just cut it off. It's for a 10 year old cell phone, you're never going to use it again anyway. It's frankly kind of weird that you saved it to begin with.
- Separate and strip off 1" of each wire. You have *just* made booster cables! Good for you.
- Remove the screws holding the battery together. There's a hidden screw under a piece of plastic. You need to pry the plastic off to get at the screw underneath. I used a very thin screwdriver to pry it off.
- Pull the top off of the battery case.
- Remove the 2 plastic side pieces. They're the things you press in to remove your battery from your drill.
- Lift the battery pack out.
- Set the Multimeter to read volts. For testing an 18 volt battery choose the 20 volts setting. This will give you the most accurate reading. (If you don't have a multimeter skip to Step 9 and hope for the best)
- Touching the red probe to the positive (red) terminal and the black probe to the negative (black) terminal, read the voltage shown on the multimeter. In my case the battery was carrying a charge of 0.06 volts. Which is *almost* nothing, but not completely nothing.
- Plug your AC adapter in and using the wires, boost your dead battery. Just touch the black wire to the negative terminal (the one with the black wire going to it) and the white wire (or striped wire) to the positive terminal (the one with the red wire going to it). Do this on and off for approximately a minute. DOUBLE CHECK THAT YOU ARE TOUCHING POSITIVE TO POSITIVE AND NEGATIVE TO NEGATIVE.
- Test your the voltage on your battery pack again. It should be higher than it was before boosting. IF IT IS NOT, THEN STOP. YOUR CELL COULD BE DAMAGED AND CONTINUING COULD BE DANGEROUS.
- Put the plastic cover back on the battery pack (just the part that goes into the charger) and set your battery on the charger to see if it will take a charge. If you still only get a red flashing light and the battery won't charge, boost the battery some more. I find the battery charger will recognize that the battery is good again when you boost it to between 10 and 14 volts.
- Repeat the "pulse" boosting and testing the battery until it will finally be recognized by the charger and you get the green light.
- Reassemble your battery. Your rechargeable battery is now fixed.
Video
Notes
- Black wire = negative Striped or solid white wire = positive It is very important to not mix the two up.
- There's a hidden screw under a piece of plastic. You need to pry the plastic off to get at the screw underneath. I used a very thin screwdriver to pry it off.
- Volts are symbolized by a "V" with one or two straight lines over it on a multimeter so it's that section of the multimeter that you use. The section under the V with the straight line(s). Not the squiggly line. The straight line.
- Lithium ion batteries need to be "pulse" charged. Which means you hold your wires down for 15 seconds or so, then release them. Then hold them down again. Over and over.
Please direct marriage proposals to my publicist. A certain tool company is *not* interested in proposing marriage to me. So I'd like to make a point of saying I love these tools and use them all the time. Their batteries and chargers on the other hand, could use some improvement.
OTHER WAYS TO FIX THINGS.
- How to Unclog Your Central Vacuum
- How to Sharpen a Push Mower
- How to Replace Carbon Brushes on Any Motor
- How to Mend a Broken Fingernail (because you're surely going to need it after replacing carbon brushes)
Questions & Answers
- Is there an easier way to do this? Possibly. Some people have had success with putting the battery in the charger and waiting for the red light to come on. Then you pulse charge the battery by quickly plugging and unplugging the charger.
- What voltage does the charger need to be? A 12 volt charger will do the trick.
- Isn't this dangerous? There is a small chance of BIG danger. So proceed with caution. If a cell doesn't immediately charge a little bit with this technique, stop. If anything (charger, cells, wires) starts to heat up, STOP.
- How long will the battery last after fixing them this way? Until you accidentally leave it in the charger too long again, or until the battery's natural death.
Seeing as you're the sort of person to make it all the way down here to the end of this post, you might like to learn how to install a battery operated electric fence around a home vegetable garden.

*Proceed with caution and follow instructions exactly. Failing to do so could lead to injury.*


An oldie but a goodie. Thanks for sharing. I 'think' I'd first try to jump the discharged battery with a charged one using stripped wires like jumper cables to the like terminals. If that failed then I'd do surgery. I don't know who invented cordless tools they are a godsend for all sorts of DIY tasks.
I have a Ryobi cordless 40V weed whacker and I LOVE it. It stays charged forever and is reallyyyy strong. ~ karen!
The charger method is safer because another battery would dump too much current at once. For the first few seconds you're effectively shorting out the good battery, risk damaging both and causing an explosion. The donor battery method is usually fine with nimh and nicd though, but lithium should be revived very slowly for the first few volts (if you really must - but still not recommend)
You. Are. Amazing. I would absolutely propose marriage if I wasn’t already engaged 🤭🤗🥴
I’ve been cursing ryobi alllll weekend whilst throwing random tantrums as I bang my foot on scattered about salvaged pieces of wood that should be on my bare walls holding my things (that are also on the floor and are not floor things at all whatsoever!) haha 😂
Thank you more than you freakin know!!!
Kind Regards,
Whitney 🫡👍🏼👍🏼👏🏼💪🏼👑💚
Lol, you're welcome Whitney! I know *exactly* how you feel. Get hangin' those shelves. ~ karen!
Complete twaddle. Lithium ion batteries do NOT need to be pulse charged.
Then why have SO many people thanked me for this post Peter? Which by the way isn't a post on pulse charging lithium ion batteries, it's a post on how to trick your charger into charging your batteries again. ~ karen!
Also to note, most "old" cell phone chargers are probably 6 volts or less, so not enough to bring the dead cell back up to sufficent voltage for the Ryobi charger to recognize it.
Your instructions have people pulse charging on the battery contacts that go into the charger. If you are only doing this, you DO NOT need to take the battery apart, unless you want to access the battery cells individually. Also note the removing the security plug and taking the battery apart, voids the warranty if you choose to contact Ryobi after the boost method fails. Also, you should check the voltage and polarity of the wires from your boost charger to ensure it's working, and correct polarity.
Also , is that an apothecary behind you in your photo ? I've been wanting to make one for my wife for awhile now and could use any tips or pointers I can get . Oh and I'm building it all from pallet wood and other reclaimed wood to give it some more character and also it will make It look more aged is my hope anyhow lol
Hi Dave. It is, to the best of my knowledge. It's an antique, found in an old hardware store. Good luck with the pallets - there's nothing I hate more than breaking apart those stupid pallets, lol. ~ karen!
Great idea , but do you have to pull the battery apart ? Can you not just boost it from the two charging tabs on the stem of the battery ?
You have to pull it apart. you need to pulse it at a point before the circuit board. the charger clips are after. I just did 3 batteries each for about 1 minute they all revived. I did see a version where someone drilled thru the case at a point where the contacts are rather than dissemble. but I think that would expose the system to moisture.
Neat trick, I will print this out and save it, Thank you
Interesting stuff, over my morning cuppa tea ✅. Might be worth recycling dud Ryobi batteries and selling them for a few £€¥$
The Li-ion battery i have is sealed, no screws at all, can i still pulse charge this battery using the +- terminals that are visible on the outside of the battery? (its a godox VB18 camera flash battery DC 11.1V 2000mAh)
1960 State of the Union Address
Great job and it works, Now I'm ready to Marry You !!!
Will this work on a Coleman battery ???
Total nonsense. Failed batteries cannot be resurrected.
As I said in the post, the batteries are not failed. There's an issue with the charger not being able to read that they're still chargeable. But thanks for your positive and uplifting comment. ~ karen!
Karen,, it's
a technical feature to prevent fire .. and it is true all batteries will fail in time. (of course)
Btw,, I love your humor and demeanor but marriage is no laughing matter. ...cuz I really do like you.. Even more after i saw your picture in your garden .. it's a Symphony of sorts.. 💛💯
It'll work. But while you celebrate your successful your battery is very quickly dying again. Capacity will never be the same. Your 2Ah battery is now a 0.5Ah if you're lucky
Nick I think you're misunderstanding. It isn't that the battery isn't good, it's the the charger isn't recognizing it. I did these batteries years ago and they're still working just fine. Do they stay charged as long as a new battery? No. They never do. But they still work and complete jobs. ~ karen!
Just sayin; there's a variable that seems to be overlooked. Might wanna re-think the adapter! Seriously, jumping starting the battery pack particularly Li lo when voltage has dropped to cut-out is entirely possible but please note the adapter must be AC/DC "output" not AC else you probably fry BMS. Not withstanding, if the battery pack was run dead under high load or overheated when it cut-out. Chances are good if "any" of the series cells such as 5s2p have overheated they are probably terminally open circuit! You must see a voltage presence for this to work. Might wanna consider possible fire hazard, and determine if battery replacement is the better advice! : )
Hi Karen,
Just wondering if you could shhh a bit while the stuff you just explained in your blog gets man-splained but wrongerer back at you.
I mean, SOME of us would like to consider stupid and/or irrelevant alternatives to your well-explained, intelligent tutorials, okay?
Tah x
The weirdest thing is why so many men who have experts in this topic are googling how to fix a battery that won't charge. ;) ~ karen!
The charging control electronics BMS is disabled, if you recharge the cells, the repair works. An example is the hoverboard accumulator, for which there are several videos on YouTube. look at them and you will understand too.
Steve, you are just plain wrong. Yes after a Battery is truly Dead you are correct but many times a trick will freshen up a Power tool Battery.
The battery is not failed, it’s faulty/badly manufactured. It’s heavily documented as well that this is a common reoccurrence with these sort of batteries. And it DOES WORK I JUST DID IT 😀
The best thing you can do if you use battery powered tools is invest in RIDGID brand. Lifetime warranty on tools and batteries. BOOM. Also you can buy an adapter to use your RIDGID batteries on royobi tools. $25 bucks or so from amazon. Look into it, you wont be disappointed.
When I contacted RIGID about a 6 year-old deceased battery they refused to honor their much touted “lifetime warranty”. The lady I talked to said that I had to be reasonable in my expectations. I guess RIGID expected me to live less than 6 years.
Is there really a need to pull the battery case apart to do this. Can’t the same be achieved by touching the terminals when it is still fully assembled?!
I came here to ask this same question. there are no fuses or circuit protectors to check so why do you have to disassemble the battery??
That’s exactly what I was thinking. I worked on electronics 25+ years in the military, so I know a thing or two. Those two terminals that the battery uses to make contact with both the charger and tool are no different than the contacts within the battery. So doing this pulse exercise on those exterior contacts will
negate having to disassemble the battery for the same results.
Thanks for the information. I tried it on a 2ah, using a 12V car battery trickle charger. I got the battery pack up to 11.5 volts; but it still won't charge. Is there a way to see if I have a dead cell (other that cutting the cell connectors) and replace a dead cell? Or, is there something else wrong with my battery? Thanks.
is it possible to do something like this whit nicad batt
or different method exist for nicad batt
No that I know of Jacque. ~ karen!
Ya. Its the exact same process. Alot of drills use NiCd batteries too.
Thing they don't mention tho is that even if your jump is successful the capacity of the battery will forever be trash. You'll be lucky if you 2Ah battery is now a 0.5Ah. might a couple minutes out of your reanimated battery pack before it has to go back on the charger.
avez vous mesure le voltage de votre chargeur de cell
a combien est t'il 12 ou 20 v
have you mesure the voltage of your cellcharger
is it at 12 or 20 v
I've had problems with my Ryobi batteries before, even brand new ones. I find the 4ah to be more dependable than the lower rated ones. I've never owned a bigger on, no need for it. Seen a lot of different recovery techniques and this one is the simplest and makes the most sense.
THanks James. It works! Although the fact that we all have to go through this is ridiculous. ~ karen!
Great, NOW YOU TELL ME!! Kidding…. My fault. Just threw away three batteries that didn’t survive the winter on the charger. Bought a pair of the newer, larger capacity batteries, but I’m dying to try your method when my one remaining old battery dies. Thanks for the tip though!!
Skelly
When I wanted another battery I went to the recycle depot by my house and asked them if I could rummage through their old batteries and found one. Took it home, did the fix on it and it worked. :) So you could do that for the fun of it. ~ karen!
Thanks for keeping it simple! FYI - from other sources, if the battery falls below 9 volts the charger will reject it as bad. -Randy
Risky? A little. But people don't seem to think twice about throwing their kids in a Tesla that has 7,200 of these exact same batteries that were all just supercharged from dead to past nominal voltage in 20 minutes flat. This is only 5. Still, wear acid splash goggles, have a respirator ready, and maybe something fire resistant.
The much larger point is, if you had even a basic comprehension on how rechargable battery backs work you would never find yourself in this situation. Its really not complicated. just remember like 3 basic things
1) They get too low, they're useless now. They will shut off before they get too low, but;
2) They discharge even when they're sitting on the shelf doing nothing. If you run you're drill to the point where it says stop I'm gonna die forever if you keep using me, and then you just throw it in a box, it still keeps discharging. Very soon it will be useless.
3) The batteries don't like to sit at 100%. Once it's charged, take it off the charger. Bonus points if you put it right into a tool and turn it on for like 5 seconds. Now it's at like 95% charge, it's much happier, battery is now ready for storage and doesn't need to be touched for a year.
Also, keep them indoors. Not in the garage.