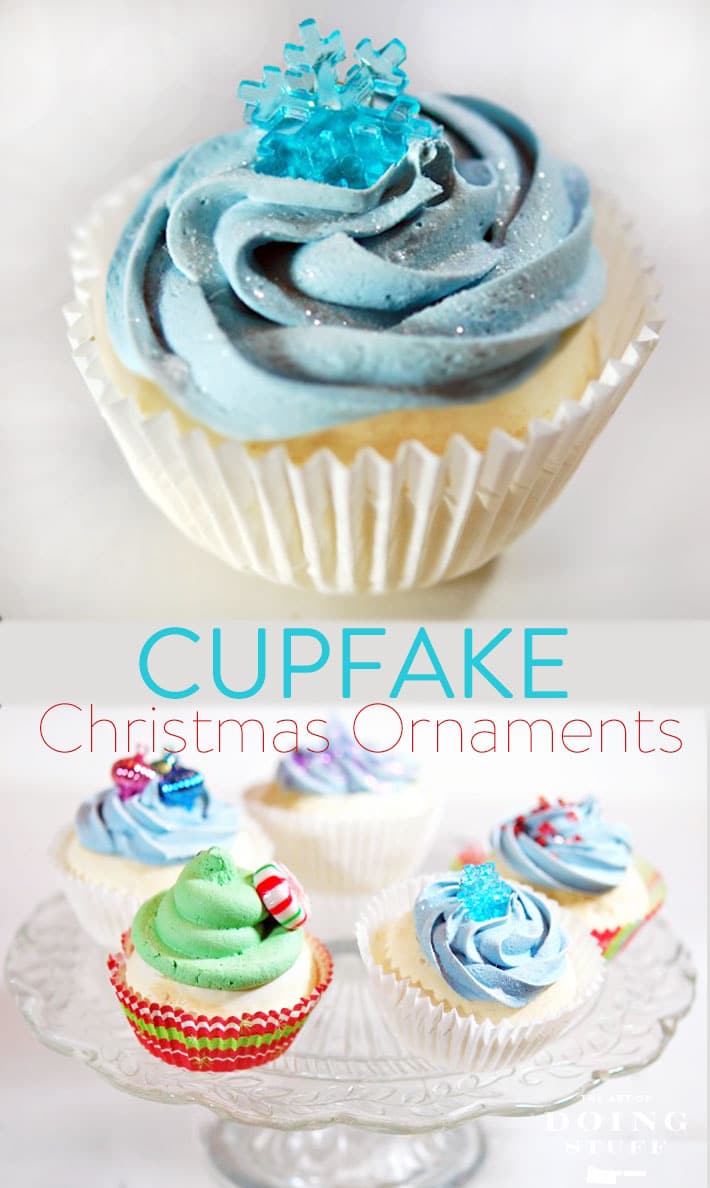
We like cupcakes. We like Christmas trees. So could you explain to me why we never thought to combine cupcakes with our Christmas Trees?
It can be done. You can have an ENTIRE Christmas tree covered only in cupcakes this year. I know. Because I've done it.
YOU can make Cupfakes for your Christmas tree this year and they'll look GREAT. They're totally made with some poisonous materials so don't do this if you have either small children or a very stupid but much loved spouse in the house.
You make the "cake" out of a can of Great Stuff expandable spray foam insulation. You make the "icing" out of a bucket of premixed drywall compound.
Using these 2 ingredients, some items from around the house, plus some do-dads for decoration you'll have cupcake ornaments that will look like real cupcakes.
But to reiterate you probably shouldn't eat them. I don't mean to tell you what to do, but if it were me ... I wouldn't eat them. What with them being made out of poison and plaster.
This is incredibly easy to do but does take some time.
HOW TO MAKE A CUPCAKE TREE ORNAMENT
Materials
Drywall Compound (might be called something else in your part of the world. It's the stuff that comes in a bucket and you use it to repair your drywall or sheetrock)
Great Stuff expandable foam insulation
Muffin tin/cupcake tin
Paper Muffin/cupcake cups
Acrylic Paints
Piping Bag and tips
Electric Handmixer
Kitchen Bowl
Decorations (sparkles, Mini ornaments, beads) for top of cupcake
To make the cake portion of the cupcakes get your muffin tin and liners.
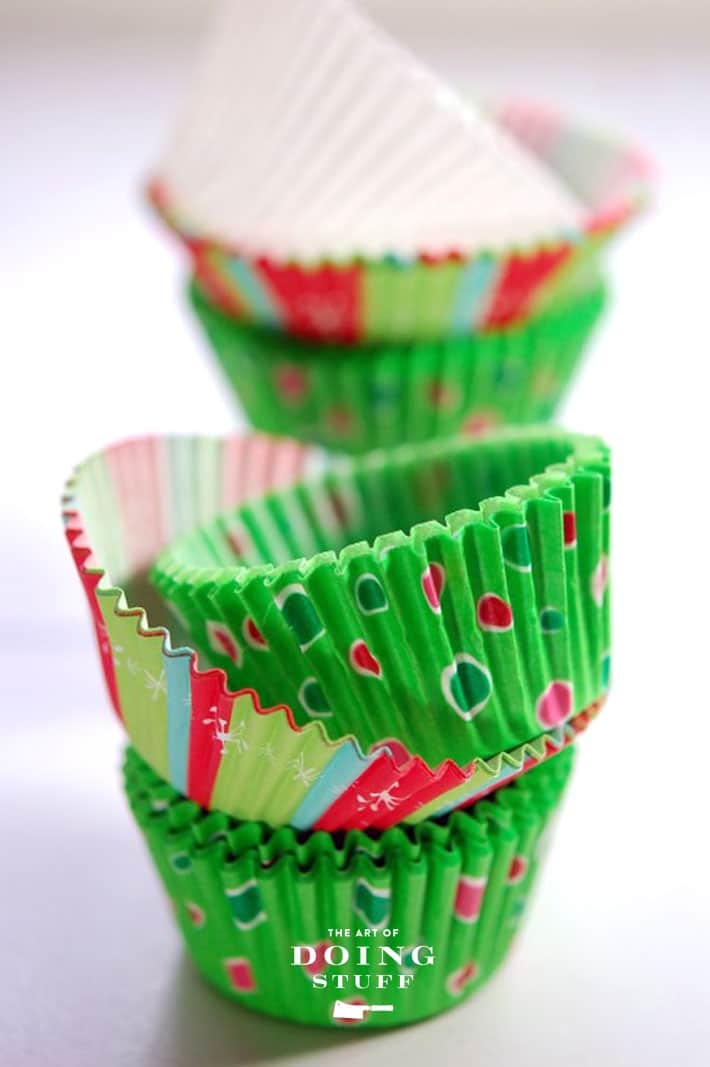
Some paper cups also come with these tooth pick thingees.
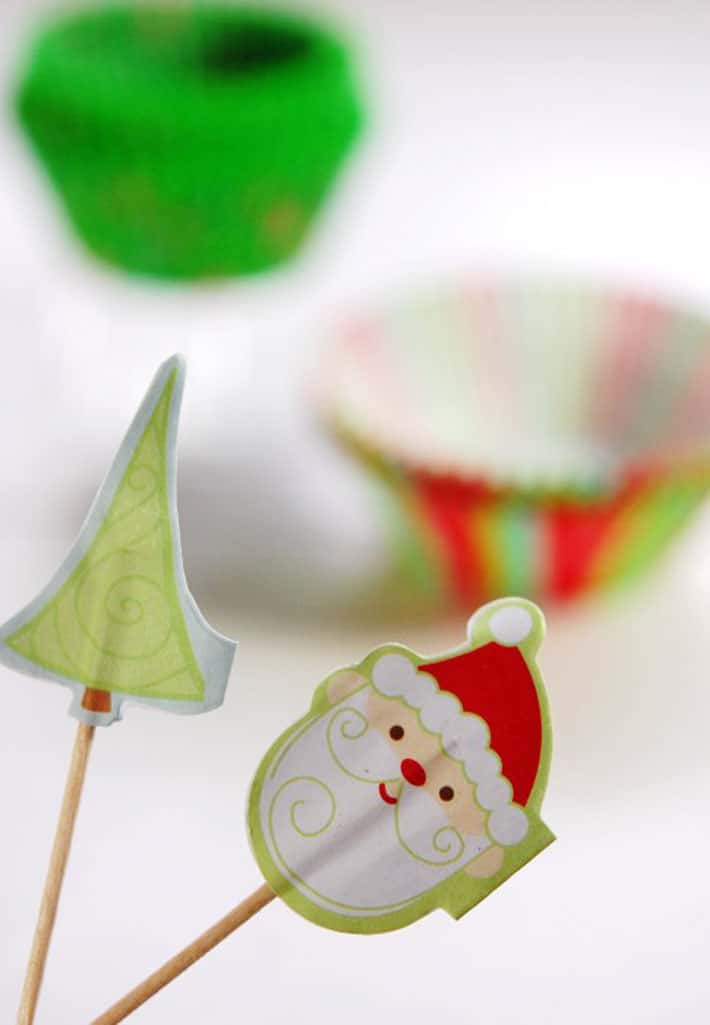
You can save those to use in your ornaments or spear a cocktail wiener with them as you're making your Cupfakes.
Line your muffin tins with the liners. I didn't do this the first time I made these, but putting a heavy washer or pebbles into the liners before you fill them will help weigh them down so they don't tip over later on.

Fill the liners ¾'s full with Great Stuff expandable foam.
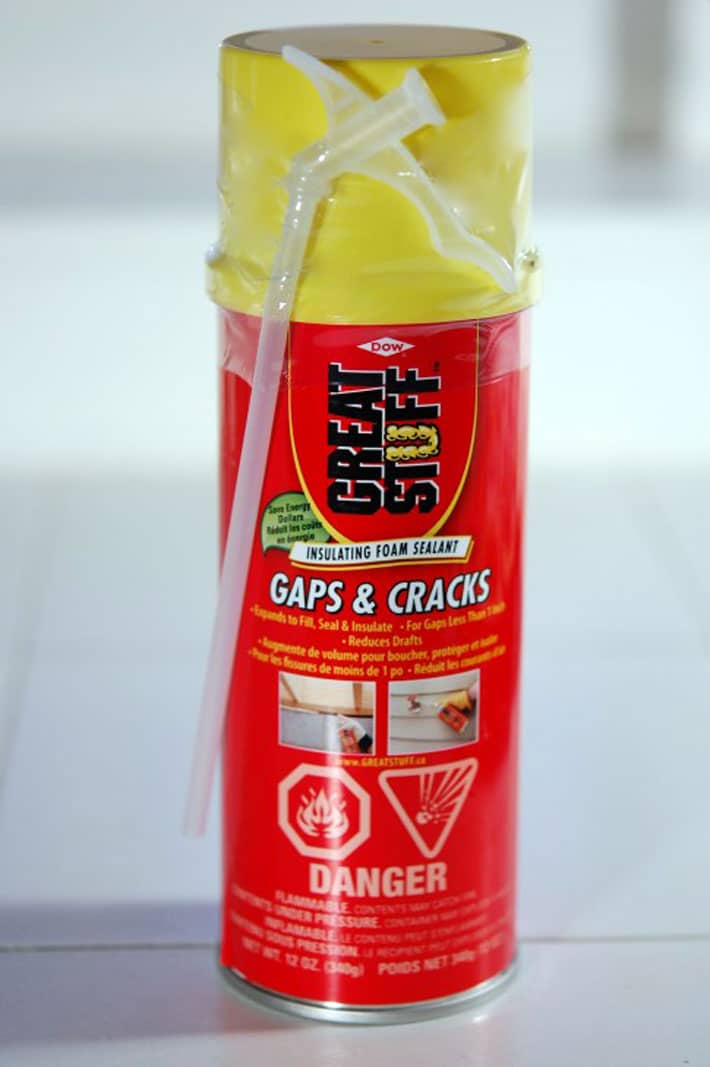
This much foam will make about 40 Cupfakes.
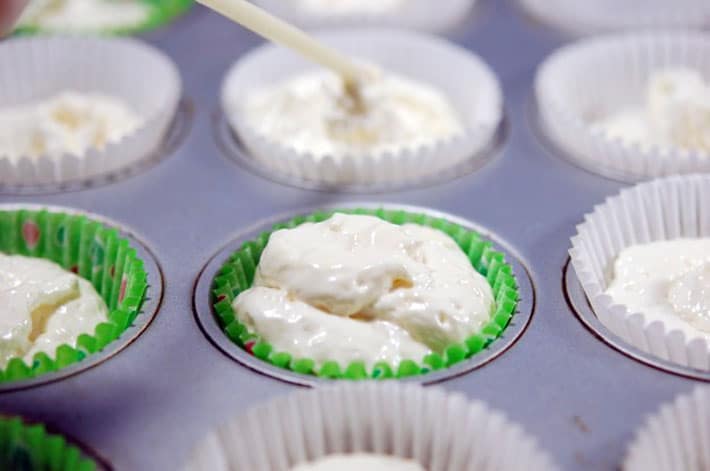
See that cupcake with the green liner in the centre? It's too full. You should only fill to ¾s full.
Move slowly because this Great Stuff is REALLY sticky and you don't want to make mistakes. Also wear gloves. Did I mention you should wear surgical gloves? Also, it's easiest to fill the cups if you spray the foam in circles.
The reason I say to only fill the cups ¾s of the way is because this stuff means it when it says it expands.
This is how much the cup looks at ¾s full.
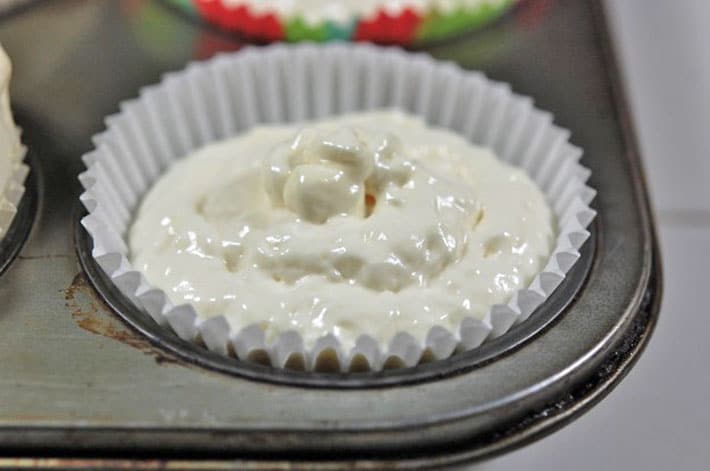
And 10 minutes later ...
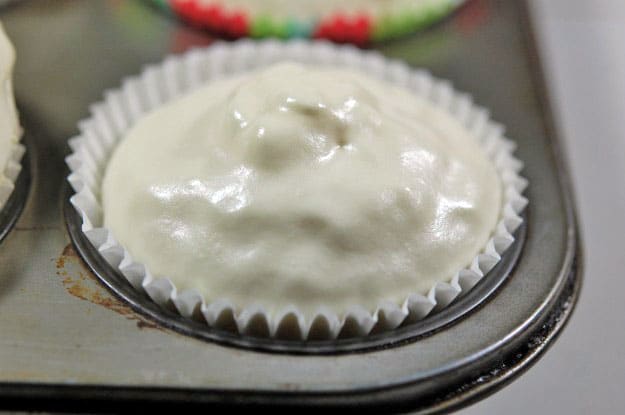
And another 10 minutes later.
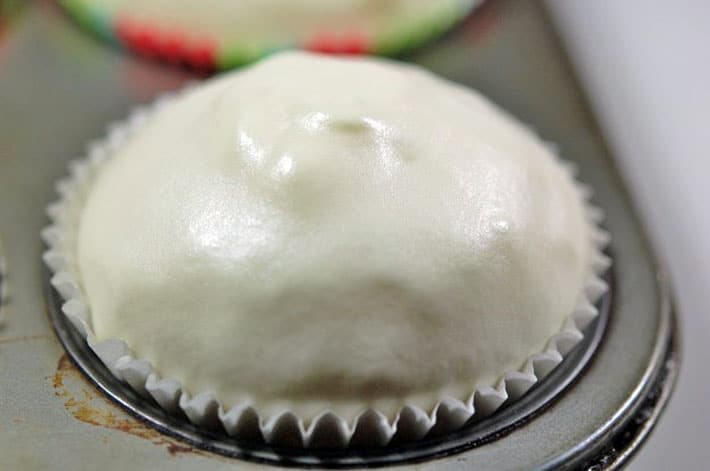
Let your foam set for a minimum of a couple of hours. I let mine set overnight. Once they're set you can pull them out of the muffin pan and start to paint them if you want. When the foam dries, it's completely white and shiny. You can leave them like that, or you can paint the cupcakes. I painted mine to make them look as though they were really baked vanilla cupcakes.
So instead of looking like this ...
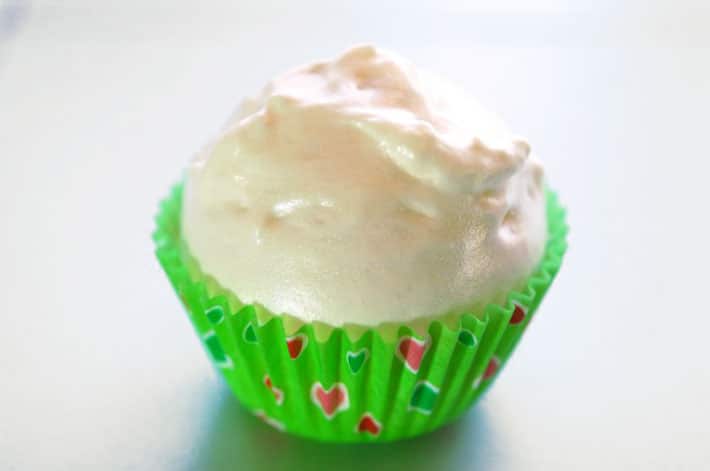
They look like this.
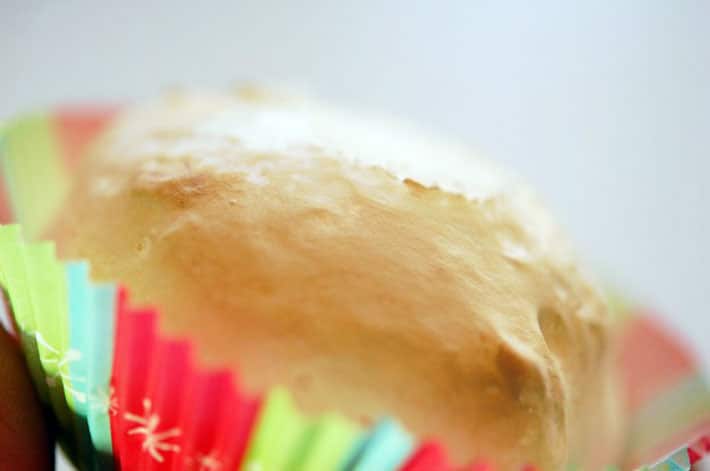
To paint them just mix up a couple of brown and cream colours of acrylic folk art paint and swirl them together a bit. Then brush the paint right onto the Cupfake. It's as simple as that. Just do a light, swishy coat so some of the colour beneath shows through. Then go over the Cupfake again, darkening any high points so it looks like they're a bit more browned there.
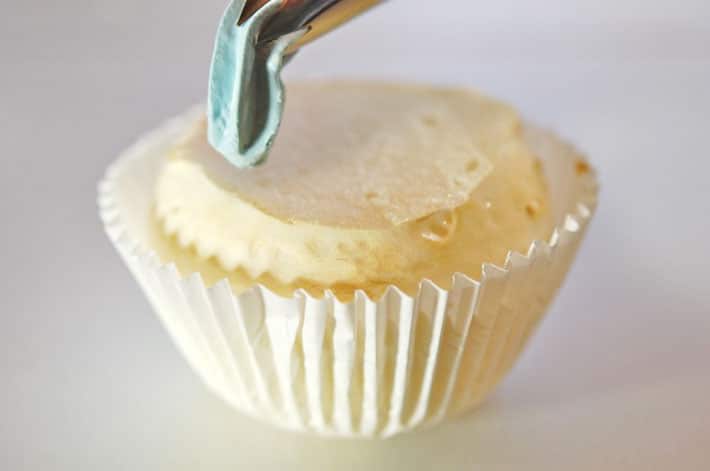
It's a bit easier to "ice" your Cupfakes if you cut the top off of them because the compound will stick better to the porous surface of the cut foam. Plus, it'll keep your Cupfakes a more manageable size.
Like so ...
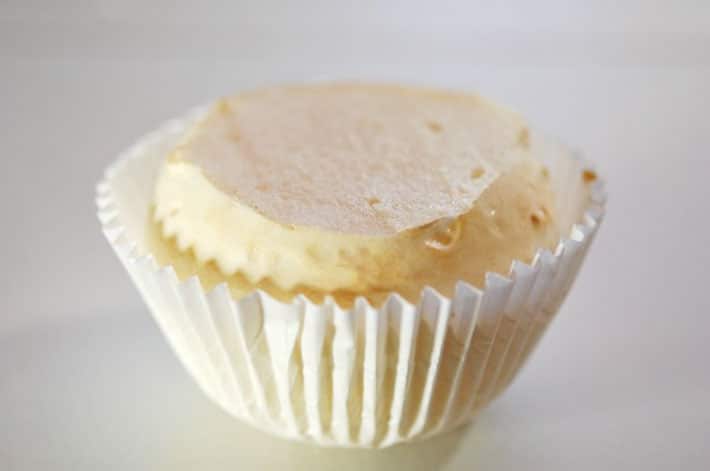
O.K. Now that your cupcakes are formed and painted you're ready to move onto the final step. Throwing them at people. Wait, no. Icing and decorating them.
Tips!
* Great Stuff is incredibly sticky and if you get it on your arm it will require scrubbing with hot, soapy water, drenching with acetone, a splash of Goo Gone, and another treatment with acetone. Finally, remove your arm with a hacksaw. In other words, be very careful with the Great Stuff.
* Do not overfill your paper cups. ¾s full and that's all.
* Don't attempt to pull them out of the muffin tins before they're dry.
* Keep plenty of paper towels handy. And by handy, I mean pre-ripped off of the roll, sitting right beside you. You'll need them to wipe the goo off of the nozzle when it accumulates there.
Tips may or may not be based on real life experiences.
Now that the actual "cake" portion of the Cupfakes are done, it's time to move onto the fun part. Not that spraying goo in paper cups and watching it explode in size isn't fun. 'Cause it is.
For decorating your Cupfakes you're going to use a bucket of pre-mixed drywall compound coloured with acrylic paint. That'll be the icing on the cake.
On *top* of the icing you can put whatever decorative pieces you want. You can use sparkles, or beads or brightly coloured condoms. Whatever tickles your chin.
Whatever you put on your cupcakes needs to be fake. Not real food items.
MAKING THE ICING
Spoon a glob of drywall compound into a mixing bowl. Add enough to fill a piping bag.
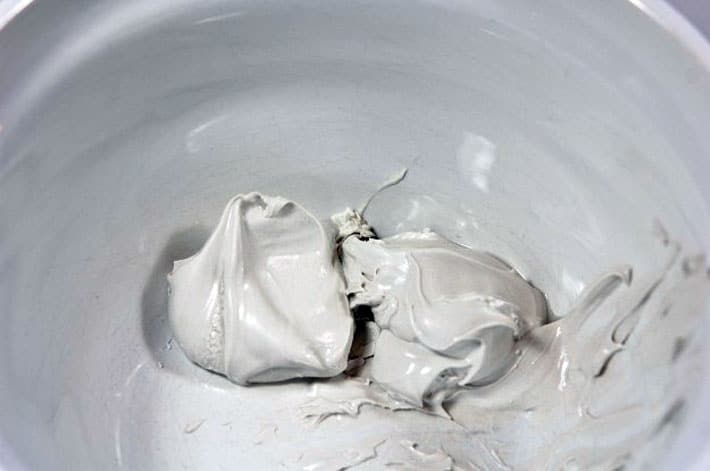
Add a dollop of whatever colour paint you want. The drywall compound is greyish so unless you can find a white drywall compound you'll never have a pure white icing.
Work quickly now because the drywall compound's sole purpose in life is to dry out when it hits the air.
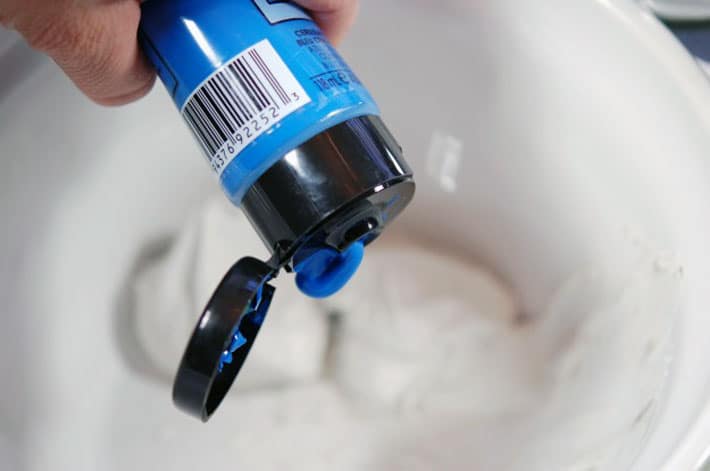
Whip up the tinted compound with a hand mixer.
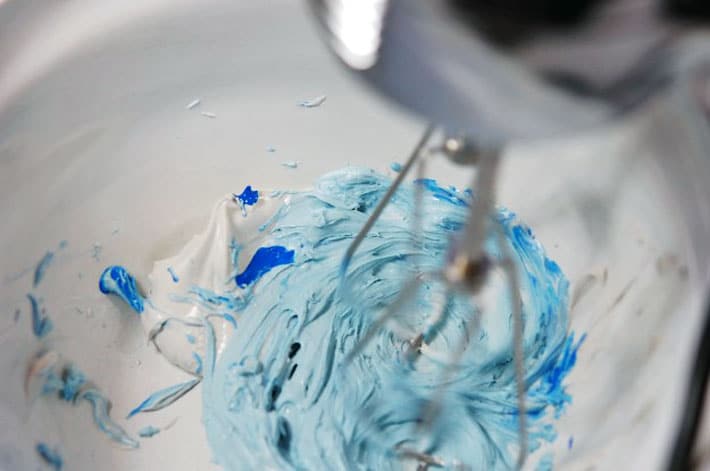
I feel the need to reiterate work quickly. There's no time for stopping and staring blankly at your recently manicured and newly wrecked fingernails. No. Time.
The drywall compound starts to dry out almost immediately and you need to get it into your piping bag quickly.
To make your life much easier, if you plan on making a variety of coloured icings, get a few extra tips and disposable piping bags and mix them all up in advance.
Once you have the drywall compound in the piping bag, it'll stay fresh while you make the cupcakes.
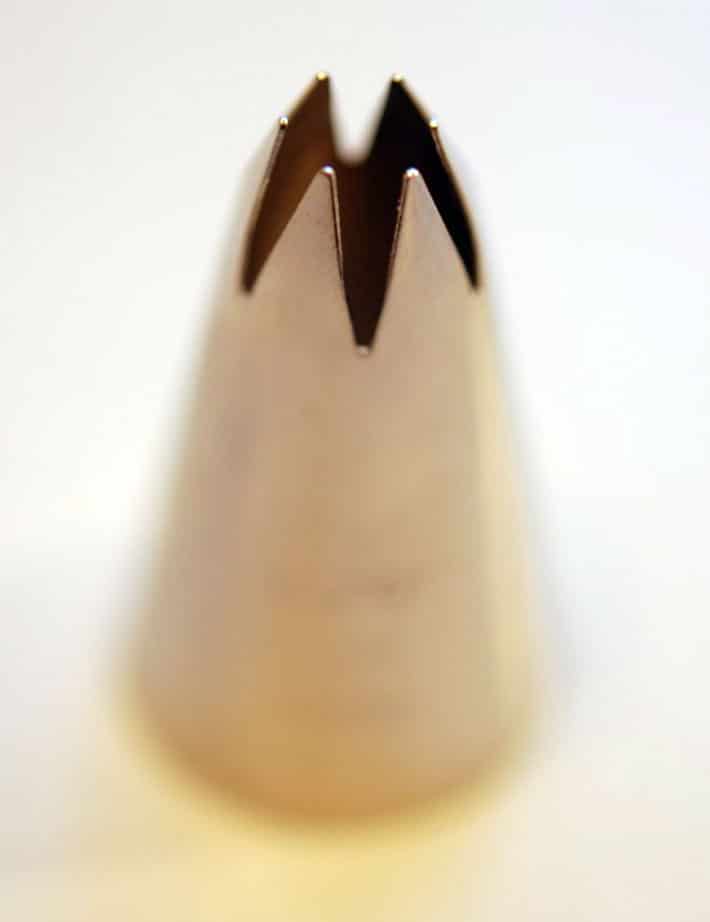
Wilton 1M tip
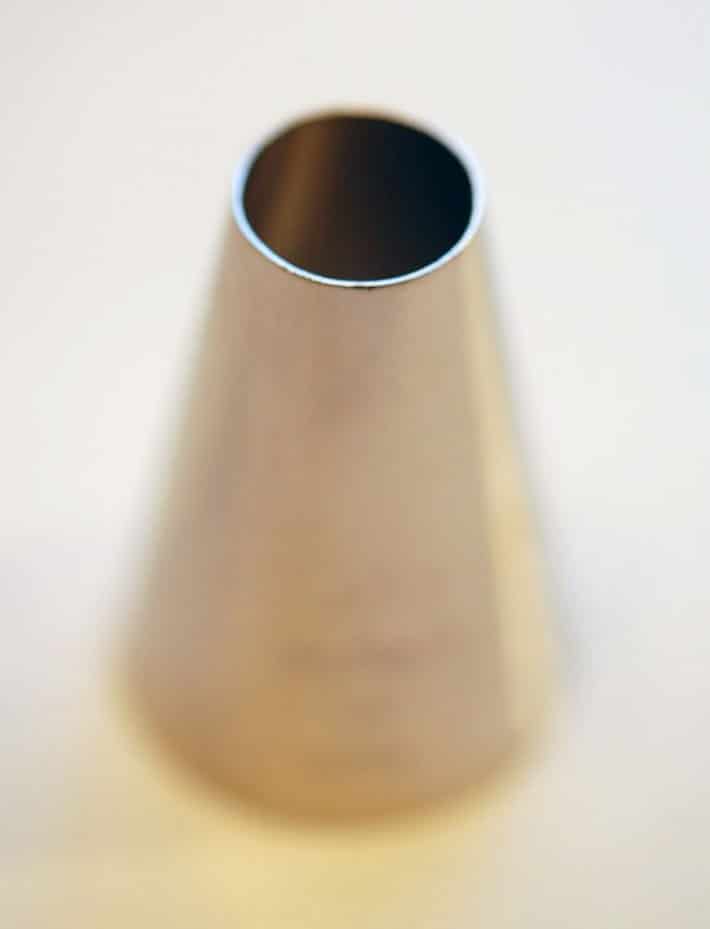
Wilton 1A tip
Once your piping bags are filled with your tinted drywall compound set your prepared Cupfake in front of you.
Unless you plan on piping with your bum. In which case you should probably place the cupcake behind you.
The drywall compound is a little softer than icing, but other than that it is remarkably similar.
Pipe it onto the cupcake however you fancy.
Once you've iced the cupcake and topped it with sparkles or whatever else you want, insert a paper clip into it so you have somewhere to hang a hook off of.
The paper clip hangers are in there fairly snug.
However, just to be safe, once they were dry I dropped a teensy bit of hot glue where the wire inserted into the cupcake.
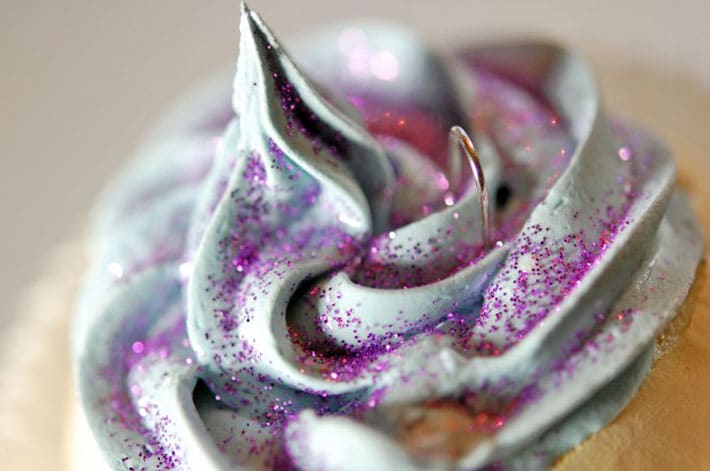
If you put the wire directly in the centre of the cupcake, it will hang perfectly straight from the tree. If you put it off to the side the Cupfake will hang at an angle.
Doesn't this look like soft serve ice cream?
Covered in purple sparkles?
Which is how I most enjoy my ice cream.
If I'd had more time I would have made black and white cupcakes.
I might still make black and white cupcakes.

Don't wanna hang em from the Christmas Tree? 'Cause you're Jewish? Or Jehovah's Witness? Or Muslim? Or you just don't like Christmas trees?
No problem. Put em on a cake plate.
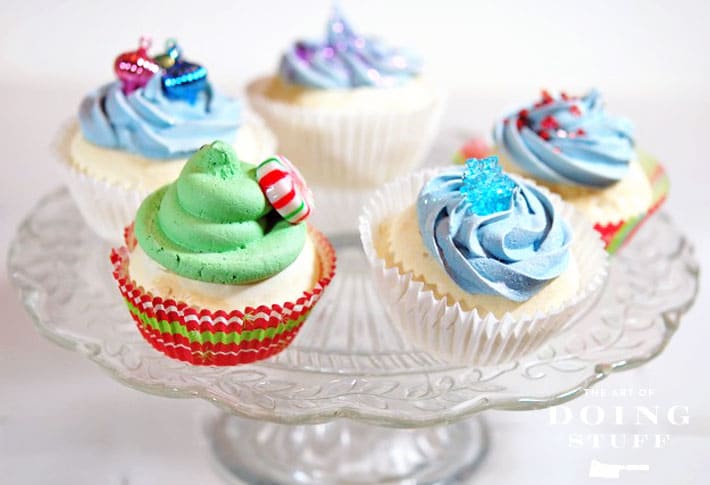
After you ice and decorate your cupcakes, sit them to the side (carefully) and let them dry for 2 days. Just ignore them. Sit them in the corner and pretend they don’t exist. Treat them like your spouse when they’ve wronged you.
You can now hang them from a tree, put them on a plate or use them as a bow on a Christmas present.
Oh … be prepared to make real cupcakes after you make your fake cupcakes. I can’t explain it, but for some reason you’ll have an uncontrollable craving.
Have a good weekend!




ADORABLE
Oh, I also meant to thank you for the Hallelujah youtube link, it's just lovely. My all time favourite is k. d. lang's version just wailin' away! Rest in peace, Leonard.
Sooooo cute, like their maker, I might add. If the paperclip is inserted in the bottom underside, or bum, then one could run ribbon through it to tie around a gift and make a gorgeous bow with the wee cake nestled in the loops.
As a complete aside to the cupcakes , the day after your biscotti search we received a whole display ! Too much.
Of course, lol! ~ karen
Just wonderful!!!!! Would look cute stacked up like a tree with LEDs entwined - for a lighted decoration on top of the refrigerator. I found out the hard way about this foam and its' permanent stickiness. I "closed up" a spider hole and used my bare fingers to smooth the rough edges. That was a mistake since the foam didn't smooth out well and I got mad and used my whole hand. If I was Chevy Chase or Tom Hanks in some funny movie I would have gotten paid. But more like Lucille Ball, I walked around with a hardened "mitt" trying to pull my fingers apart! Just getting the mitt off took a knife to cut my fingers apart and it was scary! PAY ATTENTION WHEN KAREN SAYS USE GLOVES and I would add DO NOT UNDER ANY CIRCUMSTANCES TOUCH IT UNTIL IT IS DRY! It works well to plug spider holes and I know it will make awesome cupfakes!
The ideas that come to you are mind boggling, Karen. These cupfakes are awesome. The only downside is that my subconscious keeps trying to say the word over and over, fast...and keeps tripping over it. Too weird.
I love this idea! Wish I'd seen it way back. On another note. Sorry - we loved Leonard too. x
Thanks. I've spent this evening levelling and installing some of my bookcases Lisa, and I had no idea until just 2 minutes ago that Leonard Cohen died. He was 82, so I don't know why I was shocked, but I was. :( In honour of Leonard I have this from 1501 other Canadians. ~ karen!
I never think of their age when I see them - and some of the people we have lost this year are so embedded in our souls that we never think of losing them. An amazing poet and artist. I love this version - new to me. We shall raise a glass.
Ahh. Choir Choir Choir ... such fun singing in a group. so sad to hear Leonard Cohen has passed away!
Hi - I love your idea of using spray foam to make cup"fakes"! I work for a company that makes spray foam and am trying to figure out if there is a place for spray foam in the arts & crafts market. How often do you use spray foam? Where do you go to buy it? Do you plan to use spray foam on any projects in the future? I would love to hear your feedback. Thank you!
Has anyone tried painting these later with acrylic paint not mixing with the drywall? Also I've seen bathroom caulk used as 'icing' Its already in a tube and is white. Not sure how heavy it is tho. I want to make these as a fun summer decoration project for my nieces. Paint them and glue on the ornaments. Good idea or too messy? any suggestions or advice is great! This is the cutest idea by the way!
When made would they be safe for children to play with? I'm thinking not!
Hello! I just would like to know if these are heavy or plastic like. I found adorable cupcake ornaments and I wanted to try and make them. They are squishy like a sponge. Thanks in advance
Hi Jessica! These ornaments end up being feather light. So light that I've suggested putting a little weight, like a heavy washer, into the bottom of the cupcake paper. They aren't squishy, they cure fairly hard, but they aren't heavy or hard like plastic. ~ karen!
You could put a washer in the ottom of the cupcake for counterbalance
thanks so much for info can't wait to start grand daughter wants cupcake kitchen badly, i love great crafts
Have fun with it Cheryl! ~ karen
Thank you so much for this!! I have a cupcake theme kitchen and i have bought fake cupcakes to have as decor on my cupcake stands but now i can make my own!!! You are awesome!
I love your site, and the cupcakes esp. I am trying to make them and am having some difficulties I hope you can help me with. I made two pans to begin with, a total of 24. I left them for about 48 hours before removing them. Unfortunately, they seem to have kept expanding, out, not up! so they have pushed the side of the liners out. Also, the bottom of the liners are puckered. I really want to make these, so I hope you can tell me what I am doing wrong. Also, it is hard to get the liners to stay down in the pan like I would like. Thank you so much for any help you can give me.
Kathryn - It sounds like you used too small of a liner for the size of your muffin tray. Your foam will expand to whatever width/size the muffin container is. Once it reaches the sides of the muffin tray, it will go up because it has no other way to go. You can use washers or anything heavy in the bottom of the muffin liners to keep the bottom flat. If you go through the comments, I remember one reader doing something to keep the bottom flat that was brilliant. I just can't remember what it was, LOL. Good luck! ~ karen
Karen, thanks for your fast reply! As for the bottoms, they look pretty bad. It would be obvious as I want to make ornaments out of them. I thought about just adding another liner over the first but the Great Stuff has really drawn up all over. I have them in an air-conditioned house(central VA area) so humidity is low. Just weird I guess..I will not give up!!
Thanks again!!!
Rhoda
Help!! I used Great Stuff and it did just fine...at first... but now the bottoms have sucked in and they are not flat anymore!! I left them in the muffin tins while they cured thinking that was the correct thing to do. Any ideas what I have done wrong???
Rhoda - Great Stuff seems to react differently in different areas. Leaving them in the tins is the right thing to do. Out of curiosity, does it matter if the bottoms aren't flat? It is that it looks bad, or you need it to sit flat on a shelf? ~ karen
Hi! I am in the middle of making another batch of these for a Christmas gift for my SIL who LOVES cupcakes and decorating. I made mine so that they will sit in a cupcake stand and they can be interchanged with the seasons/holidays for a fun filled gift that can be enjoyed all year long. I did several batches and found that the can of 'Great Stuff' "Big Gap Filler" is the best to use for this project. I tried 2 other types and one kind of deflated after 24hrs and the other didn't expand enough to give the shape of a round cupcake, it looked more like a drop biscuit in a cupcake liner. So, "Big Gap Filler" is best! Secondly, if you are planning to do as I did and put them in a cupcake stand that has individual holders, you NEED to keep the cupfakes IN THE CUPCAKE TIN at least 12hrs. so that they don't bulge out the sides too much. I weighed my liners down with 1/2" metal washers my hubby had in the garage. I found some sturdier cupcake papers that didn't require a pan to bake in and they held down in the pan without needing extra weight. After painting the cupfakes, I used a 'light weight' spackle for the 'frosting'. I literally picked up all the different spackle containers and bought the one that was light as air. I added a couple of drops of pale yellow acrylic paint to give it a 'buttercream' look. I then sprinkled white glitter on top and inserted a 'stir straw' that was cut down to about a 1 1/2" length. I inserted the piece of straw into the top of the frosting so that it was just below the frosting level but you could still see it. I am making cupcake wrappers to go around the cupfakes that look like football skins (my SIL LOVES NFL football) and I'm using curling ribbon in her fav. team colors that are tied to a paper football pick that I found at Hobby Lobby. That will be inserted into the straw at the top of the cupcake. This way she can make her own cupcake wrappers to decorate how she wants for Valentines Day, Christmas, Birthdays...whatever. And because I put the straw on top, she can insert whatever 'pick decor' she wants that will fit the theme. :0) (FWIW- it's been cold and rainy where we live when I was doing this project. I kept the can of foam in the house to keep even temperature then sprayed the foam into the liners in the garage and then brought the trays back into the warm house to 'cure'.)
Had a thought...if you don't like the look of the icing cracking, you can use Durabond 90 as the icing. It's a stronger, harder form of drywall compound that doesn't shrink or crack when drying. Plus, you mix it up yourself from powder form so you can make it thinner or thicker (note, thicker dries FAST, also SUPER FAST if you use hot water. 15 mins, tops.)
Hi Claire - I just dragged my cupfakes out of the basement to see how they stood up over the past year. Perfect! No shrinking, no cracking, no weeping. ~ karen!
thank you for sharing this....options are always GREAT, especially with different weather for each of us. Appreciate it!
referring to Zerenitaz comment:
I just made mine last week....but I was sure to allow lots of time in between stages. As a matter of fact, some of mine shrank after painting them. With that in mind, I hope they don't drink later....Ughh!! However, maybe it's best to let each stage dry a night or two. Before starting the next. It really depends on the weather in where you are making them, I must add. From what Karen suggested, it took much longer for where I live. I guess all in all, a good preventive measure......Just a thought!