There is only 1 thing more terrifying to a homeowner than drilling into brick: drilling into drywall. Hanging something on brick shouldn't give you a stress twitch - you have two options, and both of them are easy.

If you're looking for how to hang something on drywall you should read this post.
One of the scariest things for homeowners is drilling into things: drywall, studs, cupboards doors, teeth.
If you have something you want to hang on brick you're going to have to get over this phobia and just do it. If you're worried about putting holes in your drywall because you think they're there forever, they aren't. Here's how to easily fix holes in drywall. And you can patch holes in brick as well.
Honestly hanging stuff off of brick is not a big deal. You CAN hang that flatscreen tv mount over your fireplace (if you have a real wood burning fireplace like I do, you also have a real brick chimney above the fireplace.) Dealing with hiding the cable is another story.
Take a deep breath and calm the hell down. You can do this. Remember that time you made it through the worst stomach flu ever where you had to sit on the toilet AND hold a trash can in front of you? You made it through that, you'll make it through this.
So today ... I'm gonna teach you how to drill into brick even if all you have is something little like my battery operated Ryobi.
You can hang something on a brick wall in about 39 seconds as long as you have a masonry bit, an anchor screw and a drill.
You're not pulling your own teeth here, you're just drilling a hole. You'll be fine.
Need a video tutorial for some convincing? Here you go. It's stars me and my chickens from a few years ago.
Slightly off topic, but since getting chickens 10 years ago I've spent a lot of time developing a really good DIY fly trap that actually works. So if have fly issues click on that link and learn how to make a homemade trap, what kind of bait to use etc. etc.
I have a lot of brick walls in my house. It's a red brick Ontario cottage complete with English cottage garden that's been added onto several times over the years, most recently in about 1910. That means a lot of my interior walls are brick because they used to be the exterior walls.
Therefore - I'm loaded up with inside and outside brick wall experience and the problems they pose.
I painted some of my interior brick walls and that took a lot more courage on my part than drilling into them ever has. Mainly because sandblasting an interior brick wall to get rid of the paint is a more terrifying nightmare than filling a little drill hole.
If that's a fear of yours then you should read about restoring original brick without sandblasting or stripping. They used this technique on a big heritage building in my town and it was amazing.
To screw into brick there are only two things you need. Screw anchors for concrete ( Walldog, Tapcon, concrete screw, or screw anchors are all types of masonry screws) and a masonry drill bit. Those are the absolute basics.
Table of Contents
Tools Needed
For light duty
- Regular drill
- 3/16th anchor screws
- 5/32 masonry drill bit
- Screwdriver (optional)
For heavy duty
- Hammer drill
- Concrete bolts or concrete anchors and bolts
- Corresponding masonry drill bit
- Socket set or socket bit for drill
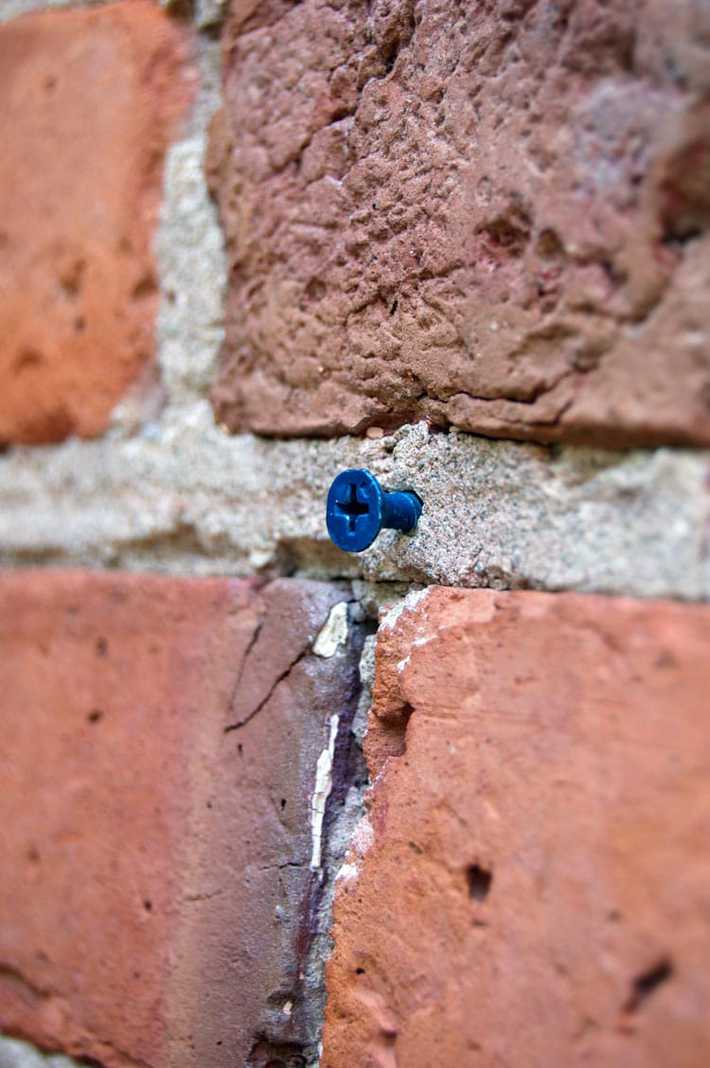
The anchor screw looks like a regular screw, and it is ... but it also has an extra set of raised threads that help it cut and grip into very hard material like brick or concrete.
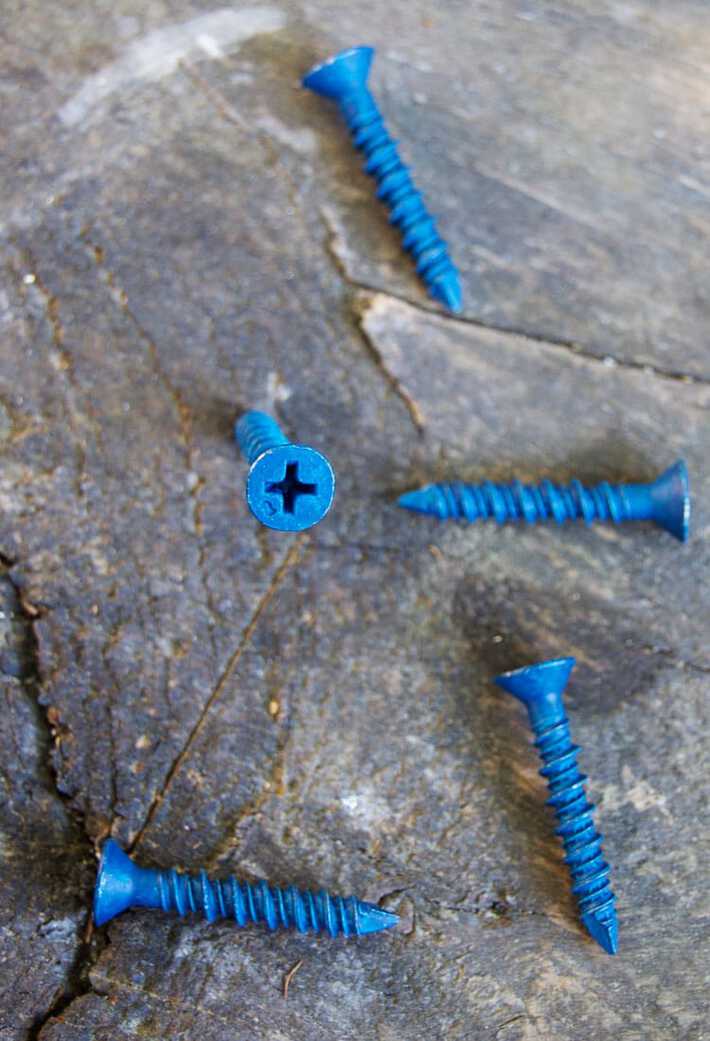
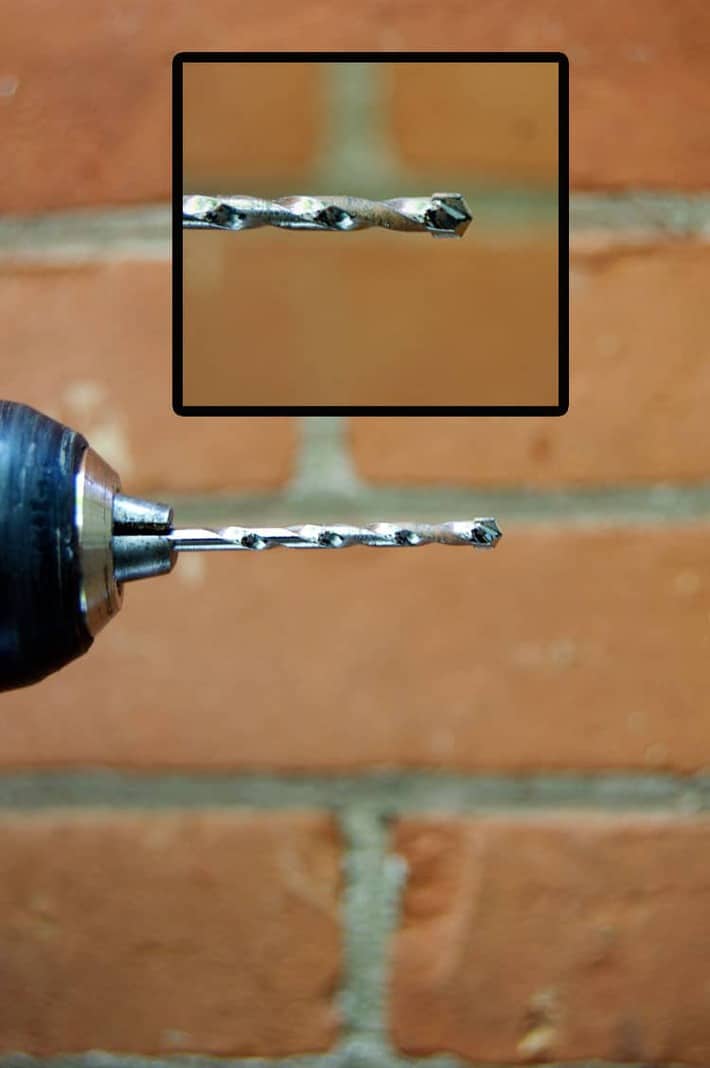
A masonry drill bit is a regular old drill bit that's made of steel with a special tip on the end that's made of tungsten carbide. If you're at home and you don't know if what you have is a masonry drill bit just look at the end of it. If it has a a sharp arrow like tip on it ... that's a masonry bit.
Technically they work best with a hammer drill but if you only have a regular drill it'll work fine, it'll just take a tiny bit longer to drill through the concrete or brick.
Deciding Where to Drill
Into the brick or the mortar?
It's easier to drill into the mortar than it is into the brick because the mortar is softer, but sometimes the grout just isn't where you need your hole.
So you can drill straight into brick too, it will just take you a bit longer and dull your bit quicker.
If you're going to hang something heavy plan on drilling into the brick because it's stronger and more dense.
Old (pre 1900 or so) mortar is soft and not as strong by design. Historic homes in particular have red clay brick that was fired in a coal oven. This type of brick is generally soft and expands, contracts, absorbs and releases moisture throughout the seasons, which means the mortar has to be even softer to allow for the bricks' movement and moisture release.
Electrical Wires
Before you drill make sure there isn't a chance of electrical wires or obstacles in the way. For instance, get rid of any livestock that might be wandering around. Like chickens. Chickens are notoriously sneaky obstacles.
Check the Brick
Take a look at the brick you're drilling into. You want new brick that's in good condition or old brick in the same condition. Don't drill into a brick that's showing signs of distress in case you crack it or it crumbles.
Using the Right Drill
Standard vs. Hammer drill
A standard drill like you have at home is all you'll need if you're hanging a television over your fireplace or attaching a hammock to the outside wall of your house. If you're using a masonry bit it will penetrate brick or mortar.
A hammer drill is what's necessary if your job requires drilling bigger holes or into very hard materials like natural stone and some concrete.
Electric or Corded Drill
For most jobs you can just use a regular drill like you have at home. Corded or battery is fine. It's only when you get into very hard materials like stone that you could burn out the motor on your home drill and might need to upgrade to a strong industrial drill (you can rent a drill like this by the hour or day.) Renting a drill will cost you about $50 a day but you can rent them for half a day as well.
Hammer Drill
A hammer driver is a drill that doesn't only spin, like a regular drill does, it also bangs up and down like a hammer. So you get twice as much force with a hammer drill because the drill is working in two separate ways to drill: by rotating and by pounding.
There are two types of hammering drills: rotary and standard.
Standard hammering drill are used for drilling ½" holes or less.
Rotary hammer drills are needed if your holes are going to be bigger than ½".
If you're going to buy a hammer drill, but you didn't even know what one was until you just read about it in the blurb up there, don't go out and buy a $200 hammer drill. You're not going to need it and chances are it'll be really heavy to hold. Just get a cute little one like this and it'll do what you need.
The Screwdriver
A screwdriver can come in handy if you need to tighten or loosen just a tiny bit. For women a large drill, especially if you're holding it up high, can get heavy. If that's the case, ditch the drill once you have your pilot hole drilled and just use the screwdriver for screwing in the anchor/screw.
Choosing the Proper Drill Size and Bit
- You need to use a drill bit that's a size or two smaller than your anchor screw, otherwise your hole will be too big and your screw will just slide right in.
Would you like to save this stuff?
For example, I used a 3/16th screw with a 5/32 drill bit, which is 2 sizes down in a standard bit kit.
So REMEMBER to drill your pilot hole smaller than the anchor or screw you are using.
You can get all of this stuff from regular hardware stores, it may seem like weird stuff but it's actually pretty regular.
2. If your anchor is going to be quite big, requiring a big hole, then drill an initial pilot hole first. This hole will act as a guide for your larger drill bit making it easier to drill straight in and stop it from taking off on an angle.
A Special Announcement about Torque
Firstly, what the hell is torque?
Torque is a measurement of force. On a drill, a low number means low force. A high number means high force. For drilling small things you only need low force. For drilling larger things you need high force.
Think of torque like muscles or strength.
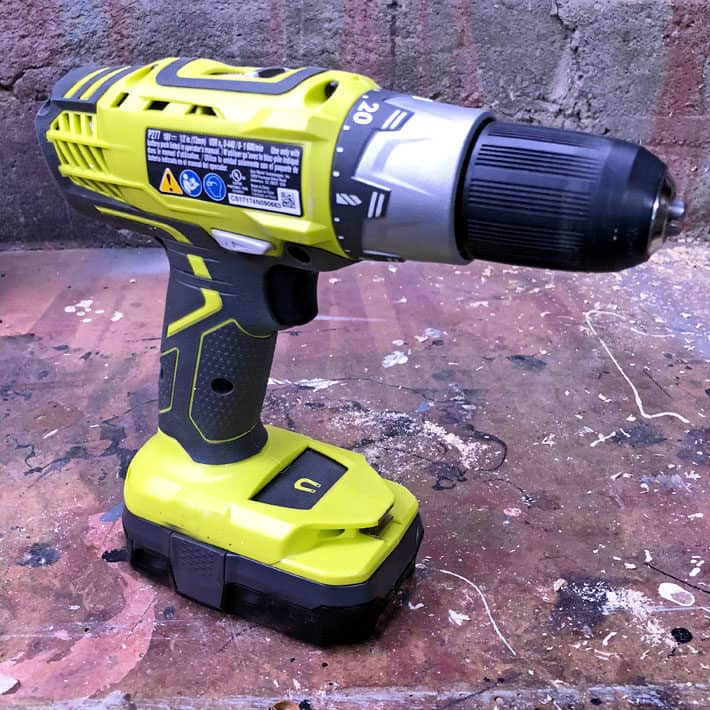
Every drill has a dial around the muzzle of it with numbers on it. This dial can be spun around to adjust the drill's clutch (torque.) As far as I can tell only 5 people in the world actually understand how to use this torque dial. So here's the deal in a nutshell ...
- Torque can be adjusted from 1-10. Some drills go from 1-20.
- The smaller the bit or screw you are driving in, the smaller the number you want to use.
- The larger the bit or screw, the larger the number you want to use.
- To adjust the torque/clutch start low then progressively go up. Using too high of a torque can cause too much resistance and the clutch will automatically disengage the motor. This in turn can come as a bit of a shock to your wrist causing torn ligaments or muscles. Rare, yes. But possible.
Steps for How to Drill
- Mark the spot you want to drill with a pencil or chalk. You can also use a centre punch.
- Measure the length of your anchor/screw.
- Mark that length onto your drill bit with a Sharpie to act as a depth gauge. This mark will let you know when you're at the appropriate drilling depth and stop you from drilling too deep. You can also buy a bit stopper that gets attached to your bit making it impossible to drill too deep.
- Slap your safety gear on. (ear muffs, goggles, etc.)
- Drill a pilot hole if needed.
- Drill into your marked area with the drill held perpendicular to the wall. Go straight in, don't waver, using medium pressure.
- If the bit heats up stop drilling and let it cool. Dip the bit in cool water (not cold water) if you want to speed up the process.
- Use compressed air to clean the hole out.
- For light duty screw in the masonry screw with a screwdriver. For heavy duty drop in the masonry anchor and insert the bolt using a socket set or bit.
- Clean up any dust or brick chips, pack up your tools and hang that thing (whatever it is you planned on mounting) on the brick wall!
Sealing Holes
If it took you a few shots to get your anchor in the right place you'll need to fill the holes left behind. If you don't, water can build up and when it freezes the water will expand, cracking the brick.
To patch or seal a hole you'll need some putty and a few other things.
Materials
- Powdered or pre-mixed mortar/putty
- Trowel (or even just a popsicle stick for small holes)
- Water
- Compressed air
- Brick colouring powder (for filling holes in brick)
- Using a can of compressed air or a standard compressor blow the hole clean.
- Mix the mortar with water if you need to. If you're repairing a hole in brick tint the mortar with brick coloured powder until you have a match.
- If you have an extra brick you can also smash that brick up into a powder and add it to your mortar for an almost exact match.
- Saturate the hole with water using a hose or a spray bottle.
- Push the mortar to the hole using a mason trowel or a popsicle stick for smaller holes. Make sure the hole is full with no air pockets.
- Scrape mortar on the face of the brick away so it's flush.
- Add some texture to any showing mortar using your trowel tip or popsicle stick so it matches the brick. You can also use another brick to press in the mortar patch to create the right texture.
Drilling & Hanging Tips
Don't drill too deep
- You risk cracking the brick.
- A hole that's much deeper than your anchor will weaken it.
- If you have to go back and fill a hole, deep ones are harder to fill.
Go slowly
- Let the tool do the work. Pushing and trying to manhandle the drill into submission will just result in your drill getting stuck in the hole. And yes. A yes a drill can definitely get stuck. I've lost drill bits to walls when they get stuck and there was absolutely NO getting them out.
2. If your bit *does* get stuck while you're drilling in, reverse the drill out.
Choose the right anchor (if using one)
- I like to use metal anchors but you can use plastic expansion-style anchors in mortar. Just make sure you get the right size. Screw expansion plugs work by expanding once they're in the drilled hole and gripping there. They're good to use in mortar because they push against the surrounding brick giving the fastener (anchor) better strength.
- A drop in anchor and bolt for solid walls works really well. I've used them on quite a few of my interior and exterior walls.
Like this.
Safety Tips
Wear safety glasses.
Nobody thinks an eye patch is sexy. Wear safety glasses or even better safety goggles (goggles don't allow anything to come in contact with your eyes, whereas with glasses fragments can make their way into your eye area from the top or sides.)
Wear a mask.
Drilling into brick and concrete can release silica. It's a natural material found in everything from rocks to concrete. It's also in bricks and mortar.
Silica particles as small as 0.5 mm and as large as 5mm won't expel from your lungs. They just build up over time which can eventually lead to fibrosis of the lungs and silicosis disease.
Drilling once in an open area without a mask probably isn't going to damage your lungs. But doing so repeatedly will.
So wear your mask/respirator when you're drilling.
Gloves
Gloves are hard to work in sometimes, I know. But if you have a pair you can work in, wear them.
The drill bit can get hot after all that spinning and friction. Hot enough to burn your hands if you try to remove them right after drilling. So when removing the bit either wait for the bit to cool down or wear gloves and say a prayer. And have Aloe handy.
Ear muffs (or plugs)
It's loud. Wear ear protection.
Alternatives to Drilling
You can also use brick clips for hanging lightweight objects on a brick wall.
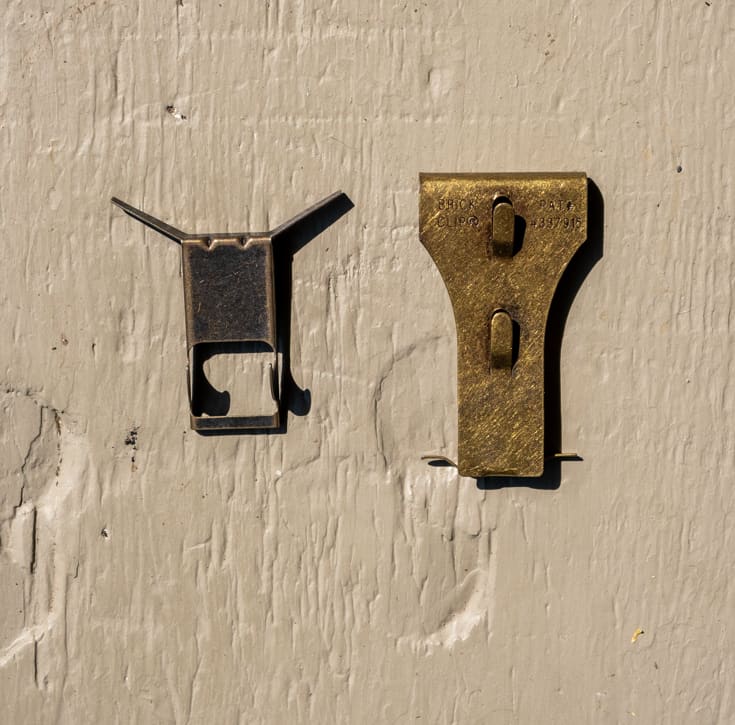
How much weight you can hang from them will depend on how well they fit your bricks. If they fit well and are nice and tight you can hang up to 25 lbs from one.
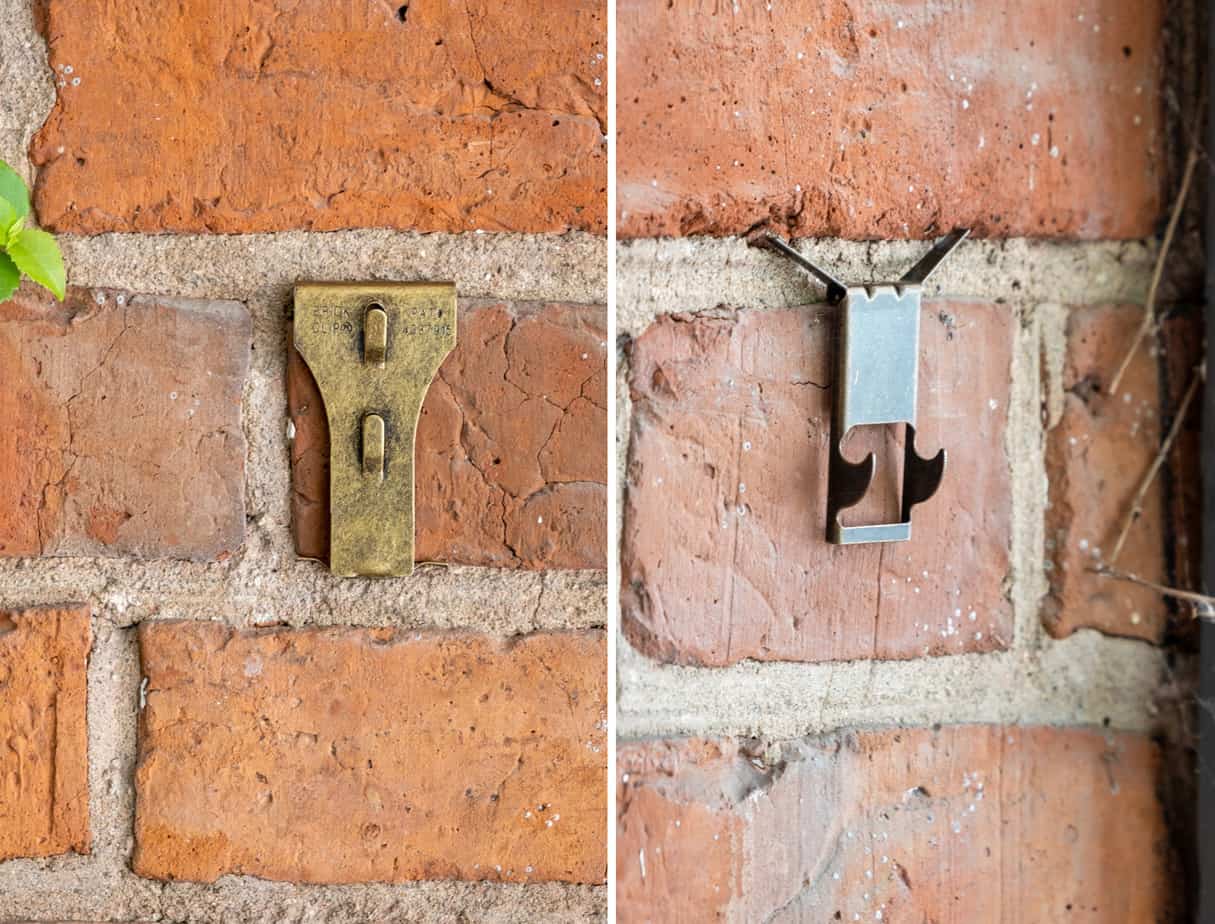
I've bullied these into place on my almost 200 year old brick. I wouldn't want to hang anything heavy off of them but they'd be perfectly fine for hanging a wreath or something like that.
But remember, that brick hangers work best on newer, symmetrical, standard bricks.
You absolutely can. A regular drill will drill through brick just fine. A hammer drill will make the job easier, but a regular drill will and can get the job done.
You bet you can. You just need to use a masonry screw and drill an initial hole with a masonry bit first.
Drilling a pilot hole and not drilling too deep will help prevent cracking.
For brick and mortar a hammer drill isn't necessary. It helps, yes, but you can absolutely drill into either of those materials with a regular drill.
Nope. If you're hanging something less than 650 pounds a Tapcon should work just fine. To use a Tapcon you simply drill a hole 1 size smaller than the Tapcon screw and then screw it directly into the hole.
It all depends on the screw or anchor you use. Check the packaging to see the load your anchor can handle. It's probably more than you think. A small Tapcon inserted 1" into brick can hold 650 lbs.
An impact driver is a bit of a weirdo in the drill family. An impact driver doesn't rotate like a regular drill and it doesn't hammer up and down like a hammer drill.
So how does it work to drive things into hard surfaces? It uses concussive force to pound from the side.
Because an impact driver works with side force, it isn't a good choice for drilling holes into anything. The side force of the pounding creates oblong holes, not round ones. This means any screws or anchors you try to set into the hole won't work properly.
An impact driver *is* a good choice for driving long screws into wood, it just isn't a good choice for this project of drilling into brick.
Honestly. Don't worry about it and go ahead and try. It's just a brick wall, not a molar. It won't hurt a bit.
→Follow me on Instagram where I often make a fool of myself←




This is a great article, after a long introduction. One comment after having decided to drill into the front of my brick house: A hammer drill IS necessary!
I wanted to hang house numbers on the front of my house. This required drilling holes that were 1 1/2 inches long into my brick. It took me over 20 minutes using a regular drill and two masonry bits to drill a test hole and then the "real" hole. (In the sun on a 95 degree day) After that, I only had seven more holes to go!
Instead, I spent 1/2 hour, and about $90 to order a hammer drill. 2 days later, the drill arrived and, in 20 minutes, I had all six holes drilled. If you have a brick home, be good to yourself--get a hammer drill.
Tapcon makes a new and improved screw now, and it can save you a huge amount of time. It has gussets (braces, Folks) underneath the head for strengthening, and Man, do they ever work. It matters a LOT when you use a hammering setting with a power drill; regular Tapcon screws will snap off at the head over and over and over. These don't. And you don't have to drill a pilot hole first with the gusseted Tapcons.
That's very important when you have to drill a lot of holes in masonry of any kind, though it doesn't matter much if you only need to drill a few. I'm sorry I don't have the exact model to show you at the moment, but they have that same blue coating as the one shown here, and The Home Depot has them.
Oh, yeah. Forgot to mention that I hammerdrilled right into the hard brick with those gusseted Tapco bits, not into the soft, easy-to-drill mortar. No pilot holes needed,either.
I used 3"-long bits (for a different, lower-strength purpose, not the loadbearing purpose shown in this article by Karen).
I drilled 200 three-inch deep holes that way. I didn't use any super-powerful, gigantic drill, just a Costco-sold DeWalt cordless 3/8" drill that has a switch to go back and forth between smooth drilling and hammerdrilling. It was easy.
Ahrrrg. Should have typed '3-inch-long screws", not 3" bits; you don't need or use drill bits with the gusseted-head Tapcons.
I'm actually going to shut up now. Sorry.
This is a superb article. Answered questions on things (like why an impact driver isnt great for drill holes) I have tried to find elsewhere to no avail. This is A+ stuff - thanks!
Great tip! Perfect timing! I really needed this!!!!♥
To find the right sized drill bit to use for pre-drilling, I've been using this trick for decades (not sure where I picked it up from). Hold the screw directly behind the drill bit - both horizontal or vertical will work. If you can see some of the screw's threads behind the drill bit, then you know you're going to have enough 'teeth' in the screw to properly grab your material.
good tip! ~ karen!