Sometimes you become immune to the ugly stuff in your house. Like old, gross electrical outlets. Fear not. There's nothing scary or hard about it. You CAN replace an electrical outlet. This tutorial walks you, a homeowner, through how to change an outlet in a real life situation.
Jump right to the Quick View Tutorial.
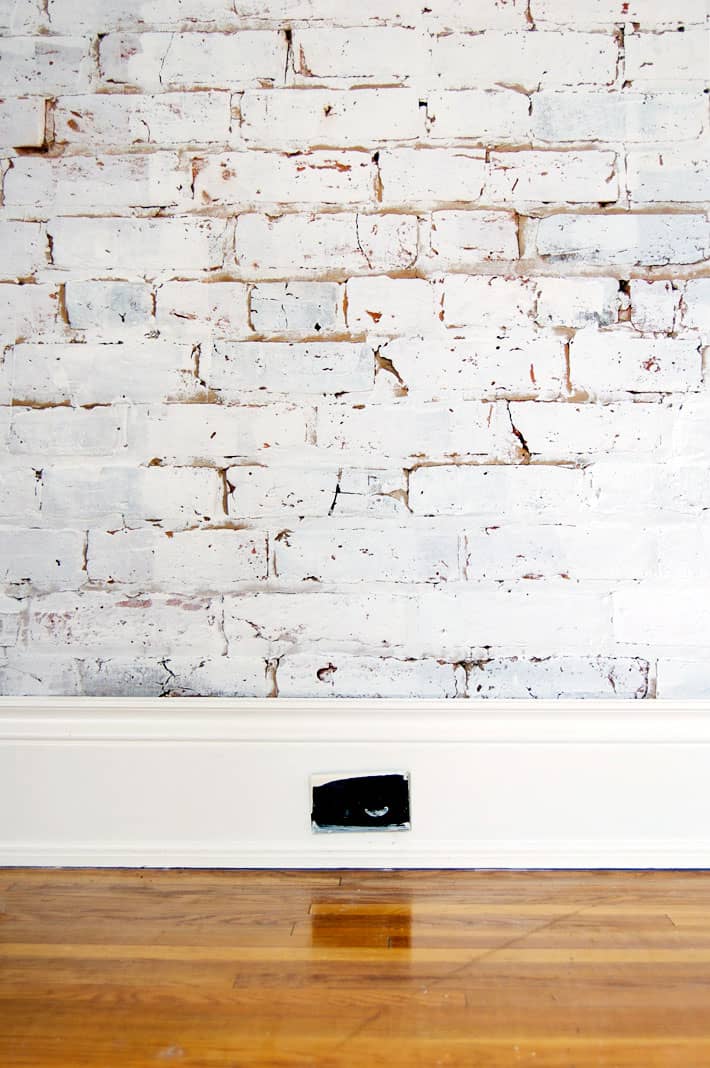
Isn't she a beaut? The elegant lines, the contrasting colour that makes her stand out and demand attention in the middle of the baseboard, the paint artfully slopped all over it. Outlet replacement was the only option. To make this look good I needed to replace the brown outlet cover and outlet with white.
At least it's near the ground. When I first moved into my house the majority of the outlets were 3 feet off of the ground, waist level on the walls for some reason. I suspect the previous owners had no knees.
I've wanted to move this plug closer to the corner of the room as opposed to being in the middle of it for ages but ... well I just haven't had time in the past 18 years. You know how it is.
I finally gave up on the bigger job of moving it and resolved to at least change out the receptacle to something less bossy.
I am a firm believer that you shouldn't do anything around your house that has the potential to kill you. Things like roofing work, installing an electrical panel or running on newly waxed floors while wearing socks.
But this? Replacing an electric outlet. That? THAT you can do without fear of death.
How to Replace an Electrical Outlet.
1. TURN THE POWER OFF to the area you're working on. Better yet. Just cut the breaker to the whole house if you aren't sure about which breaker or fuse powers the outlet you're working on.
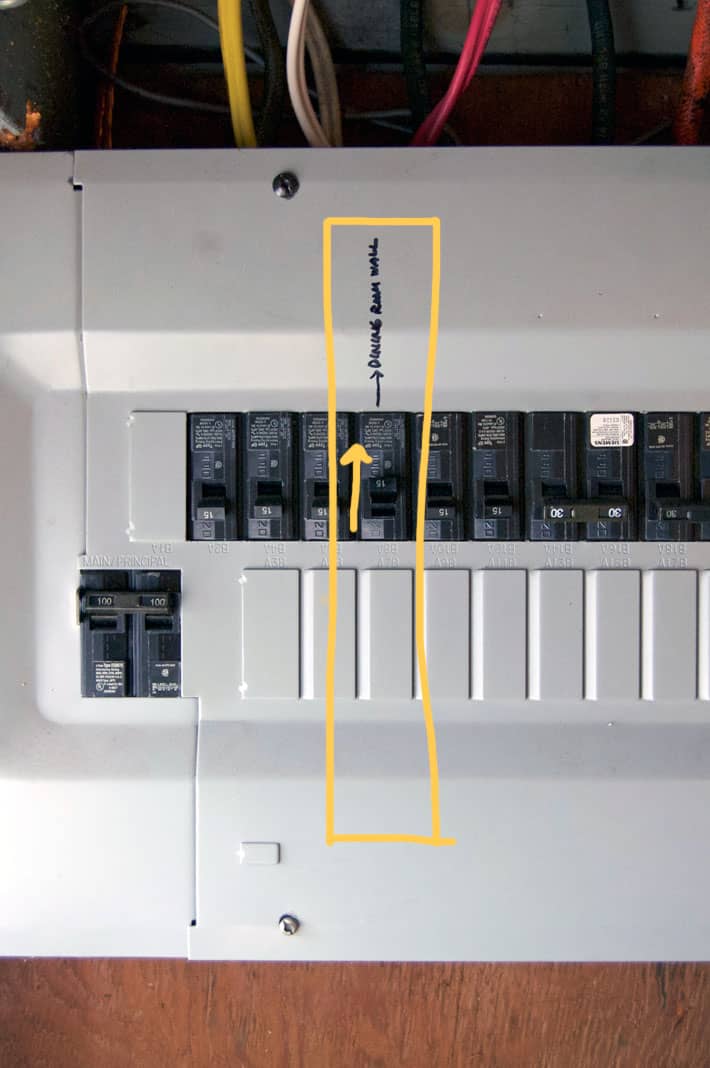
2. Remove the face plate to the electrical outlet.
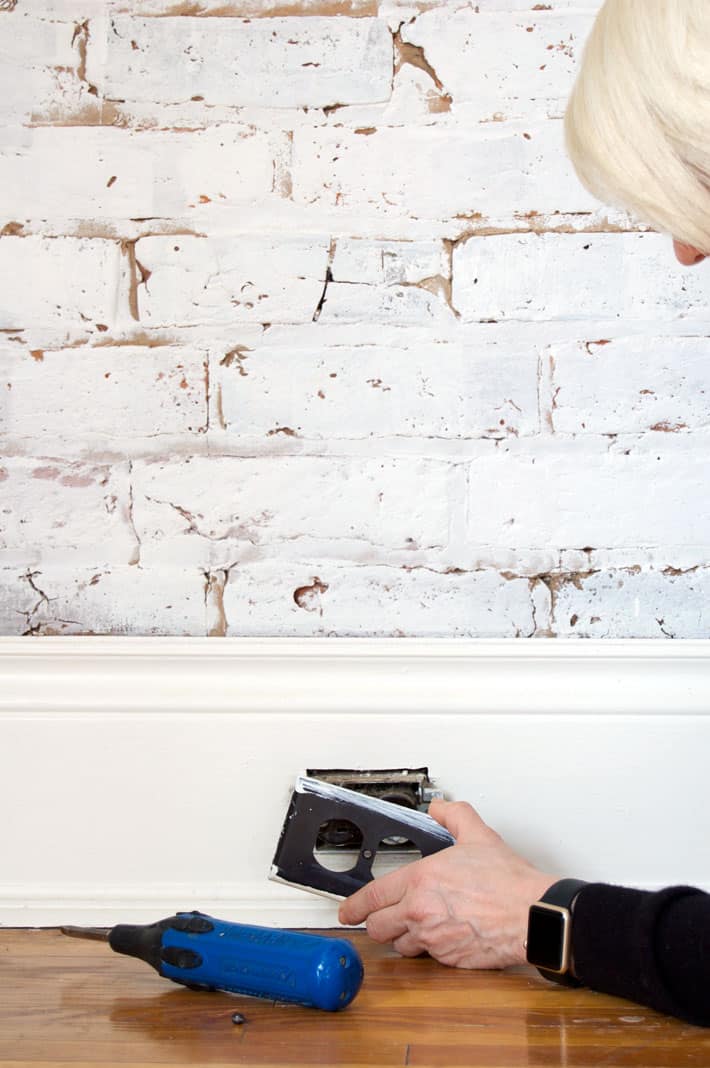
3. Remove the electrical outlet from the box by unscrewing the visible screws.
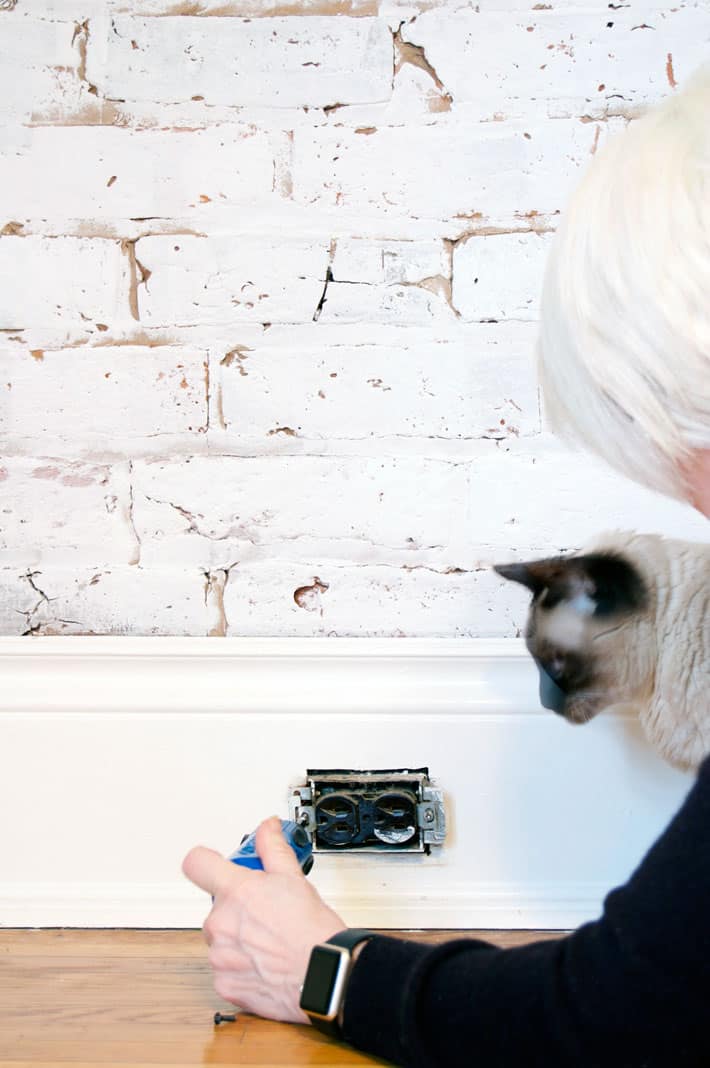
4. Pull the outlet away from the box.
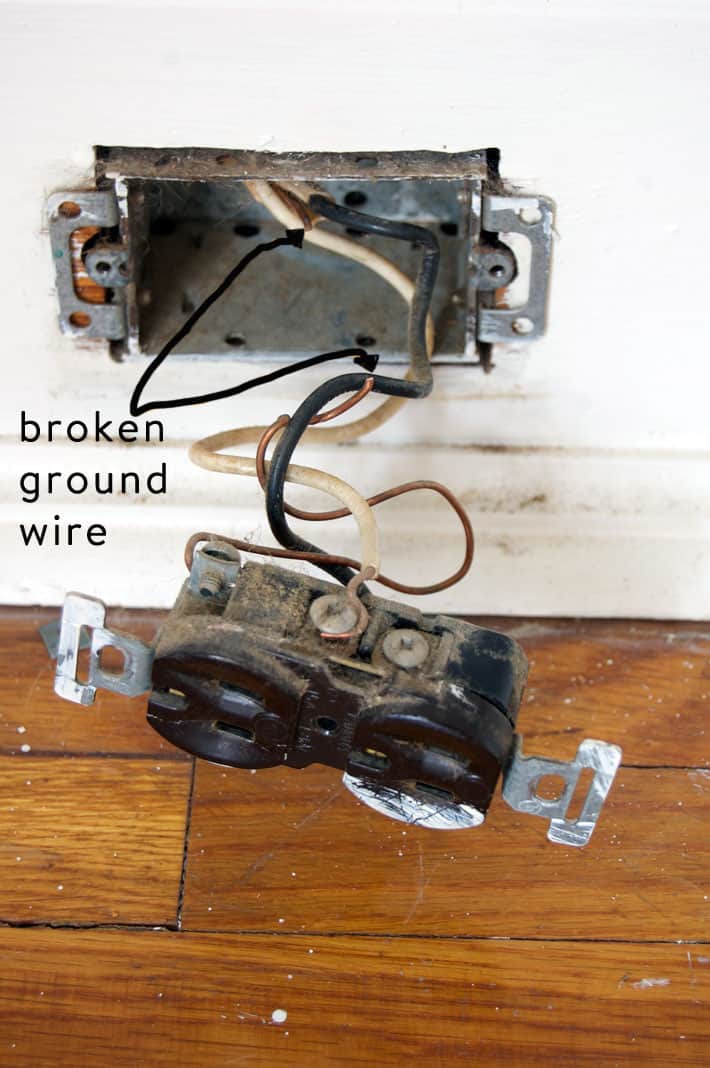
Seems I got paint splattered on more than the receptacle. Heh. I'll deal with that later.
Don't even ASK me when this outlet was originally installed but there were some issues. For some reason the ground wire was broken. It either happened as I pulled the outlet out or happened when the outlet was originally pushed in. Either way it needs to be fixed. I'll get to that.
See? This is what happens in a real life situation as opposed to a sterile instructional video.
5. Remove the wires from the old outlet by unscrewing the screws they're wrapped around slightly. Just enough so that you can slip the wires off.
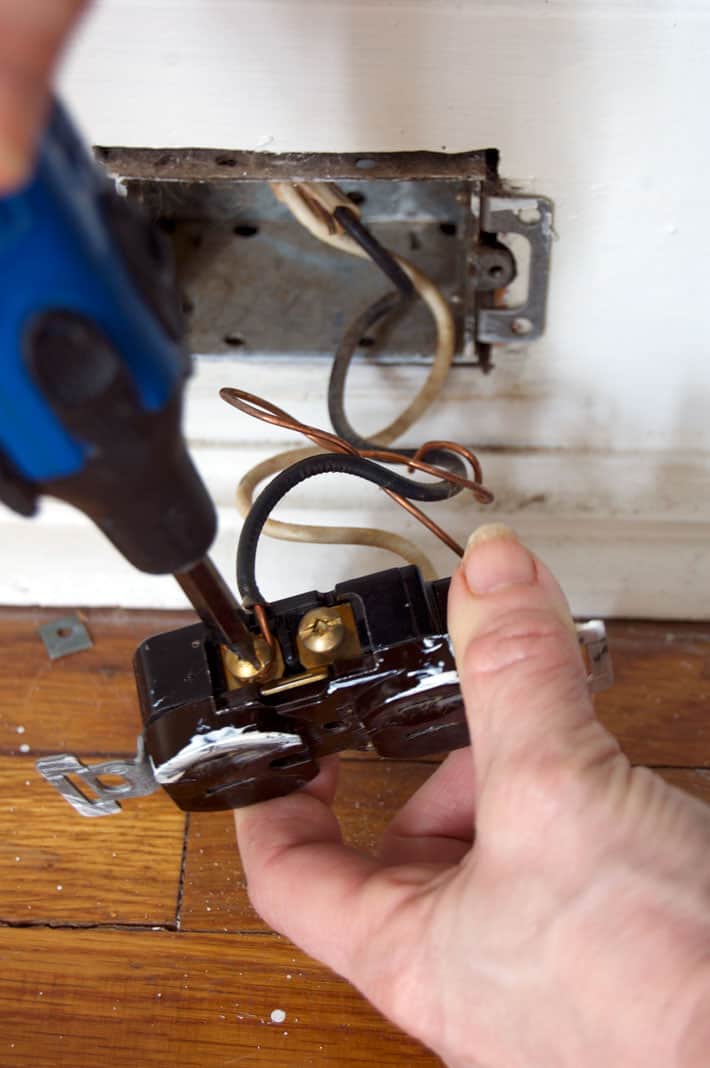
6. Throw that sucker out.
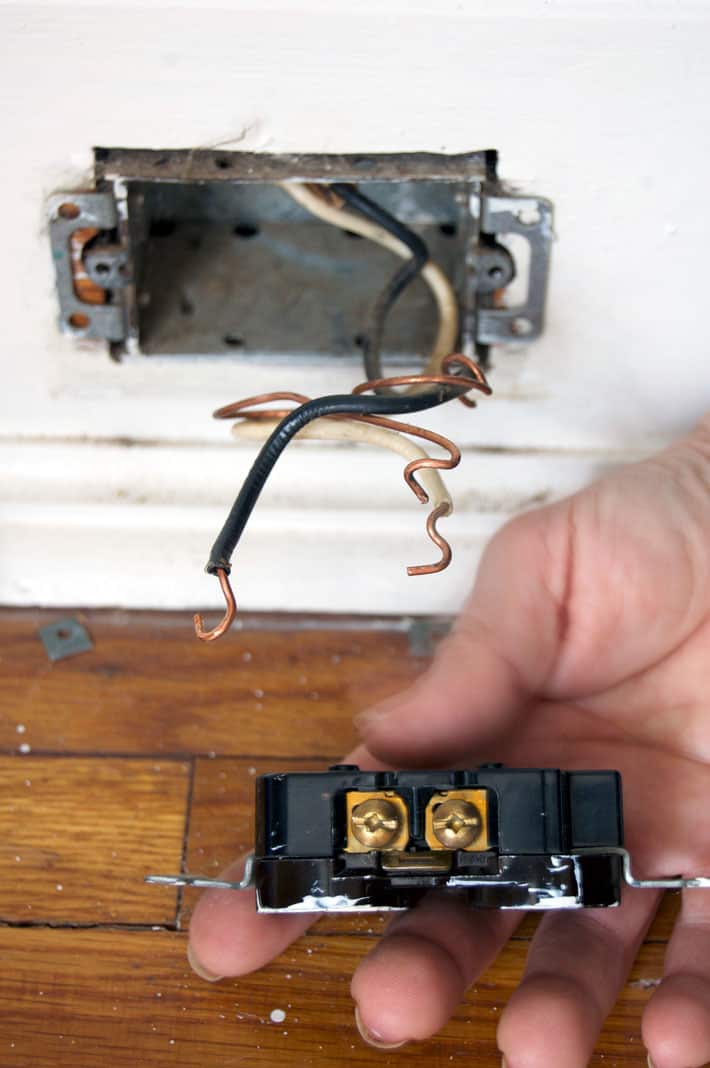
7. Now is the time to talk about the scary GROUNDING WIRE, which everyone seems confused by. Here are the two things you need to know.
a) The ground wire needs to be grounded to the box, AND
b) The ground wire needs to be grounded to the outlet.
First, how do you recognize the ground wire? It'll either be the green wire, or a bare copper wire. One of the two.
Before installing your new outlet you would wrap the ground wire around the grounding screw at the back of the metal box and then bring it forward to the receptacle.
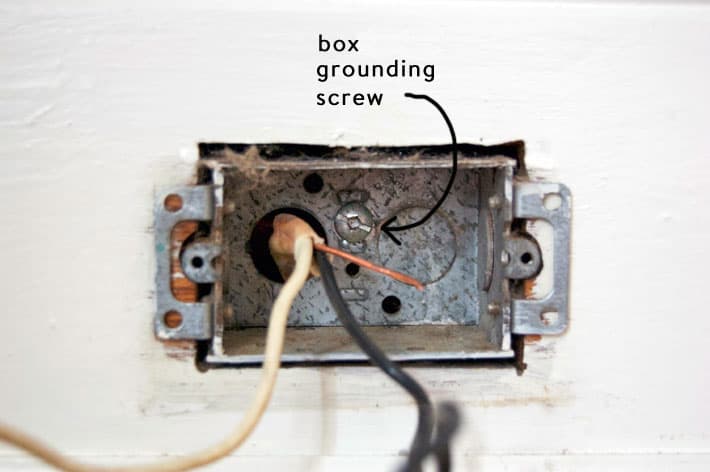
Since my grounding wire is broken I've had to do something a bit different. I'll have to make the two independent wires work together as one.
8. I've created a loop in my stubby little grounding wire with pliers. Luckily it's just long enough to wrap around the grounding screw.
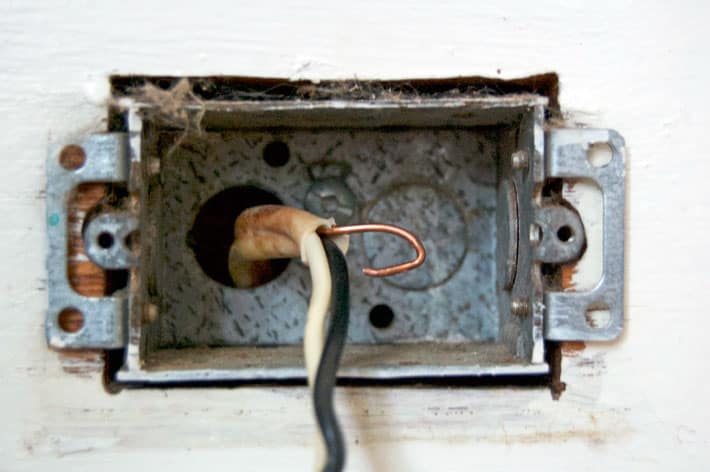
See that hole in the back of the box that the wire is coming through? There should really be a Romex connector there so the wire isn't rubbing the sharp metal edges. I didn't have one and wanted to continue with the post, so continued on without it for the time being.
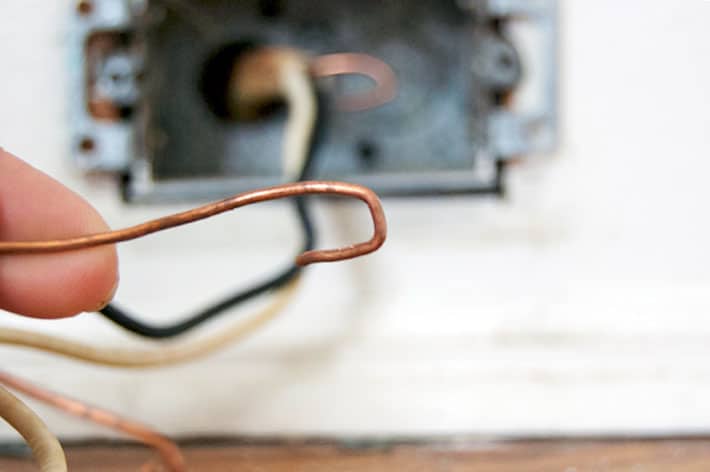
9. Then I created the same loop on the longer, broken off part of the grounding wire.
** if my copper wire had been a tiny bit longer the better thing to do would be to use a 2 port Wago like this to attach the wires.**
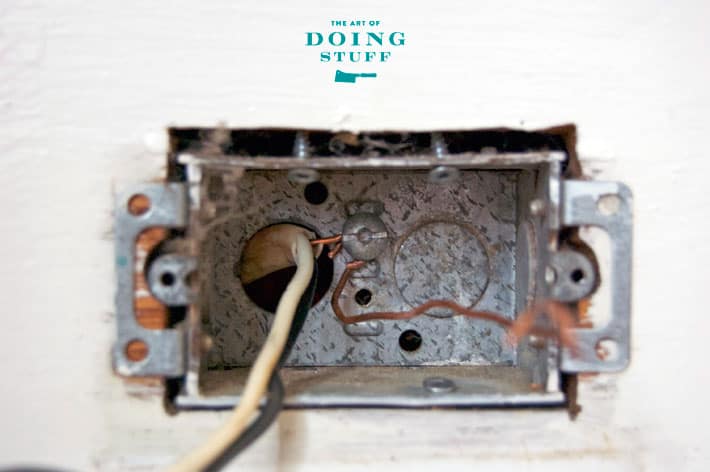
10. I looped the shorter grounding wire around the grounding screw and then I looped the longer grounding wire around the screw so everything was touching. As long as the two grounding wires were touching behind the screw, I knew I'd have a completed circuit.
REMEMBER this was an anomaly because my grounding wire was broken off very short.
Most people will have a longer wire that will easily loop around the grounding screw in the box with enough left over to attach to the new outlet.
11. Get your new outlet and face plate ready.
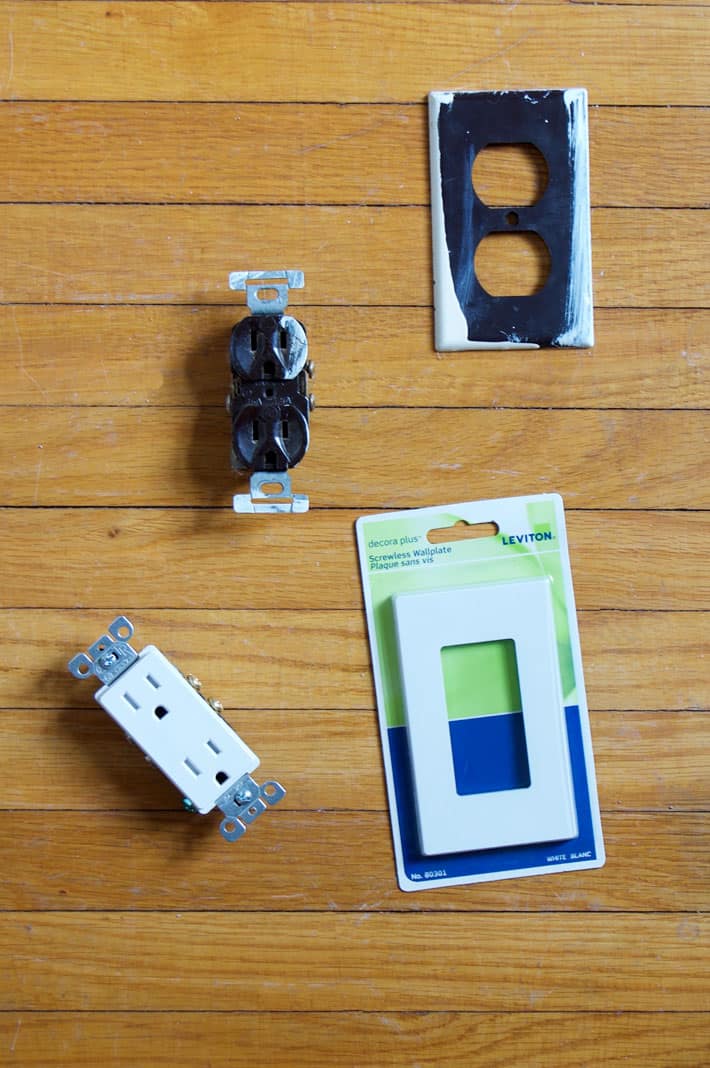
I like the snap on face plates that don't have a visible screw to hold it on.
12. Attach your wires to the new outlet.
TIPS FOR WHAT WIRE GOES WHERE
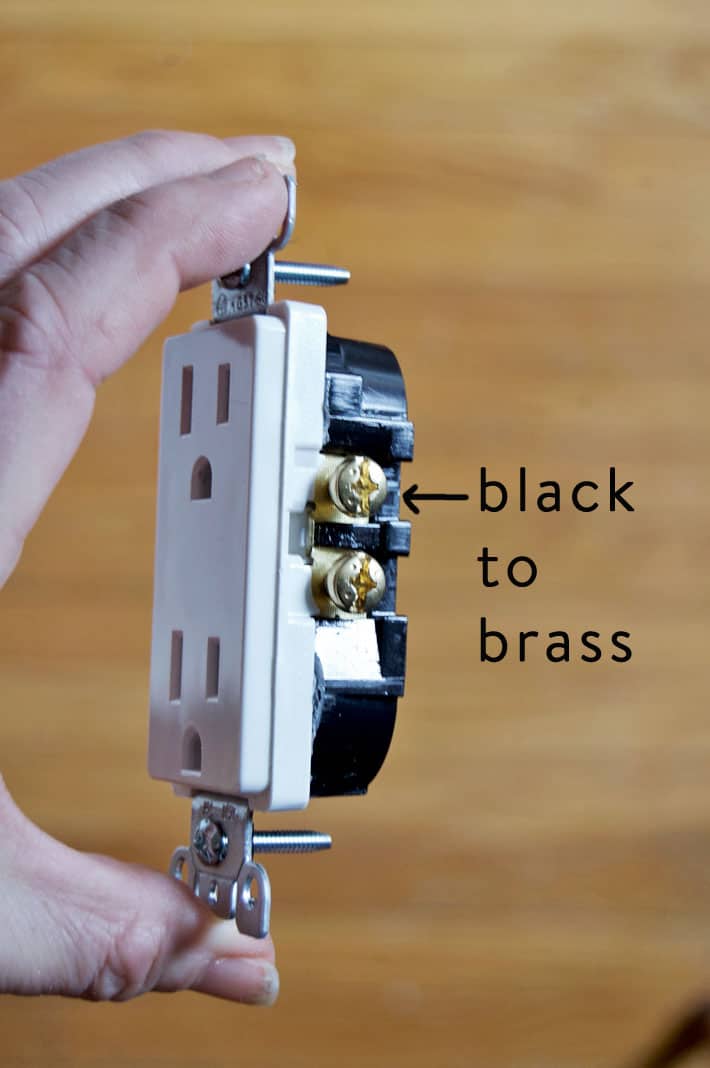
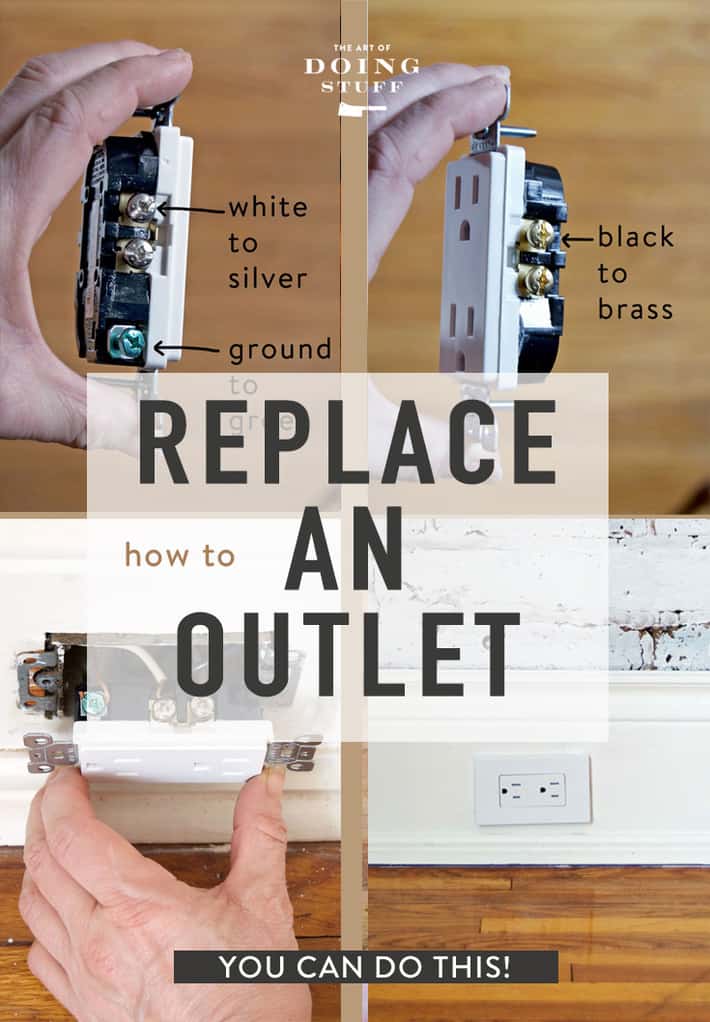
- Your outlet will have one side with brass screws. The other side will have silver screws and a green screw for the ground wire.
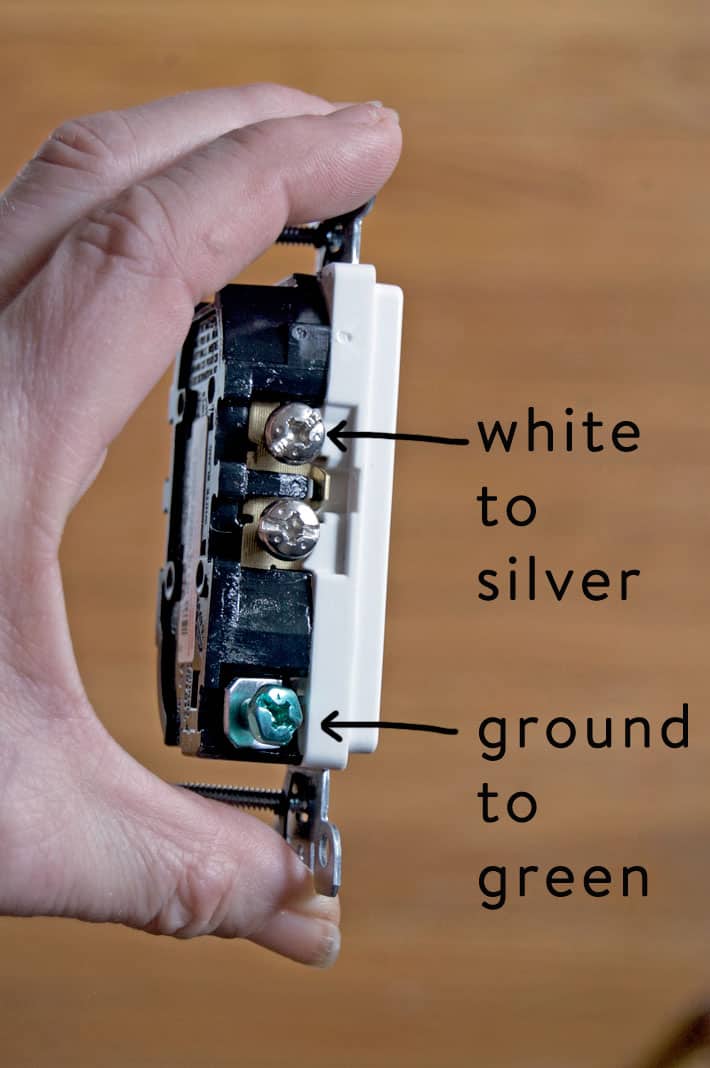
Attach your wires like this:
BLACK GOES TO BRASS
WHITE GOES TO SILVER
GROUND GOES TO GREEN
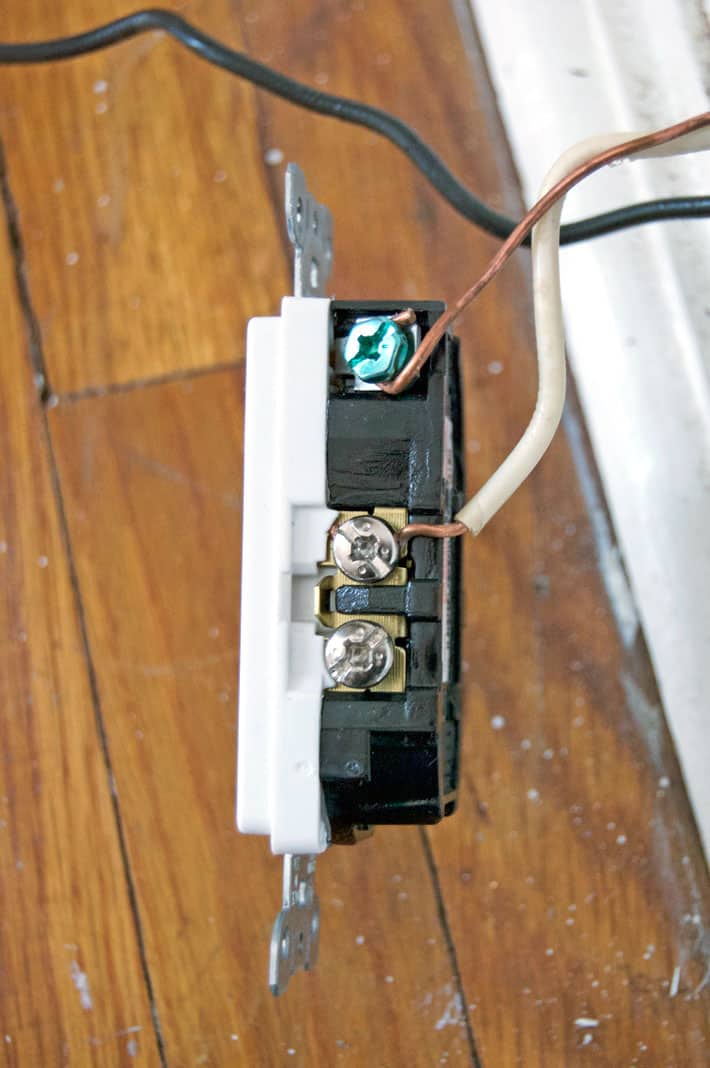
See how there are two silver screws? It doesn't matter which one you use. So don't fret over it. Just pick one. Try to do a little better than I did with the exposed copper wire though. The least amount of it should be exposed as possible. More should be under the screw. (This doesn't matter on the grounding wire as it doesn't conduct any electricity)
Hook your wires so they are going in the same direction as the screw is when turned to tighten. This will help clamp the wire down as opposed to pushing it off.
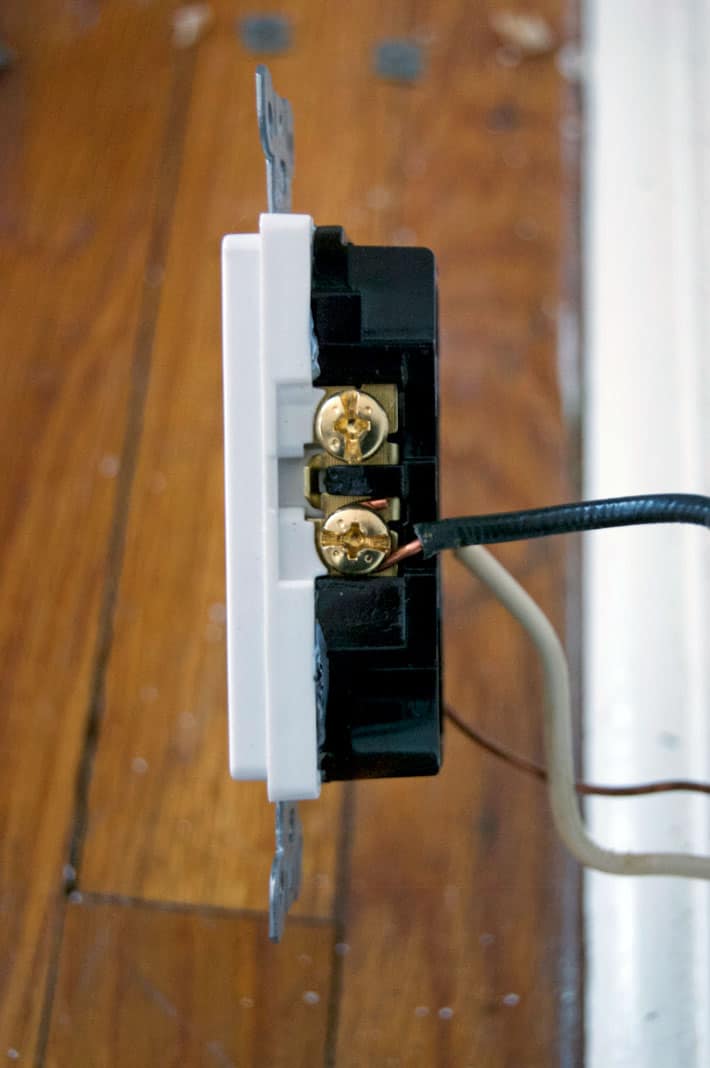
See how there are two brass screws? Again, it doesn't matter which one you use. Just pick one.
Also notice I did a better job of having less of the bare copper wire exposed.
13. Carefully push the new outlet back into the box.

This shot here nearly BLEW the minds of some electricians who read this post when I first published it. Why? Because I haven't wrapped the outlet in electrical tape. Some electricians (this is kind of a polarizing issue) wrap any outlets that are going into metal boxes with electrical tape.
This covers the metal screws and therefore prevents them from ever accidentally coming into contact with the metal box. However, there are other electricians who are just as adamant about not using electrical tape.
14. Rescrew the outlet into the box.
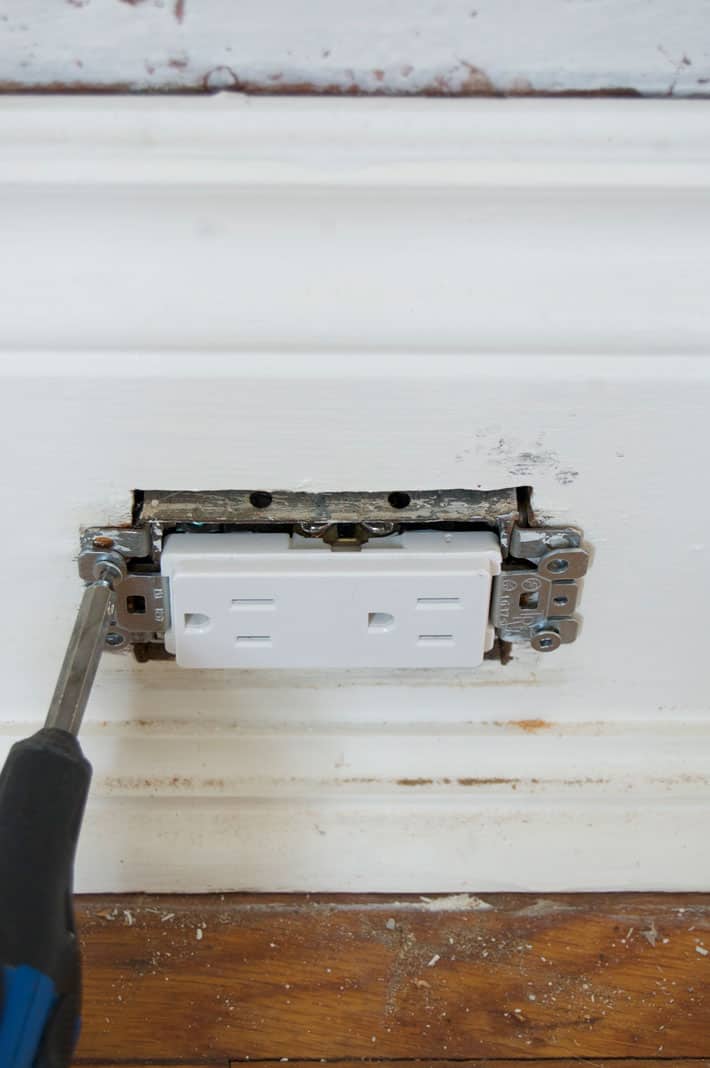
15. Cover with the face plate and you're done. Just turn on the power again and watch the room light up.
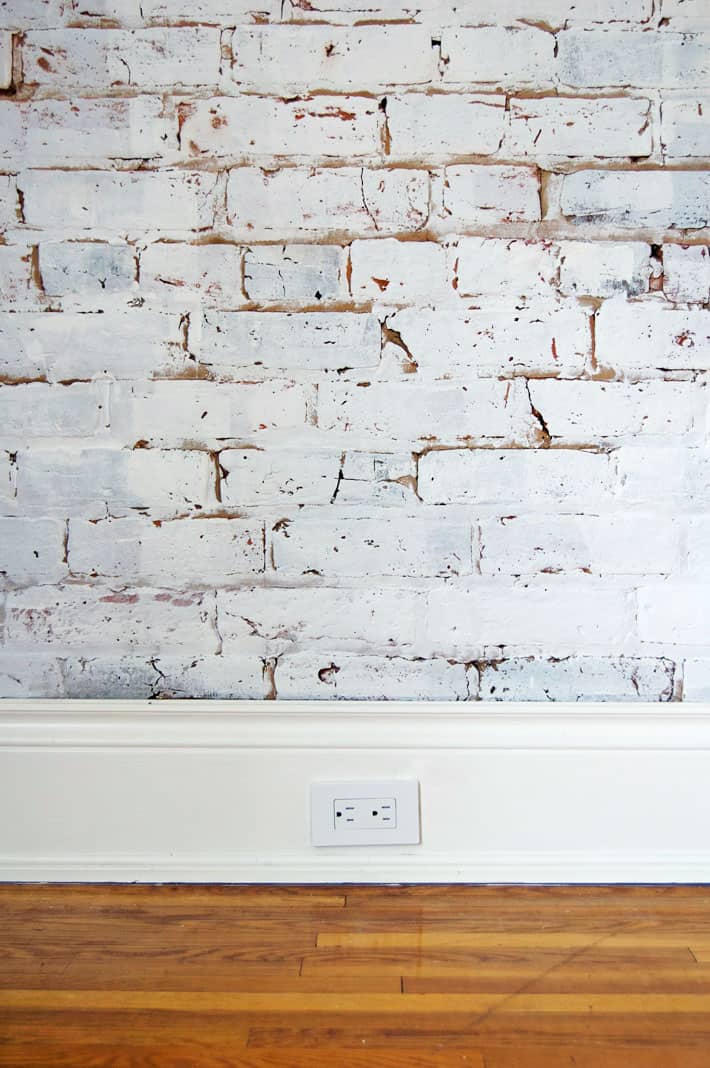
And just like that you know how to install an electrical outlet.
Here's a quick rundown without pictures so you can quickly check it for when YOU replace your hideous electrical outlet.
How to Replace an Electrical Outlet.
Step by step instructions on how to replace an electrical outlet.
Materials
- new electrical outlet
Tools
- wire strippers or scissors
- Screwdriver
Instructions
- Turn power to the outlet OFF.
- Remove the face plate.
- Unscrew and pull out the old outlet.
- Remove wires from the old outlet.
- Attach new outlet. White wire to silver, black wire to brass, Ground wire to grounding screw at back of box and then to green screw on outlet.
- Gently push the outlet back into the box.
- Screw the new outlet in place.
- Attach new face plate.
- Turn power back on and bask in the glow.
Now that you're an electrical outlet expert, you might as well learn how rewire a lamp.
There's only one question left to answer. No. I am not likely to wash the paint off of my floors in the near future. Not in the next 18 years anyway.
→Like to Sweat, Swear and do Stuff? GET MY POSTS emailed to you 3 times a week←


Is there a particular brand name to look for when buying the new plugs? I’ve checked Amazon and Home Depot and can’t find any that don’t have bad reviews stating quality issues. I’d like to buy good quality easy to install plugs. Recommendations on what brand and where to buy?
Thank you! This was so helpful and perfect! Please do one of how to change a light switch!
My 'tip'. Most likely your breaker box is NOT anywhere near where that cruddy outlet is. My solution? Plug in a loud radio or even a vacuum cleaner, then go flipping breaker switches. When it gets quiet? Bingo. As your pic shows, have a marker handy to ID that breaker.
My house is 100 years old and I have 2 prong outlet in my kitchen that has cloth wiring and 2 wires screws on each side. But the left side only has one wire attaches to bottom screw and nothing in top. Wires are all black. What do I do? Run?
Hi Randy! It needs to be replaced. The entire electrical line I mean. It sounds like knob and tube. I'd have an electrician replace it I'm afraid but it shouldn't cost much. Replacing a line usually isn't too big of a deal. ~ karen!
What about the plugs with "no tamper tabs" ? Do you break them off?
Well done! I've been slowly replacing the old El Cheapo switches and outlets in my house, and was gratified to see I've been doing it just like you did!! Let me offer one tip - has nothing to do with installation, but for later service and for people who will have the house after me, I take an indelible marker and write the number of the breaker that kills that switch/outlet on the back of the switch/outlet cover. That way, all I have to do (or anyone else) is remove the cover, see what it says and go flip the breaker. It's more signficant in my house because we added on to the house and the new part has a whole different electrical panel - so I have a North Panel (new part) and a South Panel (old part) I labelled the panels N and S, and then on the covers I write either N or S and the breaker number. It'll save whoever comes after me a LOT of headache and time this way.
Excellent directions by the way - good job!!
I am having the most hectic time fixing up my house (original, 1980). I used to work in yachting so I’ve been used to everything mapped out, checked and working perfectly, not on my dime, ofc. Thank you for this!!! I will use this forever!!!! Mel
What a GREAT idea! I'll do that for sure! Thank you!!
Thanks for this tutorial! On a side note, I noticed there was no insulation around the electrical box, cold air comes in through there and heat escapes. A few outlets like that is like having a hole in the house the size of a brick.
My wires go in from the back. How do you get them out?
You probably got it by now, but insert a small screwdriver into the slot to release the wire. Or just cut it off and re-strip for the new outlet.
Its all good. I have to say, the first couple decades, I was so focused on doing everything and not asking for help that I would avoid topics of accessibility just to "fit in", at least thats what I thought in my head. As I get older in this chair, I am realizing that I need things to be accessible if I want longevity. Not only that but by advocating for myself, I am helping many others who may not speak up. Anyway, I tend to be long winded so thats that and thank you for the reply. Best wishes and luck on future projects!
Pete
Great post! One thing I would like to add in response to the outlet heights as a couple people responded with confusion. Being a paraplegic from a logging accident twenty years ago and left paralyzed from the top of my abdomen down, I have zero core muscle control and in turn, very poor balance. This is very common of paraplegics. Due to this, it is hard on our bodies to bend over to reach an outlet so universal/adaptive design suggests that outlets and switches are installed at the height you speak of as it allows wheelchair users to use an outlet while sitting in our chair. Hope that helps:)
Good point!!! Not being a paraplegic I wouldn't have thought of that. I have a scar on my hand from cutting kindling but that really hasn't inhibited me at all from plugs. ;) ~ karen!
What if I don't have a grounding wire in my outlet? My house is old, and I want to replace the outlet in my room. How do I do it if there are no grounding wires?
I would strongly recommend having grounding wires installed in your home. It's an important safety feature to prevent electrical current from finding ground through YOU.
If you must replace the outlet for aesthetic reasons, I would recommend replacing the the outlet with another two-prong outlet, not a three-prong outlet. This way someone doesn't assume that the outlet is grounded when it actually does not have this safety feature. You won't be able to plug in three-prong plugs without an adaptor, but at least you're not pretending your outlet is grounded when it's really not.
Thank you! I knew this wasn't hard but had never done it myself. Reading through your instructions made it very easy. Of course, I had white/black/red wires and a light switch. I saw the red was attached to the light switch and plug, so I assumed it was the power. Nope, breaker flipped. So, confident in my skills, pulled it back out switched the wires and BAM, all good!
Good job Gary! ~ karen
Wow. My outlet has 3 wires black white red and ground wire. So I get it brass black and silver white but were does the red wire go on the brass side or the silver side. Also I know that the ground wire goes green blot. Also do you need to to screw the wires on the side or can you push the through the back side?