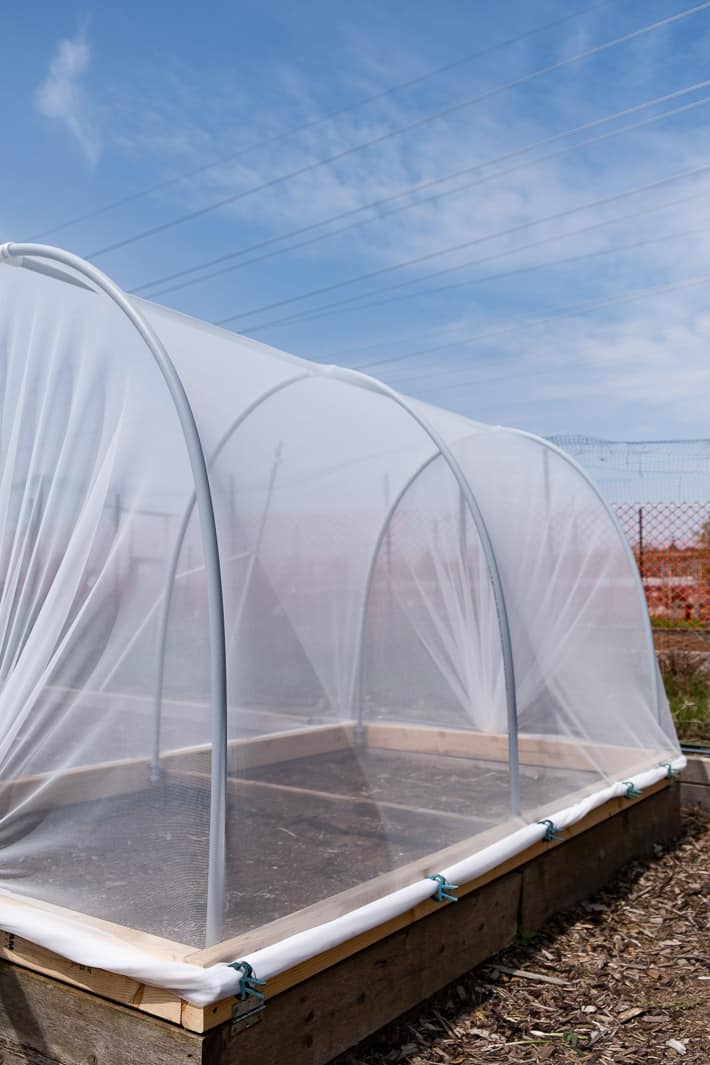
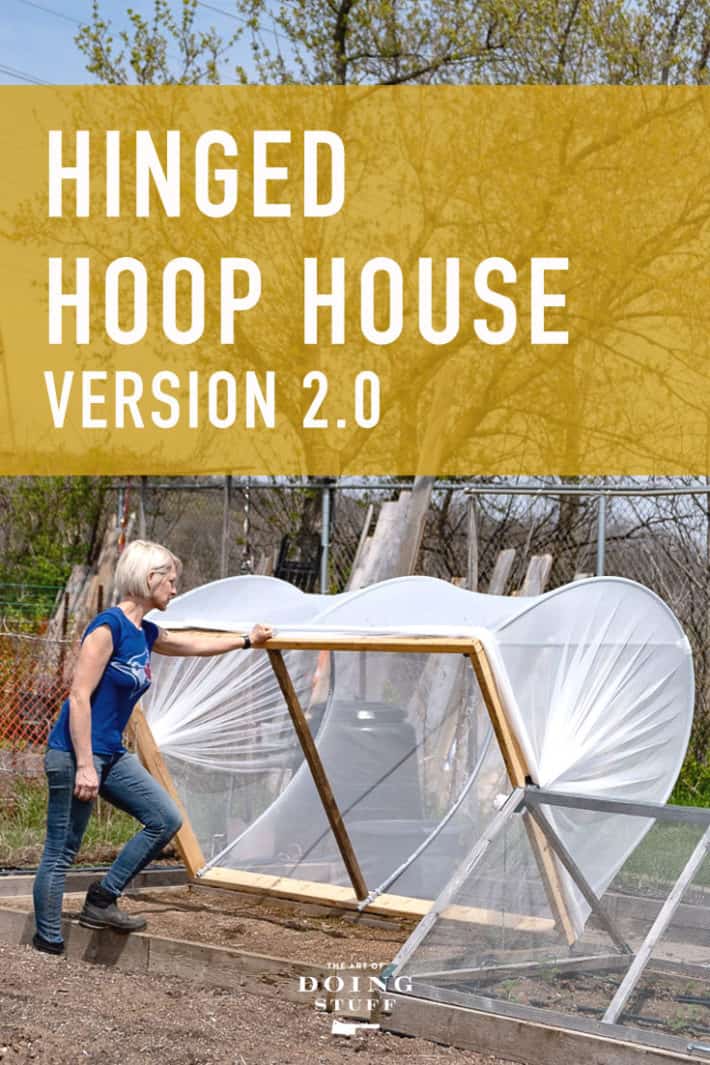
The hinged hoop house version 2.0. Bigger and better than before.
Skip right to the instructions.
If you were hanging around here a year ago you saw me give birth to my original hinged hoop house. I say give birth because I was as proud of it as most women are of their first born. Also it took around a day and a lot of grunting to bring it into the world.
But as one does with their first child, I made a lot of mistakes. Mistakes I was able to rectify with the second! Version 2.0 of the hinged hoop house is very similar to the first, with a few changes. Last year I found my original hoop houses weren't quite tall enough to accommodate a full grown black kale or Brussels sprouts plant. Not that I really care about the Brussels sprouts, I hate them, but I grow them because they look pretty and it's hard to look pretty when you're all hunched over and bent.
I also had some holes chewed into the netting over the winter by delinquent voles or mice and to replace the netting I would have had to unscrew all kinds of wood pieces that I had used to secure the netting in the Hinged Hoop House version 1.0 So I rethought that and came up with what I think is a really good solution.
The original was also a tiny bit wiggly so I beefed it up a little and improved on the top cross bar that holds everything steady.
All of the materials I've listed are available at a regular hardware store, other than the extra wide insect netting, which I've linked to on Amazon.
Hinged Hoop House 2.0
Materials - (For an 8'x4' raised bed.)
8' lengths of 2x4s, (3)
4' length of 2x2, (1)
10' lengths of ½" Schedule 40 electrical conduit, (6)
Clamps for ½" conduit, (12)
3-4 hinges
24" lengths of chain, (2)
½" PVC "Ts", (2)
½ " PVC cross, (1)
Insect netting, (wide and long enough to cover completed hoops)
Handle
Variety of screws
Screwdriver or drill
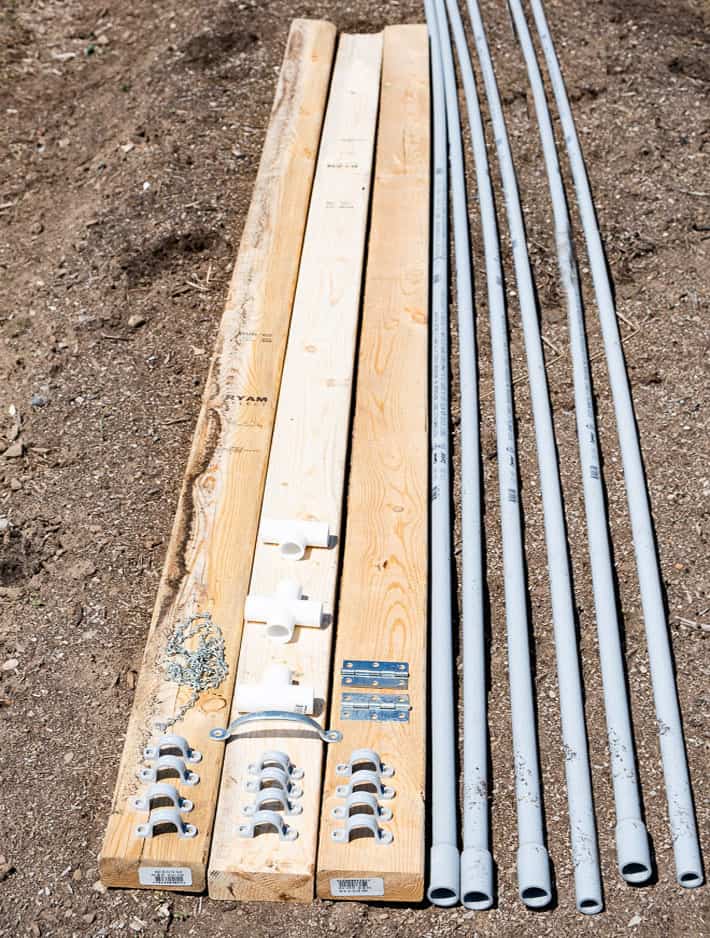
You'll find the white PVC fittings in the plumbing aisle of the hardware store and the grey, conduit and fittings in the electrical aisle.
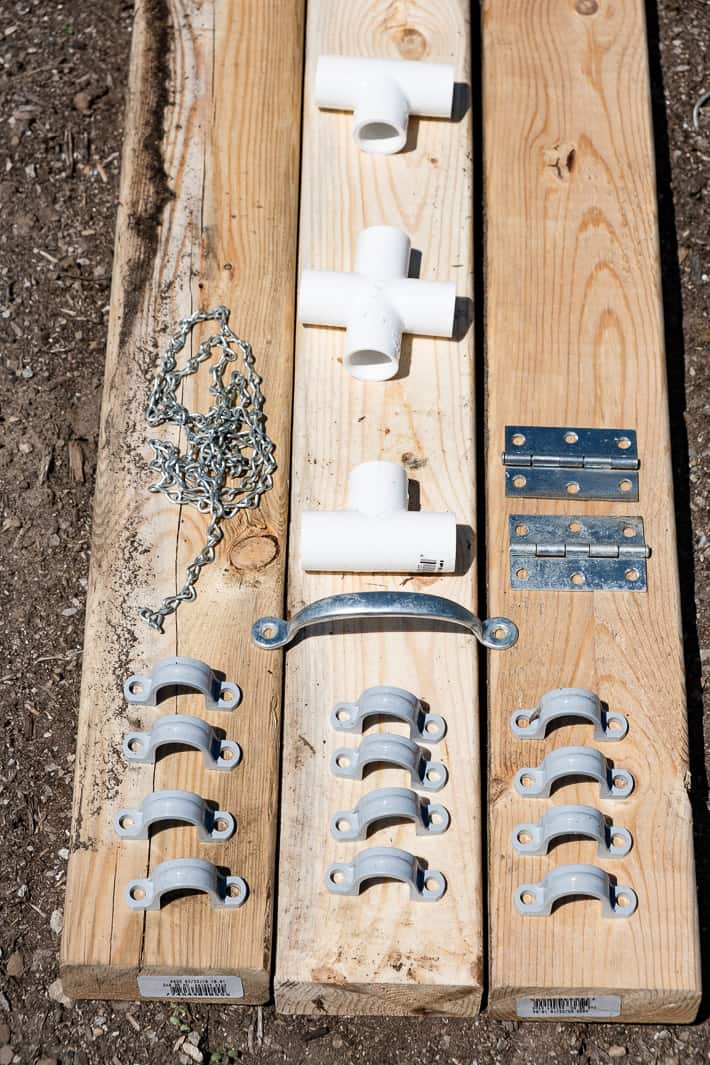
I need another hinge, because you should really use 3 or 4 but I only had 2 in my stash so I'll add another one when I go to the hardware store and pick another couple up.
Instructions
- Cut your 8', 2x4's to the length and width of your current raised bed.
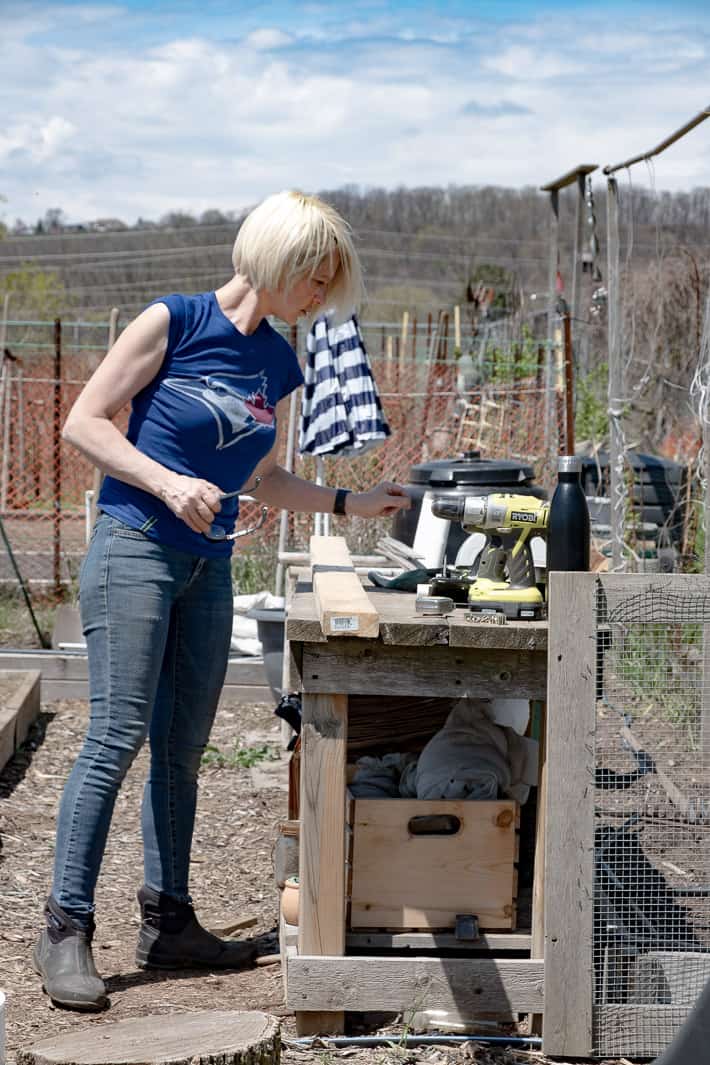
2. Lay all your cut 2x4 pieces on your raised bed and screw them together.
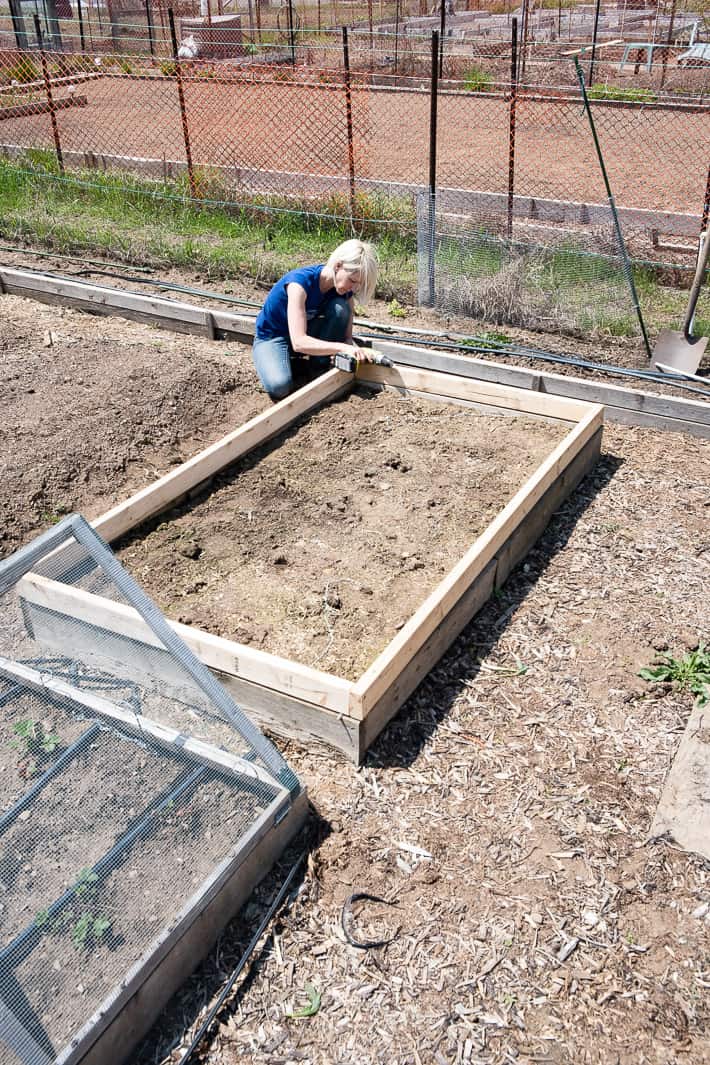
3. For added strength and to prevent any warping screw a 2x2 into the centre of the frame.
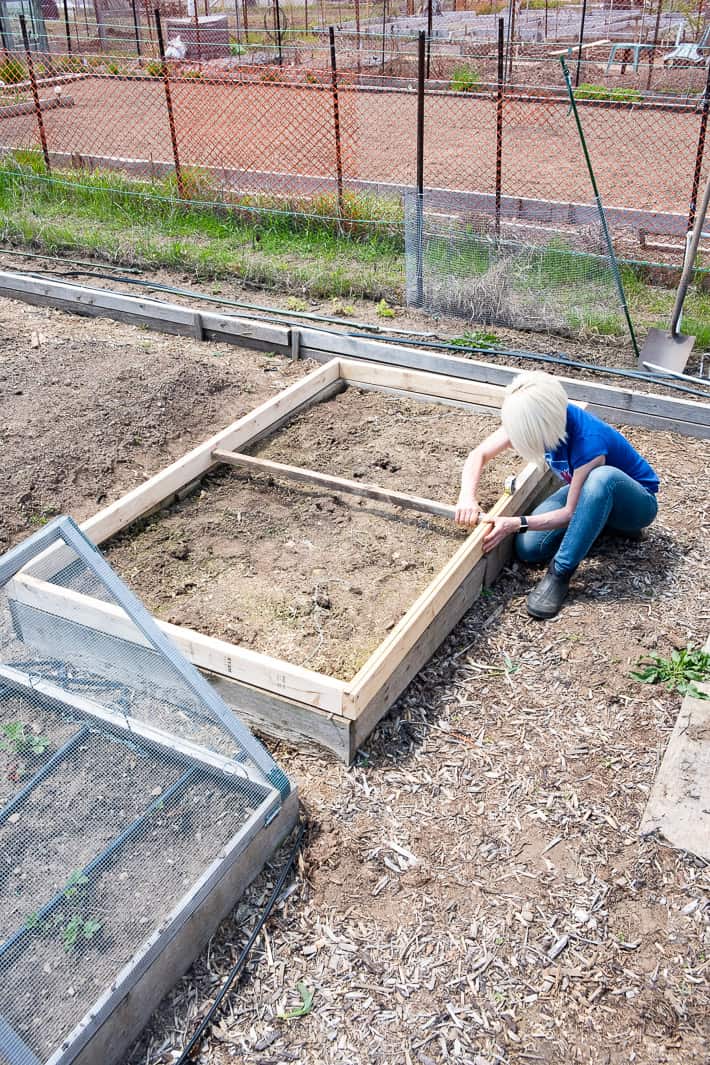
3. Screw in your hinges.
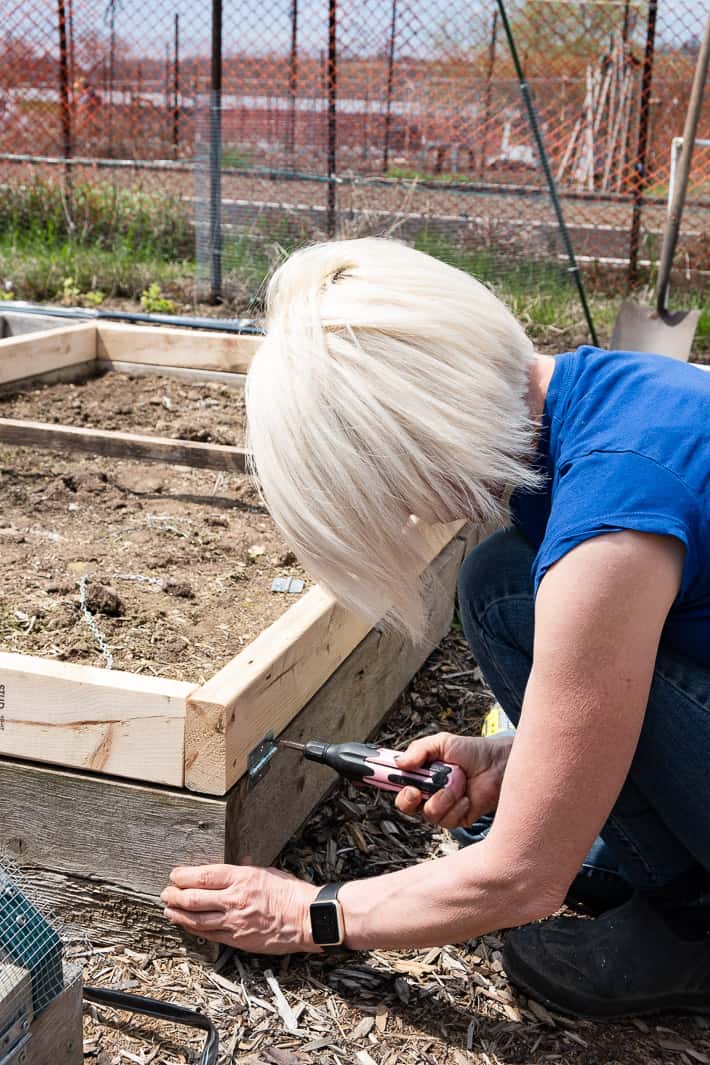
4. Cut 3 of the electrical conduit into 57" lengths. This will create hoops that are tall enough for kale, pepper plants and brussels sprouts. If you're growing lower things like cabbage, you can shorten the lengths of your conduit for lower hoops.
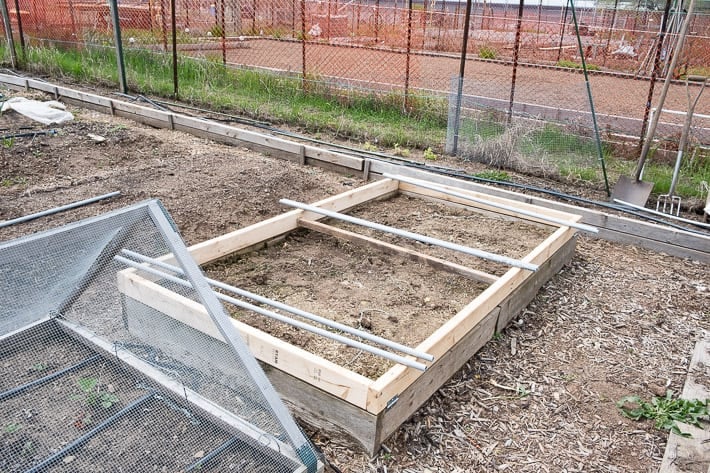
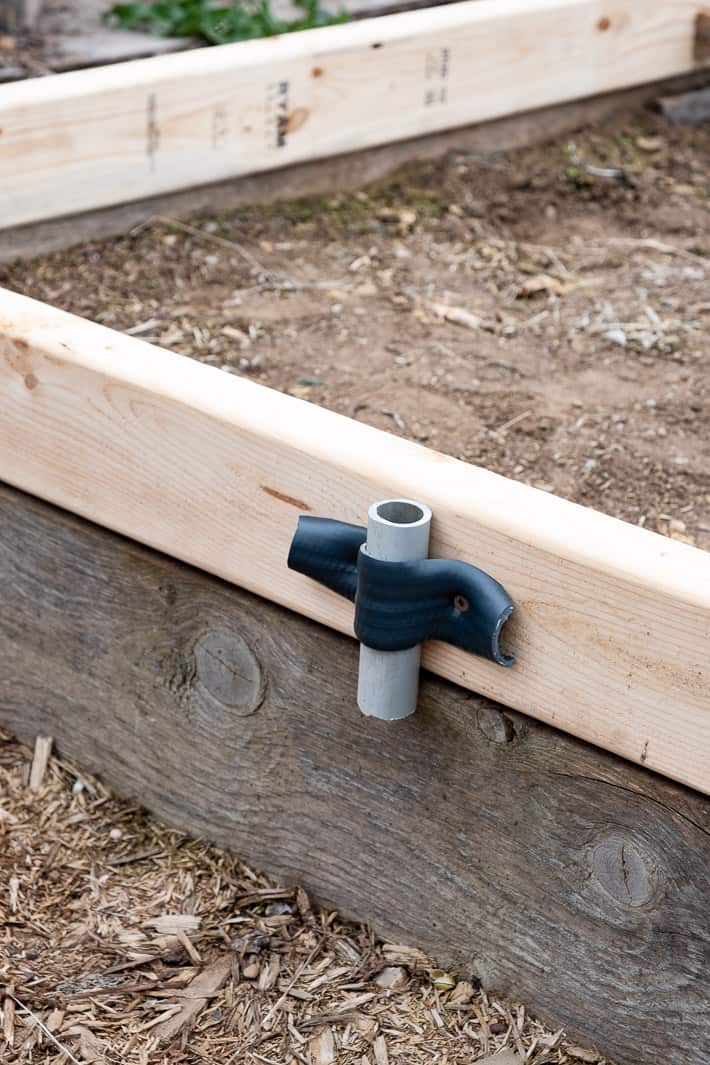
5. Screw the plastic clamps to the inside of the 2x4 frame. Each section of pipe will have 2 clamps holding it in place. Screw the top clamp in first. To get a straight line between two clamps, insert a piece of pipe into the top clamp and then screw in the bottom clamp around the pipe, like you see below.
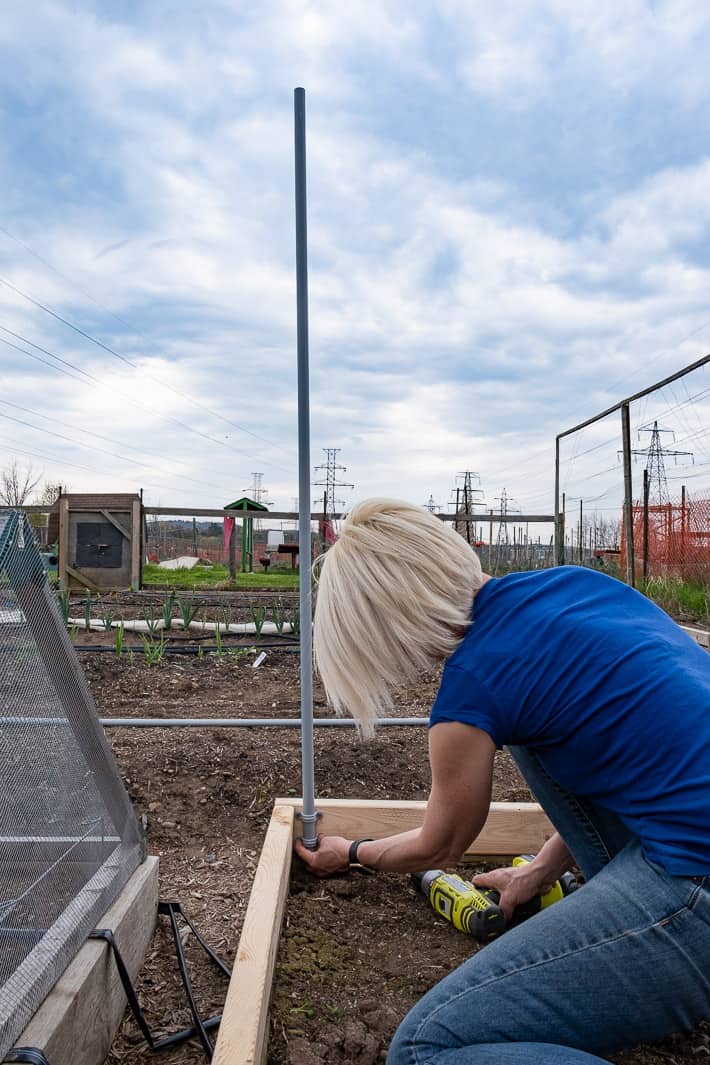
6. Once all your clamps are in, attach 2 pieces of your 57" pipe at the centre using a PVC T. You can glue these, but I didn't in case I wanted to change things. Stick one end of the pipe into its clamps then slowly and carefully bend the pipe to fit in the opposite clamps. Pay attention to your PVC T and make sure it's sitting straight, ready to accept the top horizontal rail later on. (you don't want it pointing up or down)
Would you like to save this stuff?
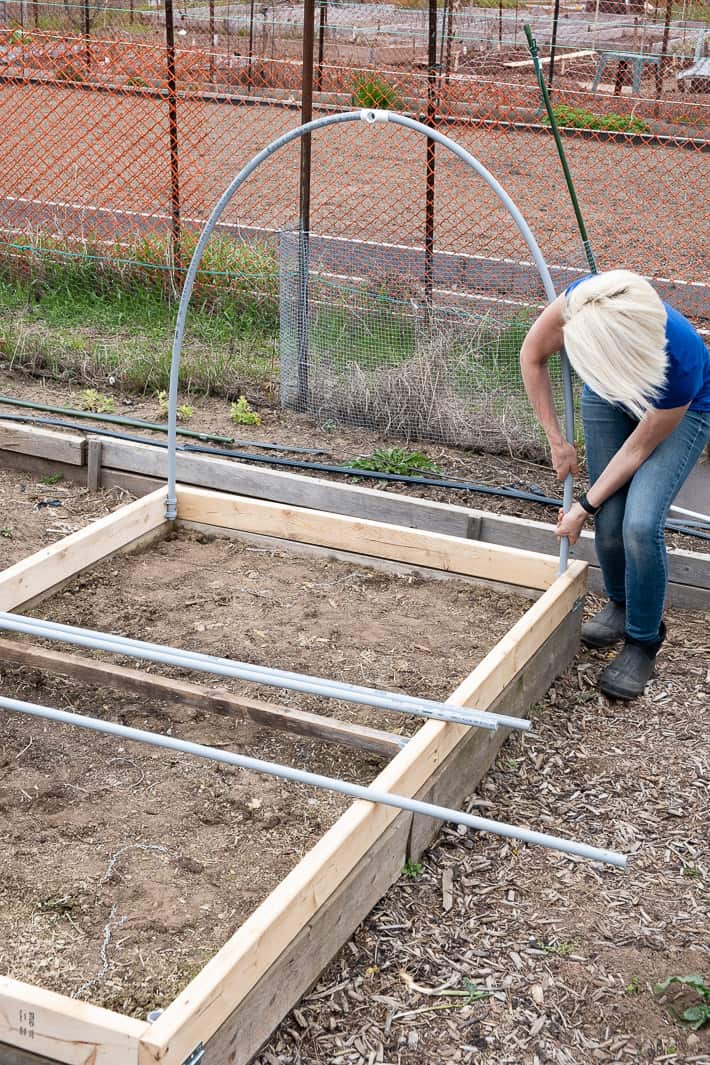
7. Screw the pipe into the frame to keep it from slipping up or down.
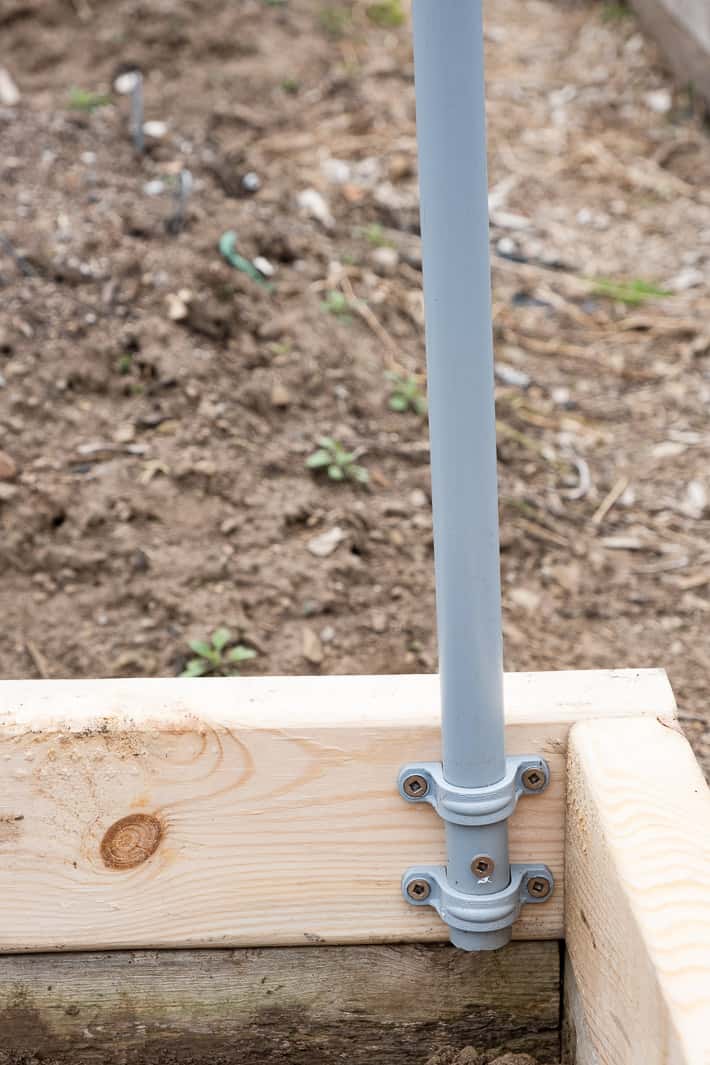
8. Continue doing this until all your hoops are built and secured. For the middle hoop you'll be using the PVC cross, as opposed to the PVC T.
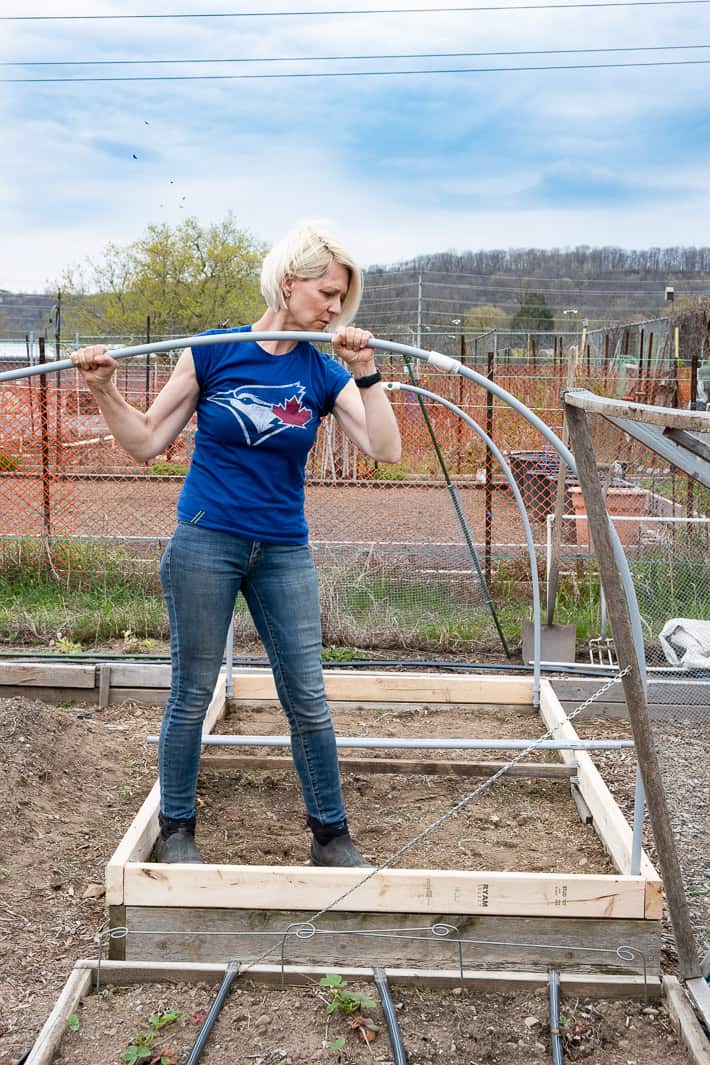
9. Measure the space between the top of the hoops and cut 2 lengths of conduit to create the top bar across the hoop house.
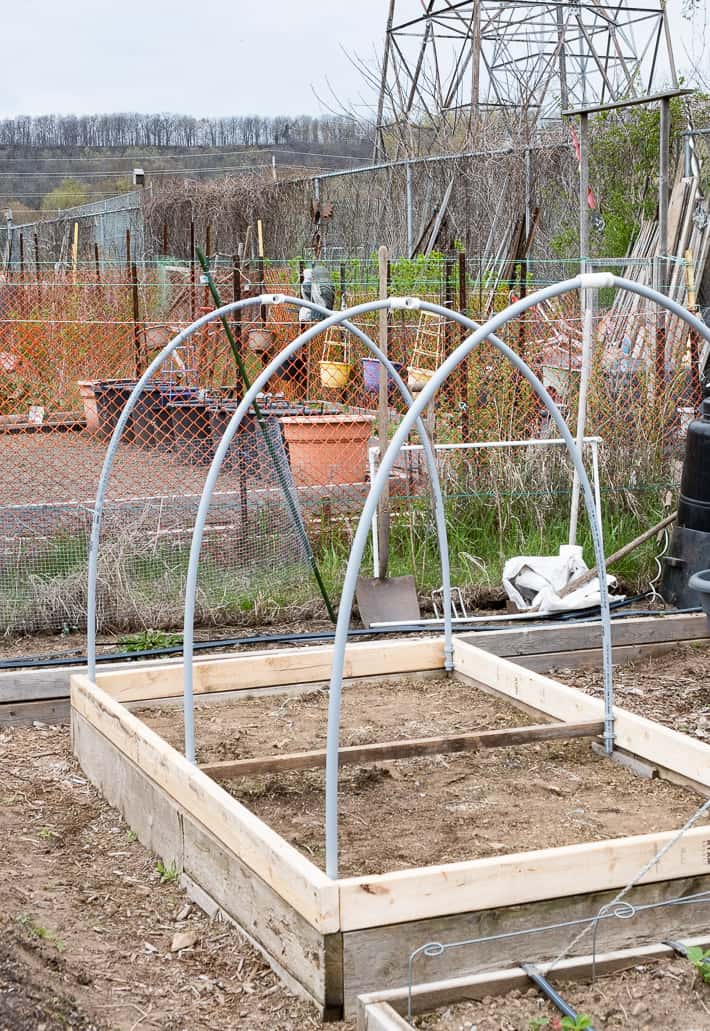
10. Insert the 2 pieces of newly cut conduit across the top of the hoops, inserting it into the PVC Ts and PVC cross.
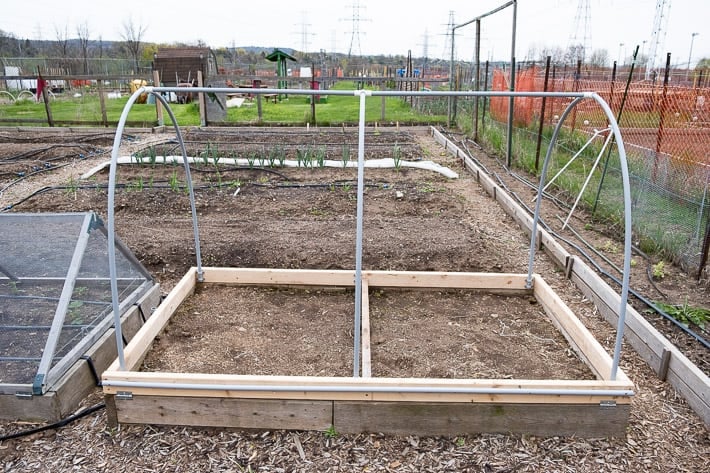
11. Cut your final 2 lengths of conduit to 8' long (or however long your frame is) and screw it onto the outside of both long ends of the frame like you see above. You'll use these to clip the netting to once it's on.
12. To hold the bunched up sides of the net in place I used a piece of 1" conduit and a piece of old garden hose. You'll see how it holds the netting in a second. This is the one area of the hoop house that could be improved upon and probably will be. I just used the spare materials I had at the garden to make it work.
***I've left these things out of the materials list because they were weird random things I found and I'm sure you can make something similar work out of your own garbage***
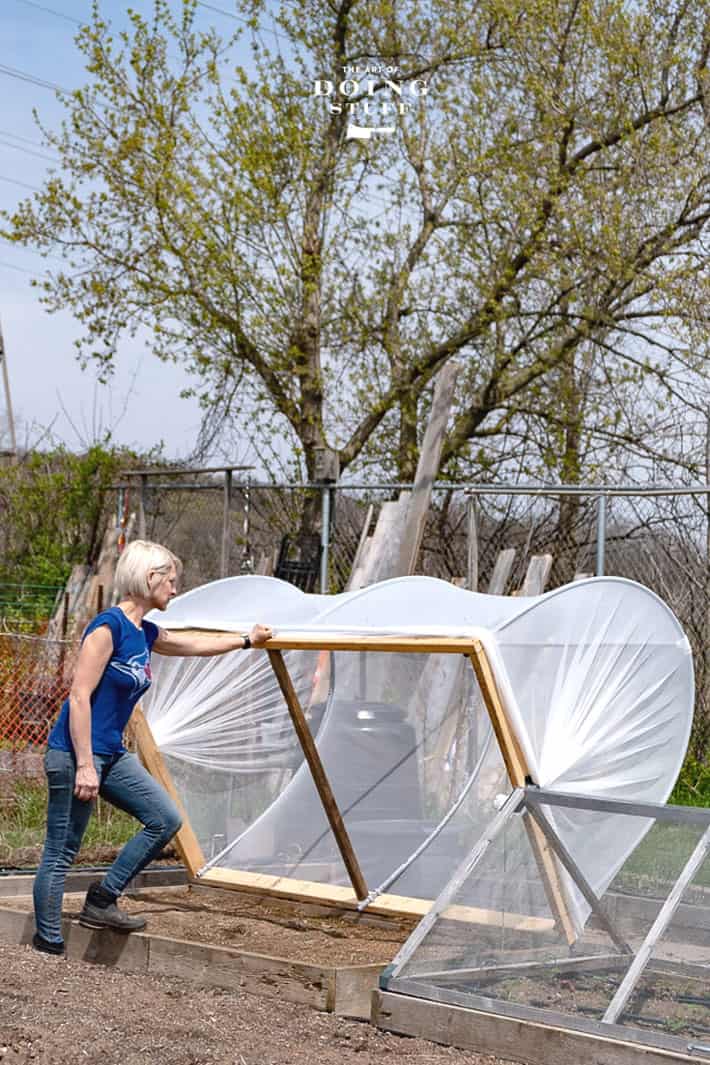
13. Drape your netting over the hoop frame. Do NOT attempt to do this on a windy day by yourself; it will end with tears and parasailing.
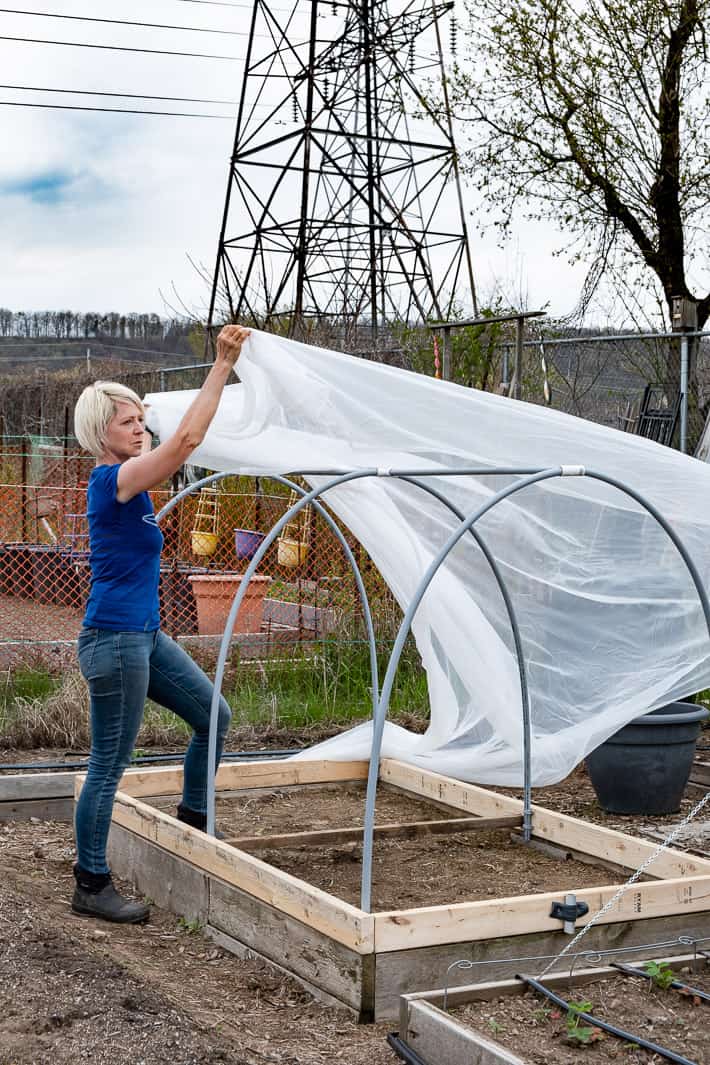
14. Clip the netting to the lengths of conduit on the outside of the frame. I just used plant clips that I got at Dollarama but I've ordered these clips from Amazon which will be a bit more discrete and a bit stronger.
I could have used this same technique for the sides of the hoop house instead of what I scrabbled together but I was worried that becaase there's so much extra fabric on the ends of the hoop house that it would be difficult to fold it all together neatly. I think I was wrong. I may still try to do the ends the same as I did the sides.
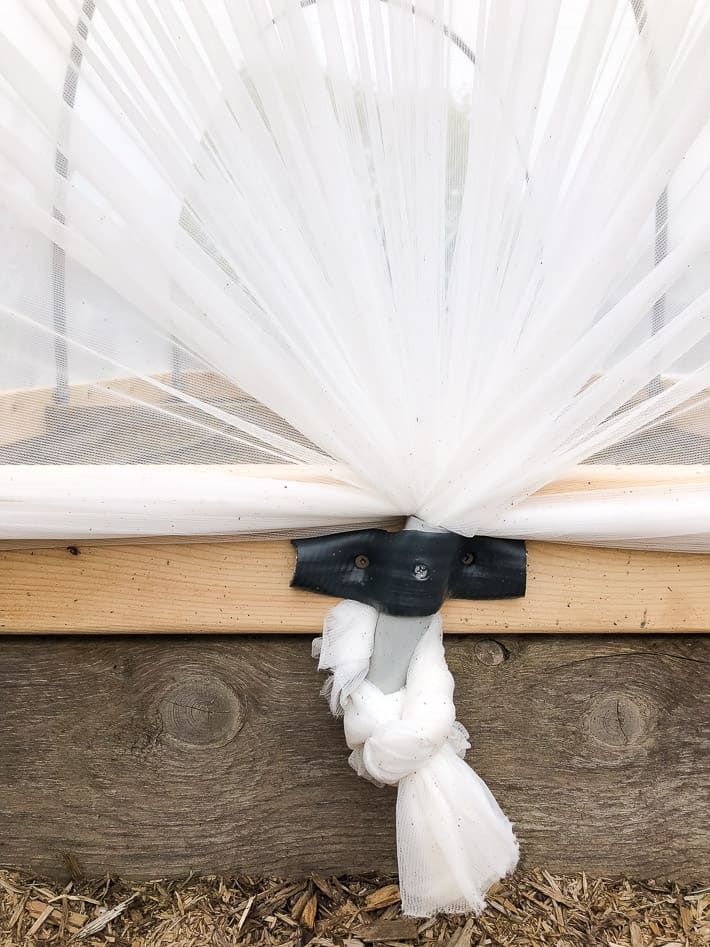
15. Twist the netting together tightly on the ends and slip it through your small piece of 1" tube (or whatever you decide to use). You'll have to pull it tightly and work it through. Once it's through, pull the netting so it's even and then tie the end in a knot so it can't slip out.
This is the side section I mentioned could be improved upon for holding the side of the netting. It's a bit inelegant but it works. The fabric has to be held tight but I wanted something that was also easy to remove if I have to change out the netting.
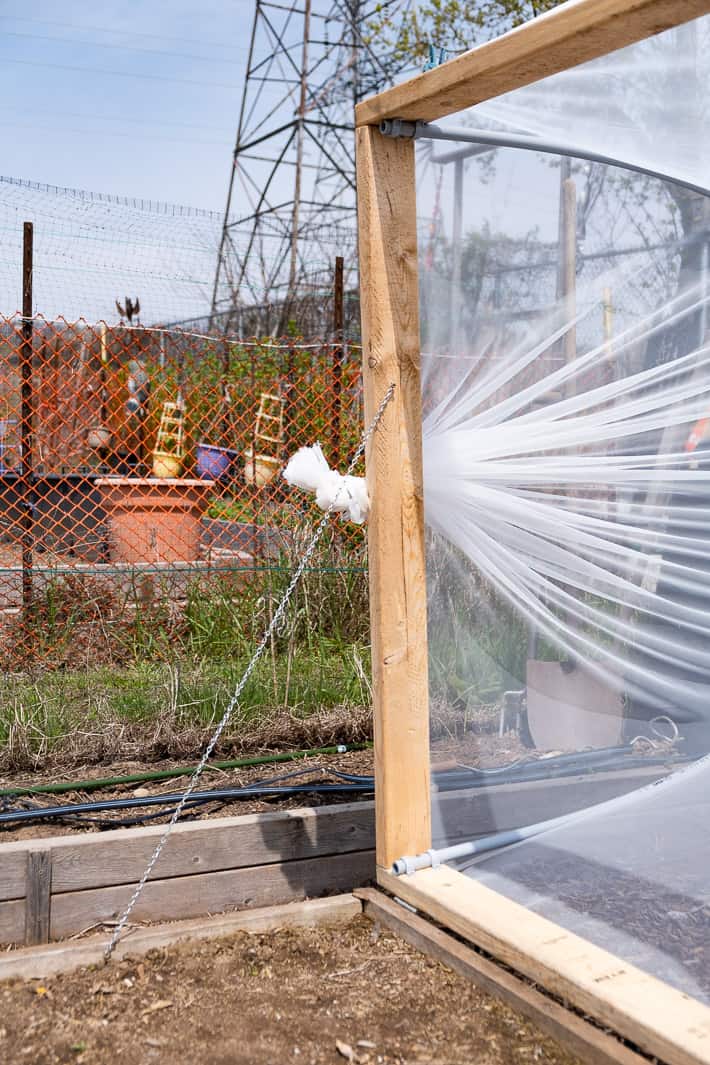
14. Attach a length of chain between the raised bed frame and the hinged hoop house. This will hold the lid open when you lift it and prevent it from tipping all the way over to the ground.
TIP: You can also get fancy and use gas struts. I may do that in the future.
15. Add a handle for opening and closing the frame.
Your hinged hoop house is built!
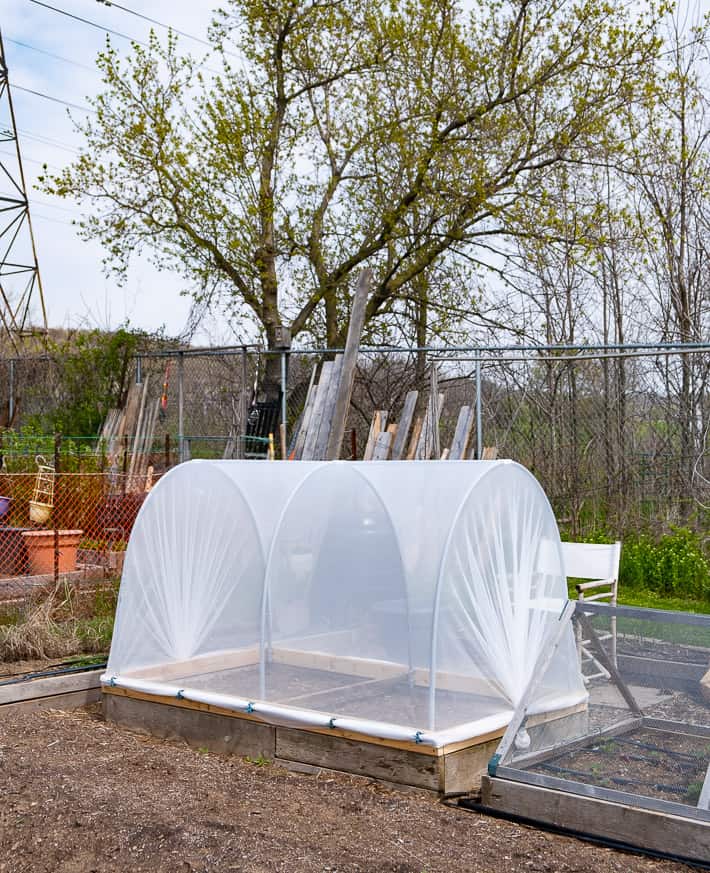
Now all that's left to do is fill it with vegetables. Pepper plants will be going in this one. Have you ever grown peppers that you thought were perfect, but when you cut them open you realized they were rotted on the inside and mushy? That's from the pepper maggot. A fly lands on the pepper plant when it's very young and lays an egg under the skin of the pepper. That egg hatches into a maggot which lives in and consumes the entire inside of your pepper until it rots, and the maggot eats its way out of the pepper. This hoop house prevents all that.
This hoop house is much heavier to open and close than the first one was because it's made with 2x4s instead of 2x2s, plus it has the wood cross bar. I'd estimate it weighs about 20 pounds.
To prevent critters from gnawing away on the netting in the winter it's very easy now for me to remove the netting for the season. It wasn't easy with the first version of this hoop house. I can also, if I want, just prop open the lid so any critters can come and go easily without chewing through anything in the winter. I wasn't smart enough to think of that logical solution myself, an Instagram reader said that's what I should do.
Otherwise leaving the netting on wasn't a problem. Snow just slid right off of it.
Oh. And because I'd done it once already it took a lot less grunting and time to bring this second one into the world. As is often the case.
→Follow me on Instagram where I often make a fool of myself←



Anne Gilson
Dear Karen,
I'm planning to build your hinged hoop house for my raised beds this spring. I'm going to use mine through the winter with plastic over them. It is now February 2025 - how have yours handled the snow??? The never ending, very heavy snow...
And did you ever add hydraulic struts?
Anne
Karen
Hi Anne! Last year the beds got to the point that I couldn't repair them anymore in the spring and I didn't have the time to make them again. :/ I ended up using this in their place this year. ~ karen!
eastwood
I have a lot of old fashioned sheer curtains big enough for a hoop house build. Is there any reason I should not use this material? I don't mind if they only last one or two seasons.
Karen
Hi! I know some people use sheers. I don't know of, or can't think of any reason not to give them a try! As long as water and light can pass through them they should be fine. ~ karen!
Barb Krahn
Okay, you've inspired me! I'm going to build my first raised bed this year, and it will feature your hinged hoop top. I've never built anything remotely straight before, but this looks do-able even for me. Thank you!
Karen
It is! It's doable. To keep it as manageable as possible, make it as low as you can. I grow tall things in mine like brussels sprouts and some tall varieties of peppers so I keep it high. But if you're only covering shorter things like cabbage or something like that keep it short. Makes it easier to build, keeps it sturdier and is lighter to lift. Good luck! ~ karen
Mary W
Fantastic instructions - even I can understand with the help of the pictures you included - just wonderful. THANK YOU!
Karen
Thanks Mary! This year I'll have to redo them ... Yesterday I noticed that the wood has completely rotted out on them. ~ karen!
Derek
Hiya, I made one per your spec last year, albeit a smaller one, to keep pigeons off my lettuces, I only needed to use bird mesh and it worked beautifully! At the moment I have early peas seeded into the frame and to give them some protection from upcoming frosts I put a piece of flat plastic strip (an offcut from a soffit board) so that its bowed up slightly (just cut it a bit longer than the width and jam it in) and then put a piece of clear plastic bag over it so it hung over the edge all round. when the frames shut you can pull the plastic out all round to tighten it up. Thanks for the inspiration Karen.
Karen
You're welcome! Glad it worked for you. ~ karen!